
In the previous section, you built the tank pool, namely a RAIDZ1 container that is online and empty. To make it useful, you'll first carve out a dataset for your files and then open it to the computers on your network.
Create a Dataset for the Share
A dataset looks like a folder from the outside, and it carries its own settings on the inside: permissions, snapshots, compression, and an optional size quota. Because those settings apply per dataset, one dataset per purpose keeps the rules apart. A family dataset for photos and documents can have a long snapshot history, while a scratch dataset for downloads can have none.
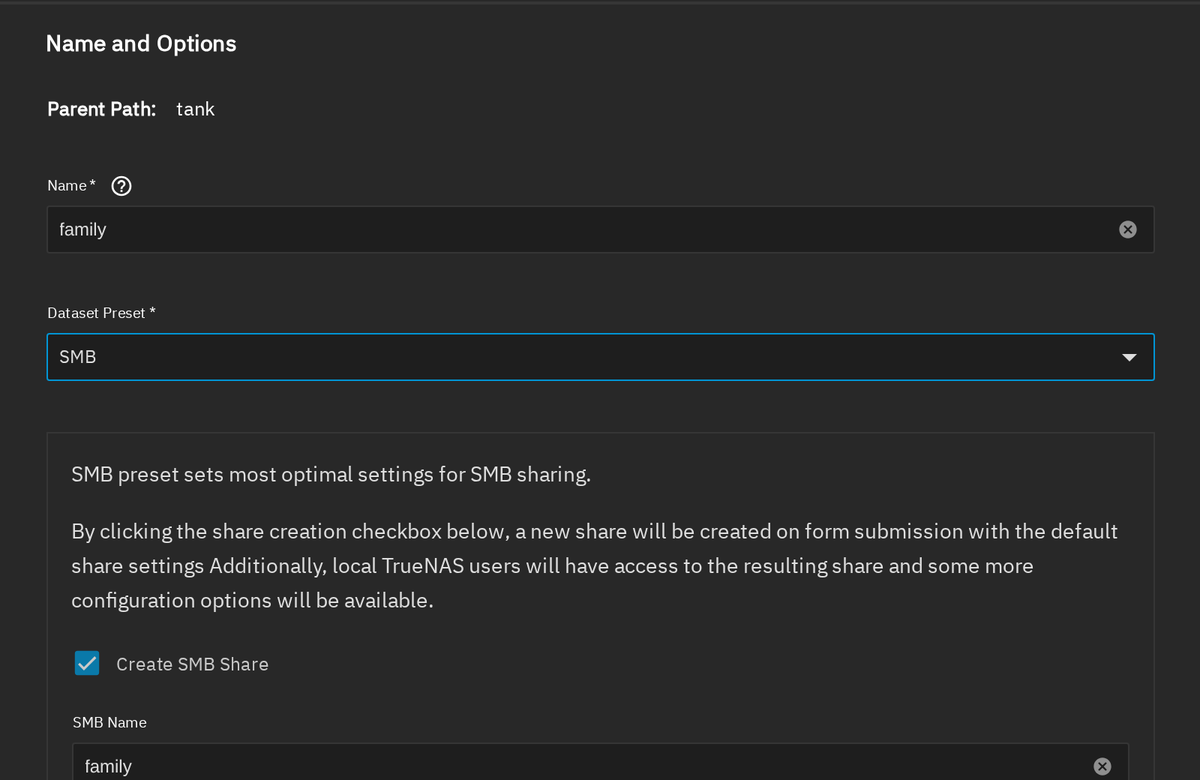
Open Datasets in the left menu, select tank, and choose Add Dataset. Type a name, and set Dataset Preset to SMB. The preset applies the settings TrueNAS considers best for file sharing, and it adds a checkbox, Create SMB Share, which creates the share in the same step. The share takes the dataset's name by default.
Why not just share the whole pool?
Because the pool's root dataset is not a good place for your files. TrueNAS also keeps part of its own system data there, and the Datasets page marks the root with the note "This dataset is used by the system". The documentation advises creating a dataset under the pool and sharing that one.
Start the SMB Service
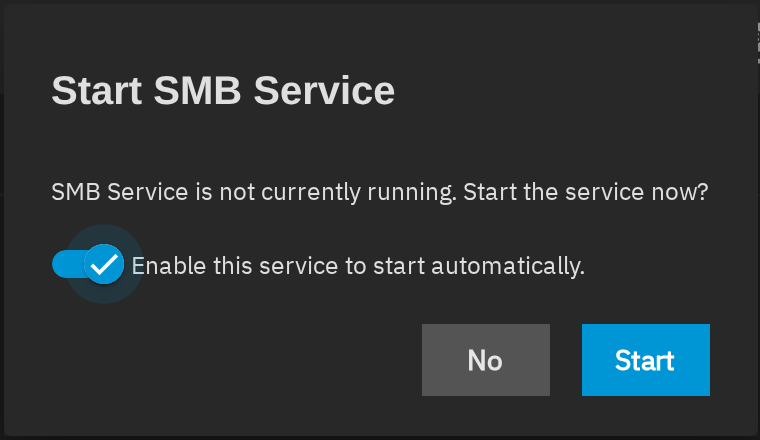
When you save the form, TrueNAS notices that nothing is listening for SMB connections yet and asks whether to start the service. Leave the toggle for starting it automatically switched on, then choose Start. Without that toggle the share would disappear after the next reboot until someone started the service by hand.
The Shares page now lists the new share under Windows (SMB) Shares, with its path, /mnt/tank/family, and a RUNNING badge next to the section title. SMB is the protocol Windows uses for shared folders, and macOS and Linux both speak it too.
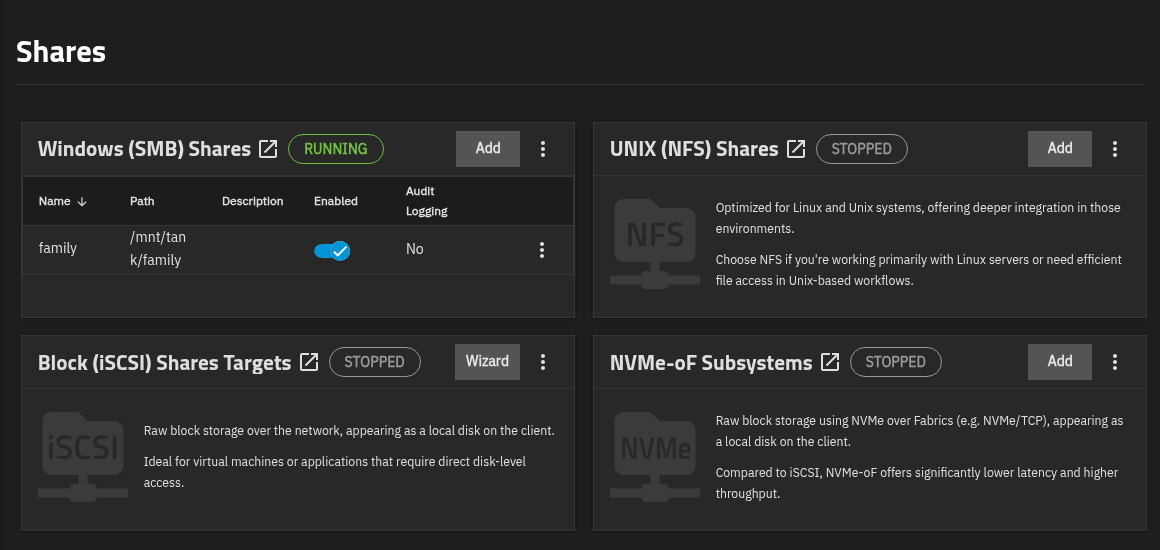
Why SMB and not NFS, which is listed right next to it?
SMB works out of the box on Windows, macOS, and Linux, so one share serves every device in the house. NFS suits Linux and Unix machines that want tighter integration, which makes it a good second share later and a poor first one for a mixed household.
Add a User for the Share
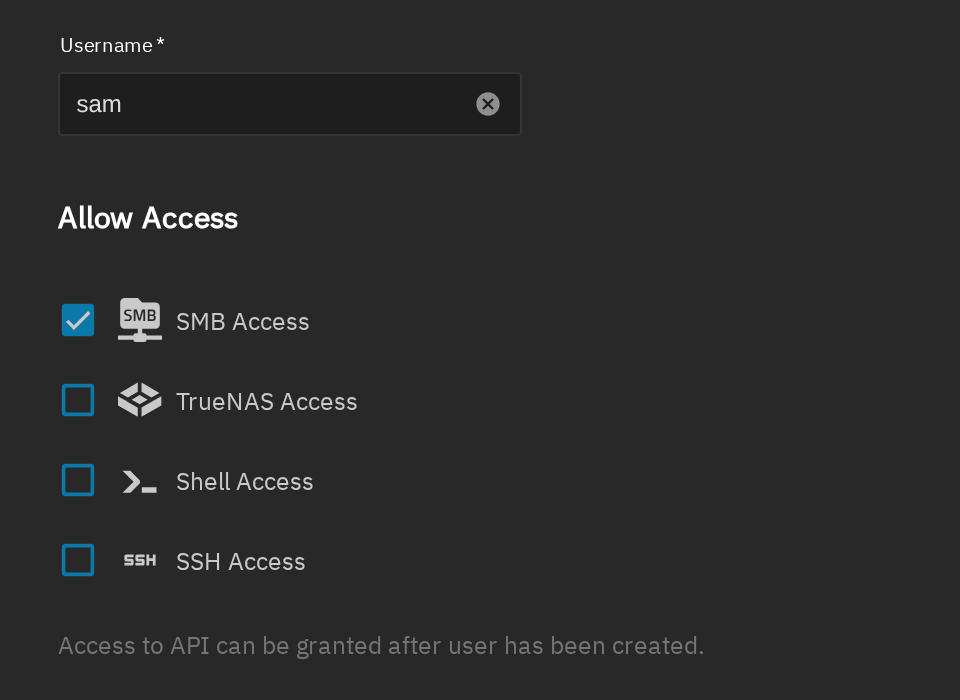
A share needs someone allowed to open it. Go to Credentials, then Local Users, and choose Add. Give each person their own account, because separate logins let you tell afterward who changed a file and let you remove one person's access without touching anyone else's.
The Allow Access section decides what the account can do. SMB Access is ticked by default, and it is the only box this user needs. TrueNAS Access opens the web interface, Shell Access opens a command line, and SSH Access opens a remote login, so leave those three empty for anyone who only needs files. Then type a password twice.
After you save, the details panel summarizes the account in plain words: it has a password and SMB access, and it has no TrueNAS access, no shell access, and no SSH access. If that line matches what you meant, the account is done.
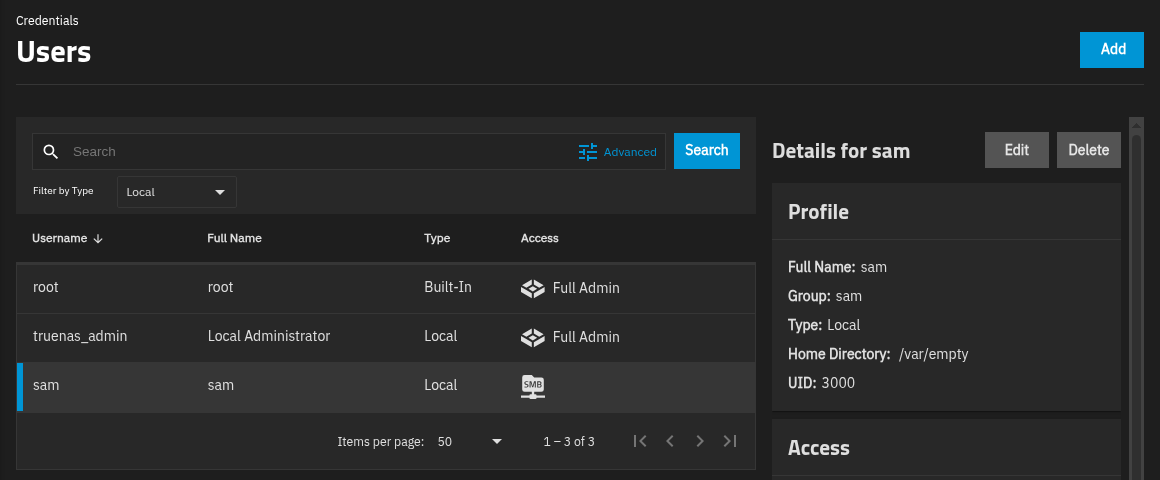
Before sharing files with the whole household: make sure you are not using truenas_admin to open the share. To check, look at the username your computer saved for the share, because the administrator account can change every setting on the NAS.
Understand the Default Permissions
Open the family dataset again and scroll to its Permissions card. It lists who may do what: the owner and the owner's group, plus two groups that matter here. builtin_users holds Allow Modify, which covers reading, creating, changing, and deleting files. builtin_administrators holds Full Control, which adds the right to change the permissions themselves.
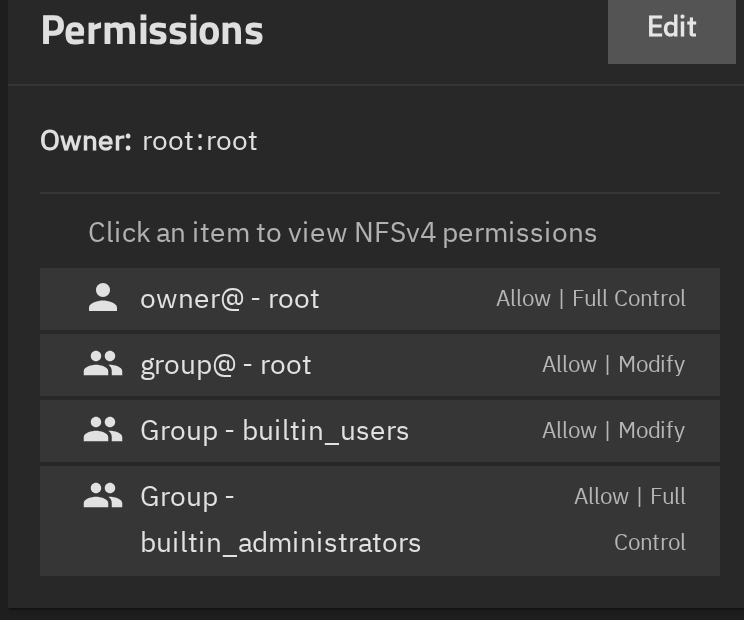
Why can the new user write to the share without any permission setup?
Because TrueNAS adds every new local user to the builtin_users group, and the SMB preset already gave that group Modify access. Nothing else is required for a household where everyone may edit everything. If one person should only read, use Edit on the Permissions card to build a stricter list, with a dedicated group for the people who may write.
Connect from Windows, macOS, and Linux
You need the NAS address from the previous section, which the examples below write as 192.168.1.50. Replace it with yours. The share name is family and the login is the account you just created.
- Windows: open File Explorer, click the address bar, and type
\\192.168.1.50\family. Windows asks for the username and password once. To keep the share as a drive letter, right-click This PC, choose Map network drive, and enter the same path. - macOS: in Finder, choose Go, then Connect to Server, or press Command-K, and type
smb://192.168.1.50/family. Enter the account name and password, and tick the box to remember them in the keychain if you want the share back after a restart. - Linux: the file manager of most desktops accepts
smb://192.168.1.50/familyin its Other Locations or Connect to Server box. On a command line, thesmbclienttool opens a session and runs commands such asputandls.
A command-line session shows what a successful connection looks like. The command asks for the password, uploads a small file, and lists the share:
smbclient //192.168.1.50/family -U sam -c 'put groceries.txt; ls'
putting file groceries.txt as \groceries.txt (2.5 kb/s) (average 2.5 kb/s)
  .                                   D        0  Sat Oct 10 10:30:22 2026
  ..                                  D        0  Sat Oct 10 10:30:22 2026
  groceries.txt                       A       13  Sat Oct 10 10:30:22 2026

		19954560 blocks of size 1024. 19954432 blocks available
The file landed in the share, and the last line reports free space from the pool. Open the same share from a second device to confirm the file appears there too, since that is what you are building the NAS for.
What if Windows says it can't find the network path?
Start with the address: type the IP address instead of a name, since names depend on name resolution that some routers don't provide, and make sure the computer is on the same network as the NAS. Then open the Shares page and check that the SMB card still says RUNNING. If both are right, a VPN client on the computer that sends all traffic elsewhere is the next suspect, so pause it and try again.
If you plan to reach the NAS from outside your home, check the next section of this guide before touching your router, because forwarding the SMB port to the internet is the one mistake that turns a private share into a public target.
In summary
- A dataset with the SMB preset creates the share and its permissions in one form.
- The SMB service needs its automatic-start toggle on to survive a reboot.
- Each person gets a local account with SMB access and nothing more.
- The builtin_users group holds Modify access, which is why new accounts can write.
In the next section, you'll order a WireGuard tunnel from Taipan Transit and attach its public IPv4 address to the NAS.