
In the previous section, you gave the NAS a public address and published one app on it, so the machine now holds files that matter. To protect them, you'll first schedule snapshots and an off-site copy, and then let the NAS tell you when a disk starts to fail.
Understand What RAID Protects Against
The pool you built survives a disk failure, which is one of the many ways data gets lost. A deleted folder, a file overwritten by mistake, ransomware on a laptop that has the share mounted, a power surge, a burglary, and a fire all leave a healthy RAIDZ pool holding exactly what you broke. The pool copies your mistakes faithfully.
Doesn't RAIDZ already keep my files safe?
It keeps them safe from one specific event, a disk dying. A backup answers every other event, and the common rule of thumb asks for three copies of the data, on two kinds of storage, with one copy somewhere else. The NAS is the first copy. This section adds the other two with snapshots on the pool and a copy that leaves the house.
Schedule Snapshots
A snapshot is a read-only picture of a dataset at one moment. Taking one is nearly instant and uses almost no space at first, because ZFS does not copy the data. It only remembers the blocks as they were, and it keeps those blocks around when later changes would have overwritten them. A file deleted on Monday is still inside Sunday's snapshot.
Open Data Protection and choose Add in the Periodic Snapshot Tasks card. Select the dataset, here tank/family, and look at the schedule. The defaults suit a family share: a snapshot every day at 00:00, kept for two weeks, named with the date and time.
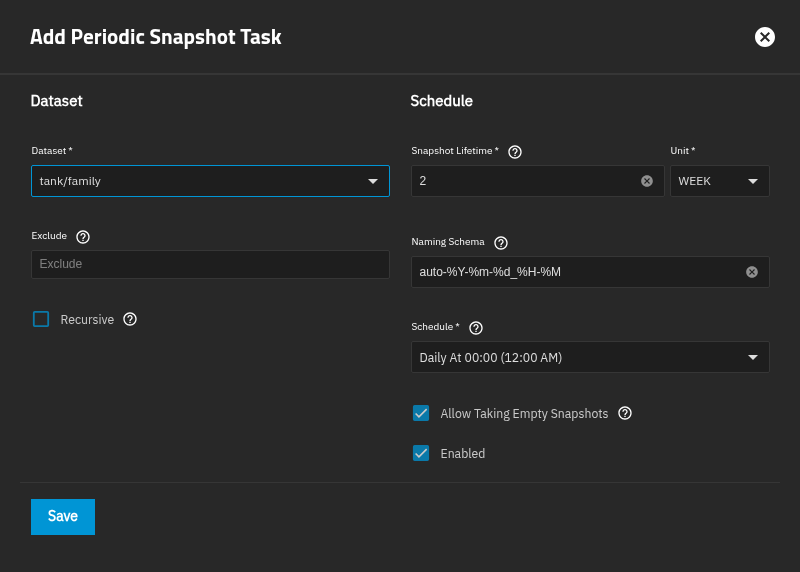
The lifetime decides how far back you can go. Two weeks catches most mistakes, since people notice a missing file within days. If the dataset holds irreplaceable files, such as photos, raise the lifetime to a few months, because old snapshots cost space only for the blocks that changed since.
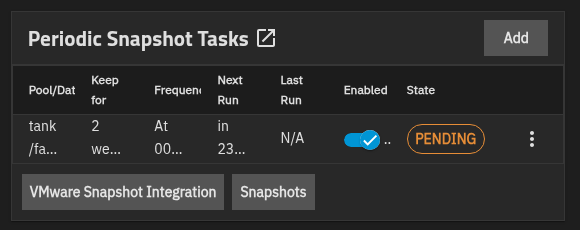
After you save, the task appears in the card with its next run time and a PENDING state until the first snapshot is taken.
Do snapshots replace a backup?
No, because snapshots live on the same disks as the data. They undo a deleted folder in seconds, and a ransomware attack on a laptop can't edit them, but a lost pool takes them along. The next step puts a copy somewhere else.
Copy the Data Off the Machine
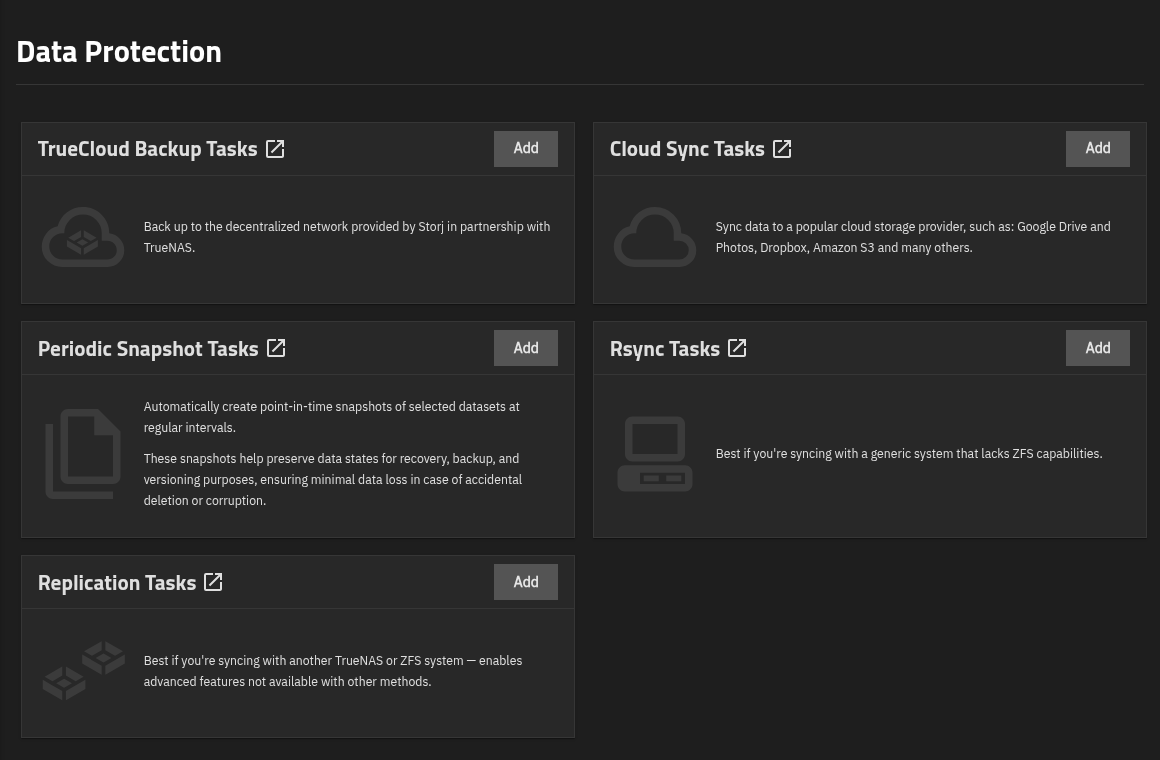
Data Protection offers four ways to send data elsewhere, and each one suits a different destination:
- Cloud Sync: copies a dataset to an online storage provider such as Amazon S3, Backblaze B2, Google Drive, or Dropbox. It is the usual off-site choice for a home NAS, because providers price storage per terabyte per month and the copy sits in a different building by definition.
- Replication: sends snapshots to another TrueNAS or ZFS machine, and the TrueNAS page recommends it when the destination speaks ZFS. After the first full copy, only the changed blocks travel, so a second NAS at a relative's house stays up to date over a slow link.
- Rsync: copies files to any computer that lacks ZFS, such as an external drive on a PC or a plain Linux server. It is the simplest tool, and the destination keeps ordinary files rather than snapshots.
- TrueCloud Backup: backs up to the Storj network, which TrueNAS offers in partnership with the provider. It is worth a look if you don't already have a cloud account.
Set Up a Cloud Sync Task
Choose Add in the Cloud Sync Tasks card. The wizard first asks for credentials, so create them from your provider's account page, paste them in, and use Verify Credential to check they work. The next screen sets the direction and the transfer mode:
- Direction: choose Push to send data from the NAS to the cloud, which is what a backup does.
- Transfer Mode: Copy adds and overwrites files on the destination and never deletes any. Sync makes the destination match the source exactly, so a file deleted at home disappears from the copy too. Move deletes each file from the NAS after copying it, which suits a different job entirely.
- Directory/Files: the dataset to send,
/mnt/tank/familyhere.
Copy is the safer mode for a first backup, since an accidental deletion at home can't spread to the cloud. Under Advanced Options, Remote Encryption encrypts files before they leave the NAS, with a password and a salt you set. Keep both in your password manager, because the provider can't recover them for you. Finish with a schedule, usually one run per night, and use Dry Run to preview what the task would do before saving.
Before trusting a backup: make sure you have restored a file from it at least once. To check, copy one small file back from the destination into a different folder and open it, because an untested backup can fail on the day you need it.
Check Disk Health
Disks rarely fail without warning. They report trouble first, and two checks catch most of it: a scrub of the whole pool, and SMART self-tests of each drive.
Keep the Weekly Scrub
A scrub reads every block in the pool and compares it with its checksum. If a block is damaged and the layout holds a good copy, ZFS repairs it from that copy. A pool with a bad sector that no program has touched in months is the setup that fails during a rebuild, and the scrub is how you find the problem first.
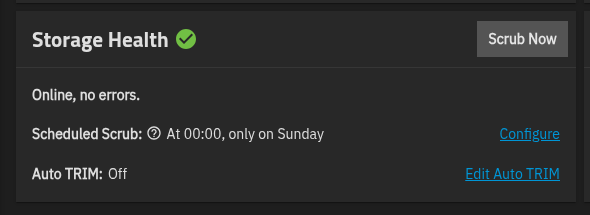
TrueNAS has already scheduled it for Sundays at midnight, as the Storage Health card shows. Leave that schedule alone, and use it as the anchor for everything else: keep other heavy jobs, including the SMART tests below, away from that slot.
Schedule SMART Self-Tests
SMART is the health report that every drive keeps about itself. It counts things like sectors the drive has had to remap and sectors it is still unsure about, and it can run self-tests in the background. A short test finishes in a few minutes with little effect on performance. A long test scans the whole surface and noticeably slows the disk while it runs.
In TrueNAS 25.10, the way to schedule these tests is a cron job. Open System, then Advanced Settings, and choose Add in the Cron Jobs card. Run the command as root, and pick a day and time that don't overlap the scrub or the snapshot task. The documentation gives the same advice about overlaps.
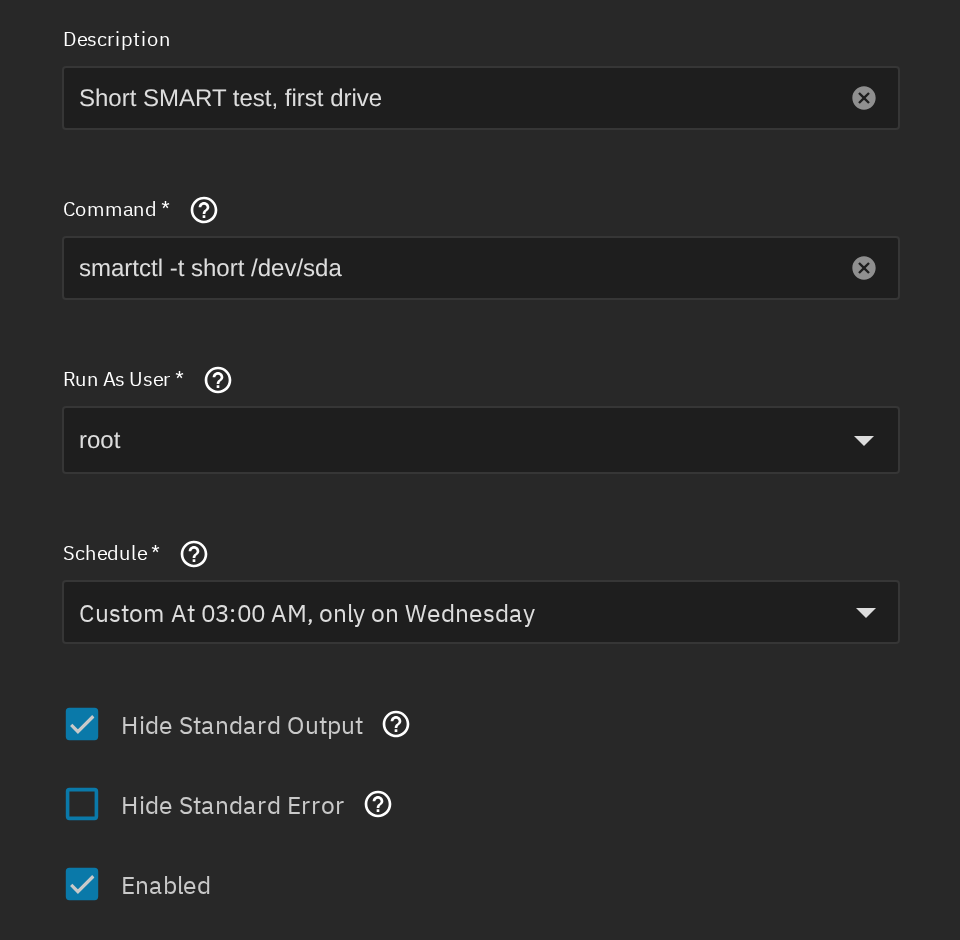
How do you find the device name to put after /dev/?
Storage, then Disks, lists the name of every drive next to its serial number. Create one cron job per disk and stagger them by an hour or two, so the drives don't all run a test at once. Once a month, add a second job per disk with smartctl -t long.
The command only starts the test, and the drive runs it in the background. To read the results afterward, open the Shell and run sudo smartctl -a /dev/sda. The attributes to watch are Reallocated_Sector_Ct and Current_Pending_Sector: a count that grows from one check to the next is the signal to order a replacement disk.
Set Up Alerts
A health check that nobody reads protects nothing, so the last step is making the NAS report problems on its own. Open System, then Alert Settings. The Alert Services list at the top holds the channels that receive alerts, and TrueNAS starts with two, E-Mail and SNMP Trap, both at the Warning level and both enabled.
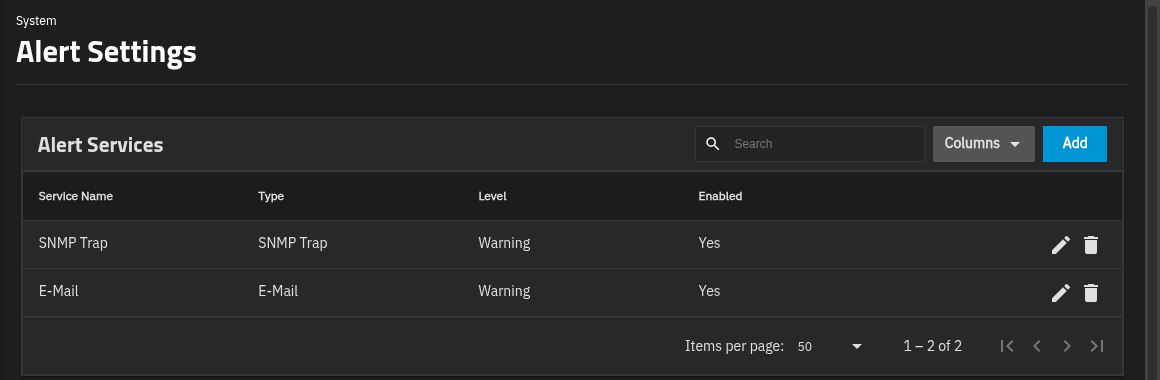
The E-Mail service needs a mail server to send through. Open System, then General Settings, and choose Settings in the Email card, where Send Mail Method is SMTP by default. Enter the server, port, and login from your mail provider, and send yourself a test email. Add also lists Slack, Telegram, Mattermost, PagerDuty, OpsGenie, AWS SNS, InfluxDB, and Splunk On-Call, so a chat message to your phone can replace the email.
Under the service list, every alert category has a warning level and a frequency, such as ERROR and IMMEDIATELY. The defaults are sensible. Look through them once, and raise anything you would want to hear about sooner. The bell icon at the top of every page shows the alerts that are active right now, and the Disk Health card on the Storage page counts temperature alerts.
Once everything works, export the NAS configuration. The Manage Configuration menu on the Advanced Settings page offers Download File, and the file holds your accounts, networking, services, shares, and data protection tasks, which makes a rebuilt NAS a restore instead of a day of clicking. With Export Password Secret Seed ticked, which is the default, the file also carries password hashes, so keep it somewhere as private as a password. The TrueNAS documentation describes each option.
In summary
- RAIDZ survives a disk failure, and a backup covers every other way to lose data.
- Snapshots undo a deleted folder in seconds and live on the same disks as the data.
- Cloud Sync in Copy mode with remote encryption gives you an off-site copy.
- A weekly scrub, SMART cron jobs, and alert channels let the NAS report trouble first.
To run virtual machines on routed IPv4 addresses once the NAS is solid, read Build a Hosting Platform from Scratch.