In the previous section, you logged into a working panel, namely a web interface with no server behind it yet. To run a game, you'll first install Wings on the machine and register it in the panel as a node.
Install Docker
Wings starts every game server as a Docker container, so Docker comes first. Docker publishes a convenience script that installs the current stable release, and the official Pterodactyl documentation uses it:
curl -sSL https://get.docker.com/ | CHANNEL=stable bash
systemctl enable --now docker
The second line starts Docker now and at every boot. A fresh Ubuntu 24.04 installed Docker 29.9.0 this way, which docker --version confirms.
Does Docker need extra settings to limit a server's swap?
On a recent kernel it does not. Swap accounting is enabled by default from Linux kernel 6.1 onward, and uname -r shows the version, which was 6.8 on Ubuntu 24.04. On an older kernel, docker info prints WARNING: No swap limit support, and the fix is to add swapaccount=1 to GRUB_CMDLINE_LINUX_DEFAULT in /etc/default/grub, run update-grub, and reboot.
Download Wings
Wings is a single binary, so installing it means placing the file and marking it executable. The commands also create /etc/pterodactyl, the folder where Wings reads its configuration:
mkdir -p /etc/pterodactyl
curl -L -o /usr/local/bin/wings "https://github.com/pterodactyl/wings/releases/latest/download/wings_linux_$([[ "$(uname -m)" == "x86_64" ]] && echo "amd64" || echo "arm64")"
chmod u+x /usr/local/bin/wings
Run wings version to confirm the download. The release at the time of writing was v1.13.3, and the panel from the previous section is 1.15.1. The project's update page lists which Wings releases match which panel releases, and the rule of thumb is to keep both on the latest version.
Create a Location and a Node
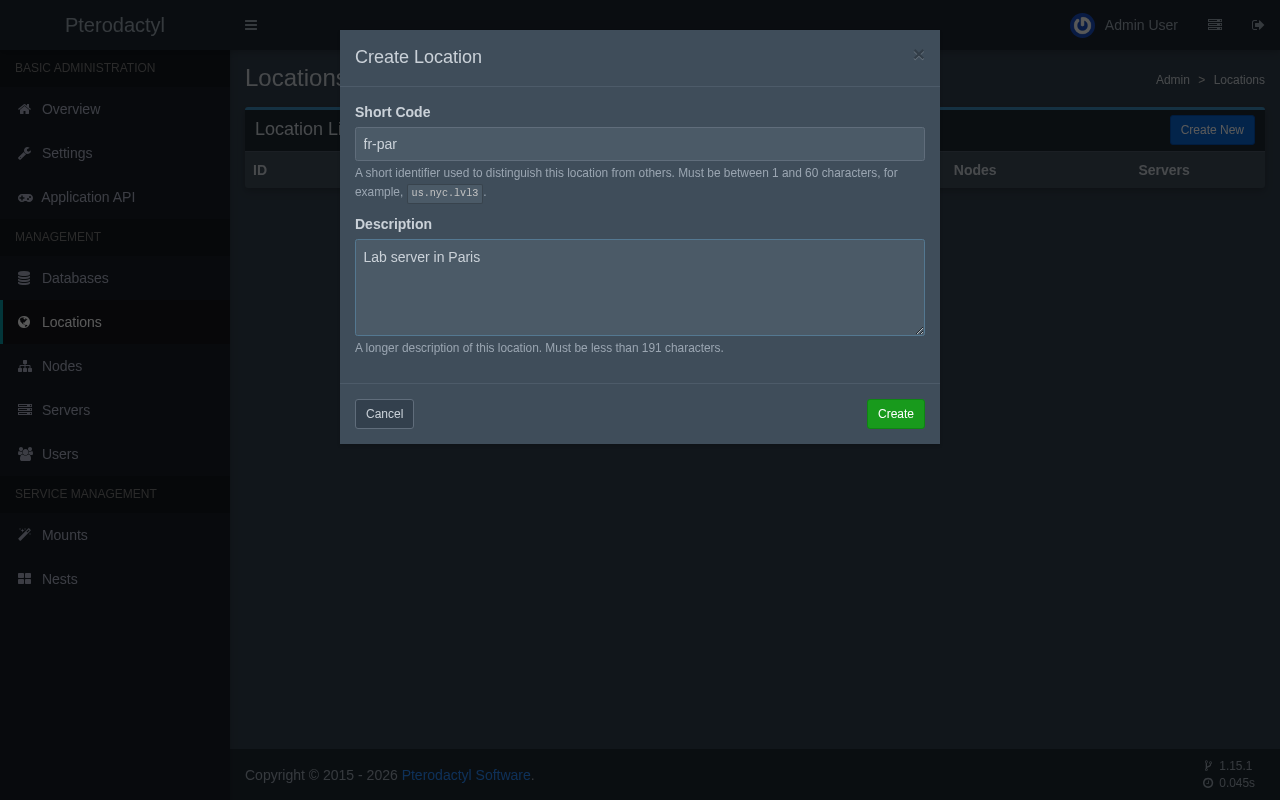
The panel organizes machines into locations and nodes. A location is a label for a place, such as a datacenter or a city, and a node is one machine running Wings inside it. In the admin area, open Locations and choose Create New. The short code identifies the place in lists, and the description is free text.
Then open Nodes and choose Create New. The form has two columns: the left one describes the node, and the right one declares how much of the machine the panel may hand out. Each field matters later, so the next list explains the ones that need a decision:
- FQDN: the domain name the panel and the browsers of panel users use to reach Wings, such as
node.example.com. It must resolve to this machine, and it needs its own HTTPS certificate when the panel uses HTTPS. - Communicate Over SSL: leave it on HTTPS. The form even prints a warning in red when the panel uses HTTPS and the node does not, because browsers refuse to open the console connection to a plain HTTP node.
- Total Memory and Total Disk: the amounts the panel may allocate to servers. The test machine has 8 GiB, and the node declares 6144 MiB of memory, which leaves room for the operating system, the panel, and MariaDB. Disk is declared at 30000 MiB of the 40 GB drive.
- Over-Allocation: 0 percent means the panel refuses to create a server that would push the totals over the limit. A positive percentage allows promising more than exists, which works only when servers rarely use their whole limit.
- Daemon Port and SFTP Port: 8080 for the API and 2022 for the built-in file transfer service. The SFTP port must differ from the port of the machine's own SSH service.
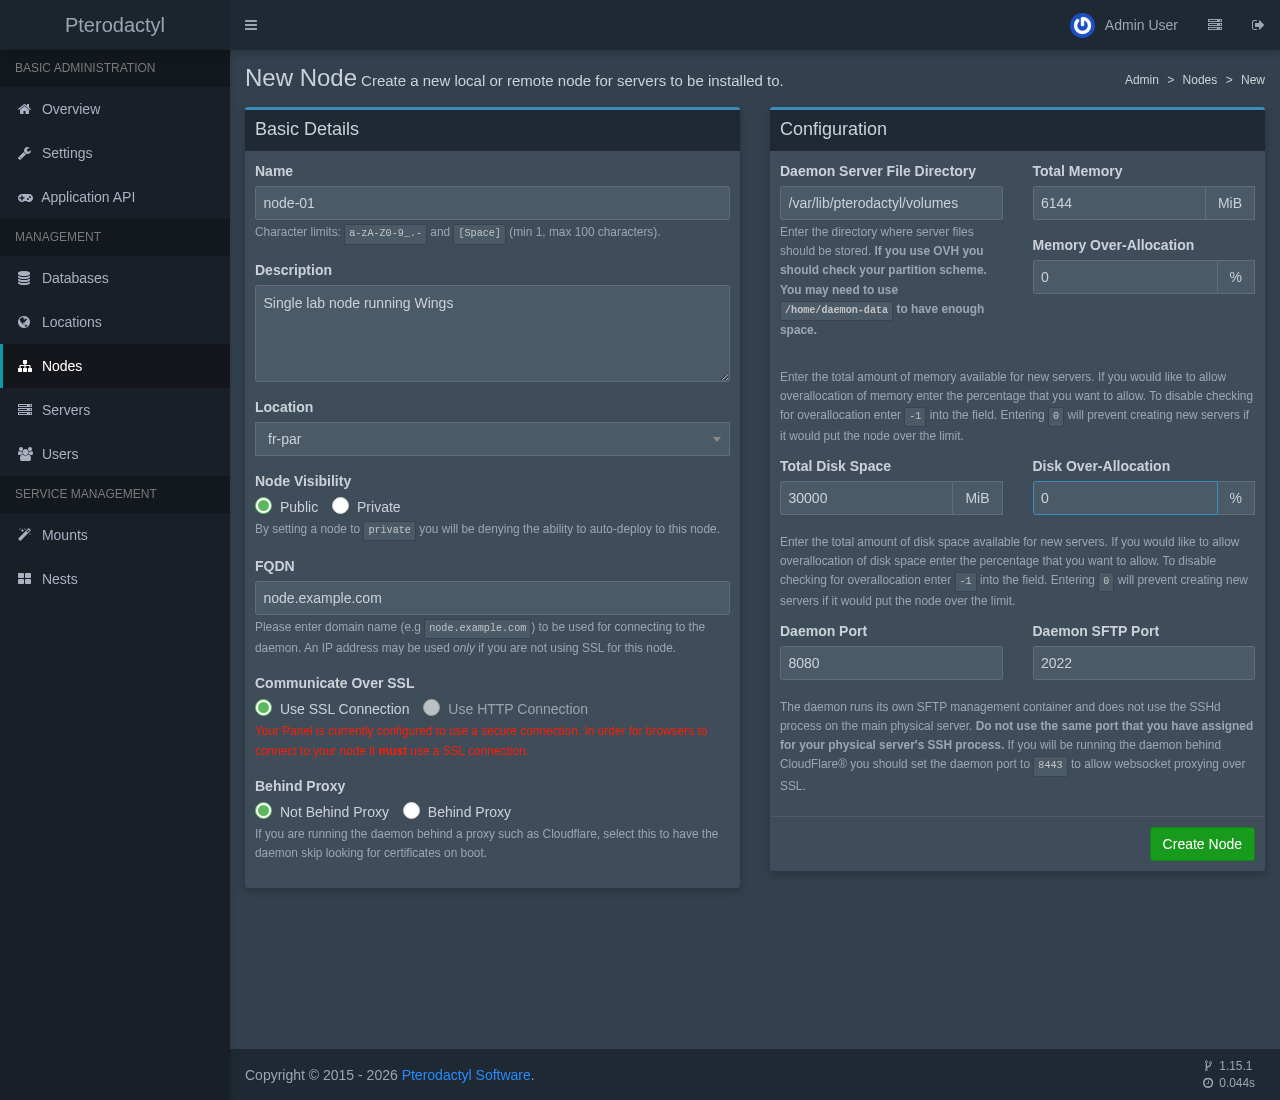
Choosing Create Node opens the new node's page, starting on its Allocation tab.
Give Wings a Certificate and a Configuration
Wings serves its own API over HTTPS, so it needs a certificate for the node's FQDN, the same way the panel needed one. Point a DNS record for node.example.com at the machine and run certbot for that name, as in the previous section:
certbot certonly --standalone -d node.example.comThe standalone mode answers the challenge on port 80 by itself, so stop nginx for the few seconds it takes and start it again afterward. The certificate lands in /etc/letsencrypt/live/node.example.com/, the folder Wings is about to be told to read.
Next, open the node in the panel and choose its Configuration tab. The tab shows a block of YAML that holds the node's identity. Copy it into a new file at /etc/pterodactyl/config.yml. A Generate Token button on the same tab prints a ready-made command that writes the file for you, and on the panel machine itself php artisan p:node:configuration 1 prints the same YAML for node number 1. The file looks like this, with your own values in place of the placeholders:
debug: false
uuid: 60b50825-9bd3-49de-bc36-7ce522db7046
token_id: <generated by the panel>
token: <generated by the panel>
api:
  host: 0.0.0.0
  port: 8080
  ssl:
    enabled: true
    cert: /etc/letsencrypt/live/node.example.com/fullchain.pem
    key: /etc/letsencrypt/live/node.example.com/privkey.pem
  upload_limit: 100
system:
  data: /var/lib/pterodactyl/volumes
  sftp:
    bind_port: 2022
allowed_mounts: []
remote: 'https://panel.example.com'
Notice the remote line at the bottom: it is the panel's own address, which Wings calls to confirm requests and to report events. The token and token_id lines are the node's password, so treat the file like a credential and never paste it into a chat or a ticket.
Start Wings as a Service
Run Wings once in the foreground first. It prints errors straight to the terminal, which is the fastest way to catch a typo in the configuration:
wings --debugOnce it runs without errors, stop it with Ctrl+C and create the service file /etc/systemd/system/wings.service:
[Unit]
Description=Pterodactyl Wings Daemon
After=docker.service
Requires=docker.service
PartOf=docker.service

[Service]
User=root
WorkingDirectory=/etc/pterodactyl
LimitNOFILE=4096
PIDFile=/var/run/wings/daemon.pid
ExecStart=/usr/local/bin/wings
Restart=on-failure
StartLimitInterval=180
StartLimitBurst=30
RestartSec=5s

[Install]
WantedBy=multi-user.target
Then reload systemd and start the service:
systemctl daemon-reload
systemctl enable --now wings
journalctl -u wings -n 20
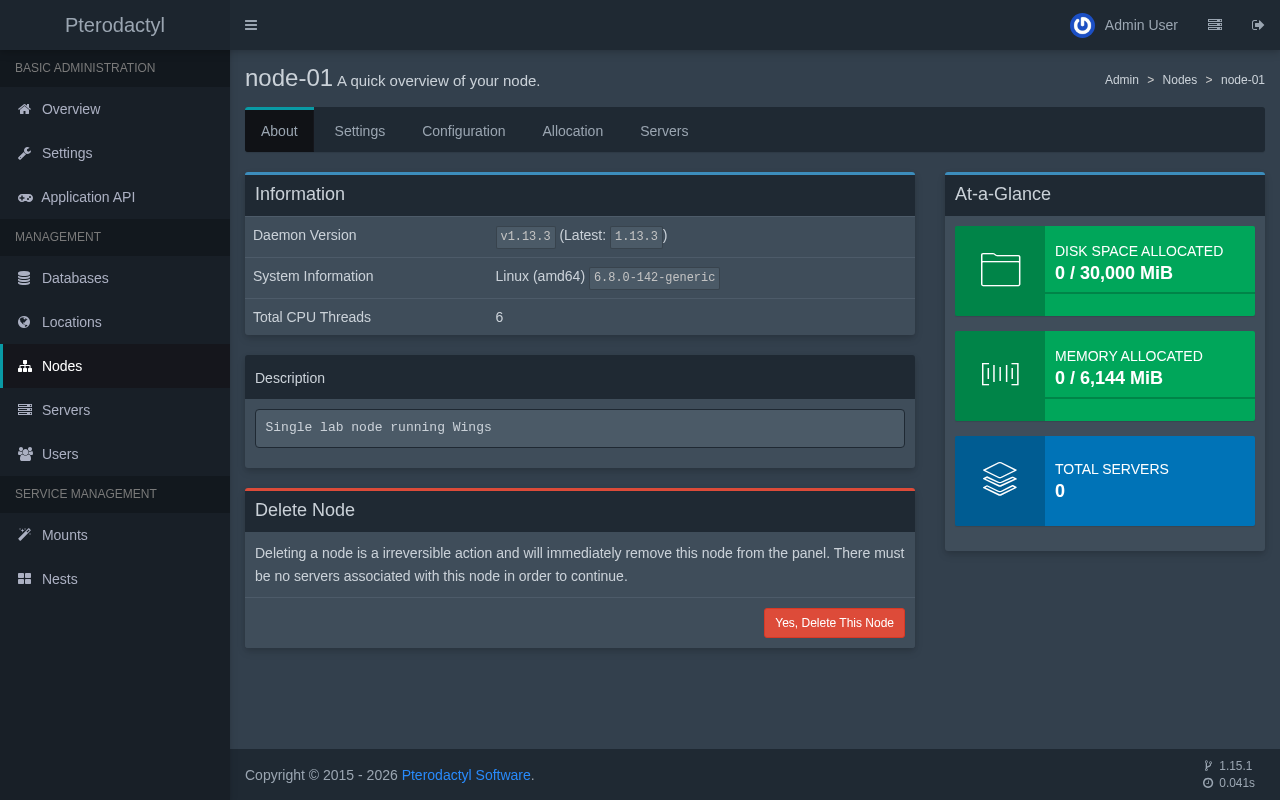
On the first start Wings creates a system user for the game files, a Docker network named pterodactyl_nw, and the folders under /var/lib/pterodactyl. The last log lines mention an SFTP server listening on port 2022, which is the sign that the daemon is ready. Back in the panel, the node's About tab now shows the daemon version and the system information of the machine, and the node list shows a green heart in the first column.
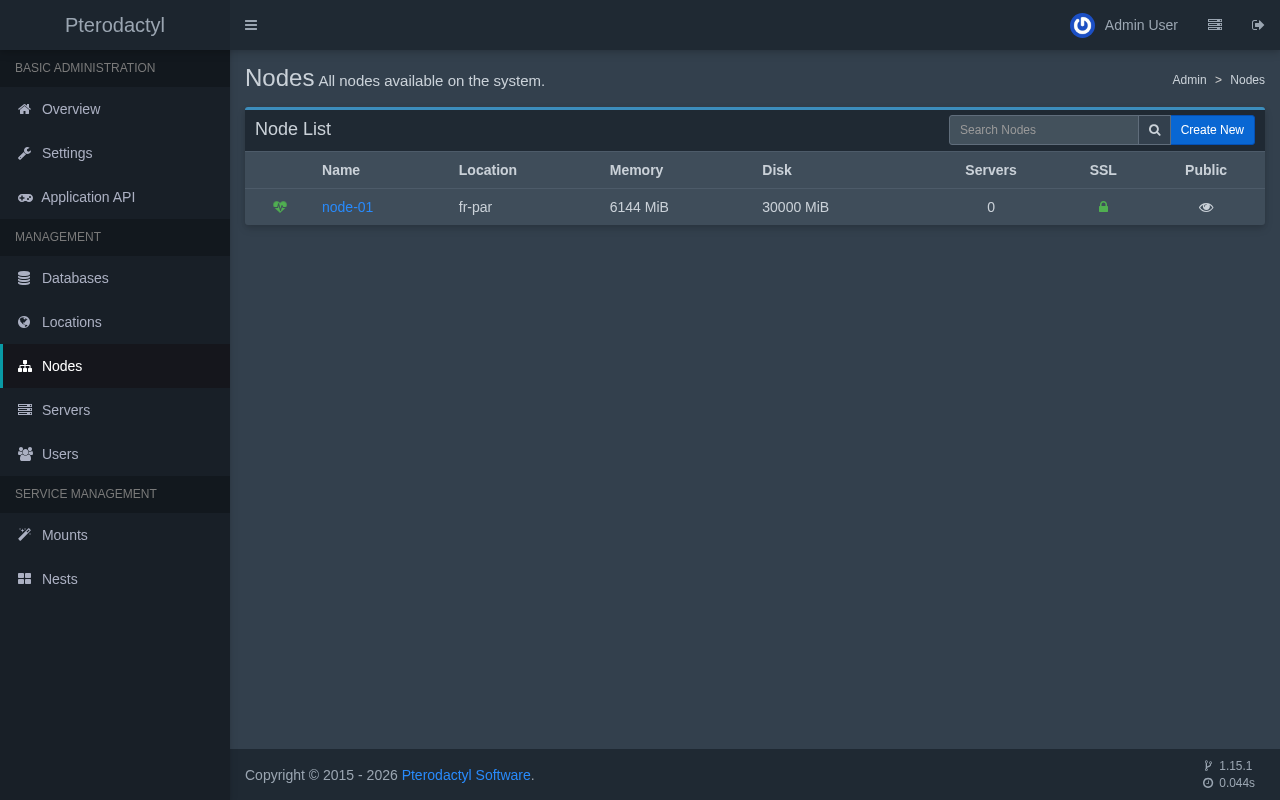
If an installation later fails with Resolving timed out in its log, the containers cannot use the DNS servers Wings gave them. Open /etc/pterodactyl/config.yml, change the addresses under docker.network.dns to your own resolver, stop Wings, remove the pterodactyl_nw network with docker network rm pterodactyl_nw, and start Wings again so it recreates the network with the new setting.
Create the Allocations
An allocation is an IP address and a port that the panel can assign to one server. Every server needs at least one, and the panel only offers addresses that you listed here. Find the machine's own address with this command:
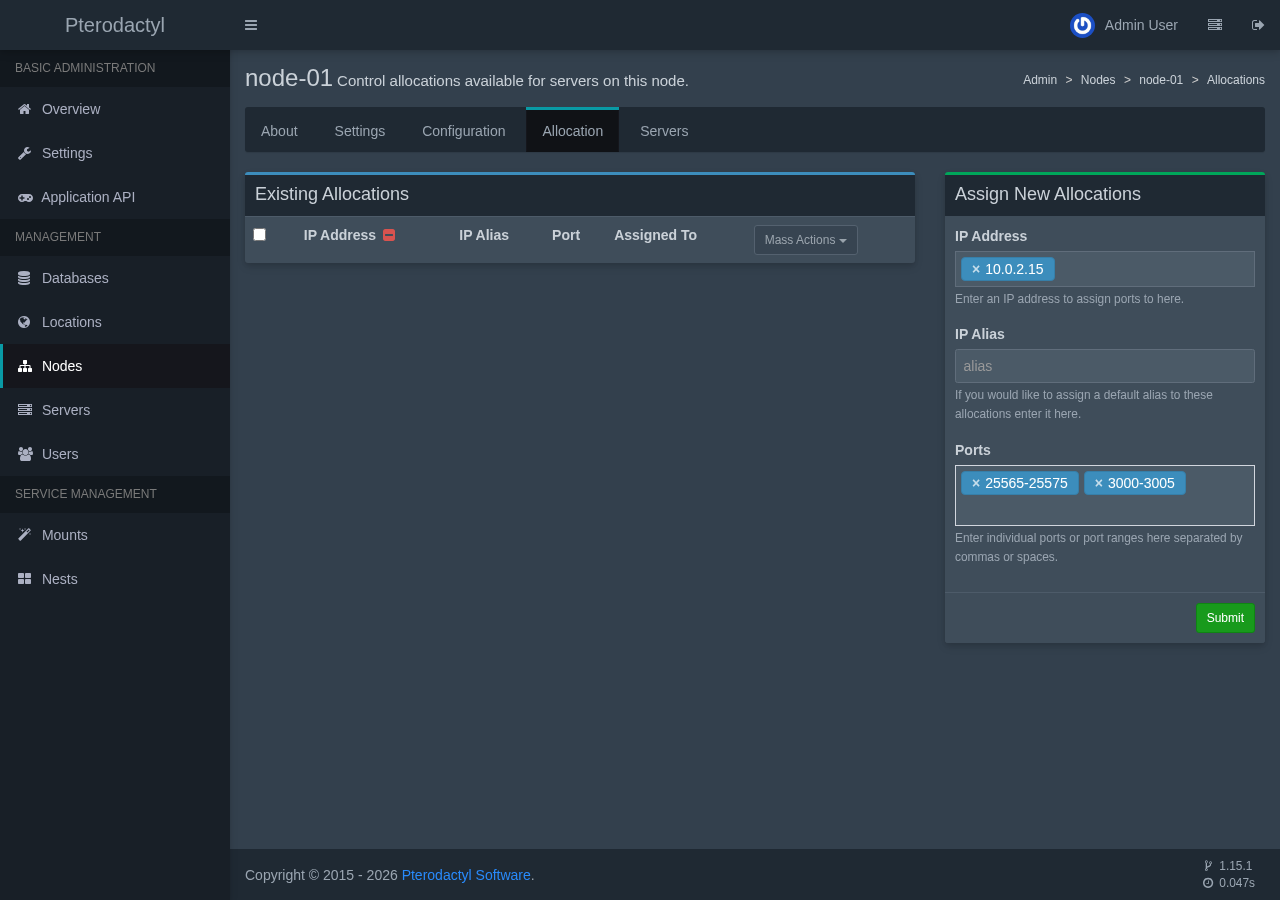
hostname -I | awk '{print $1}'Open the node's Allocation tab and fill in the form on the right. The IP Address field takes that address, and the Ports field takes single ports or ranges separated by commas or spaces. Never use 127.0.0.1 here, because a container published on the loopback address cannot be reached from outside the machine.
This guide uses 25565 to 25575 for Minecraft servers and 3000 to 3005 for bots, and a later section adds 7777 for Terraria. Wider ranges cost nothing, because an allocation does nothing until a server uses it.
After submitting, the Existing Allocations table lists each IP and port pair, one row per port, with an empty Assigned To column.
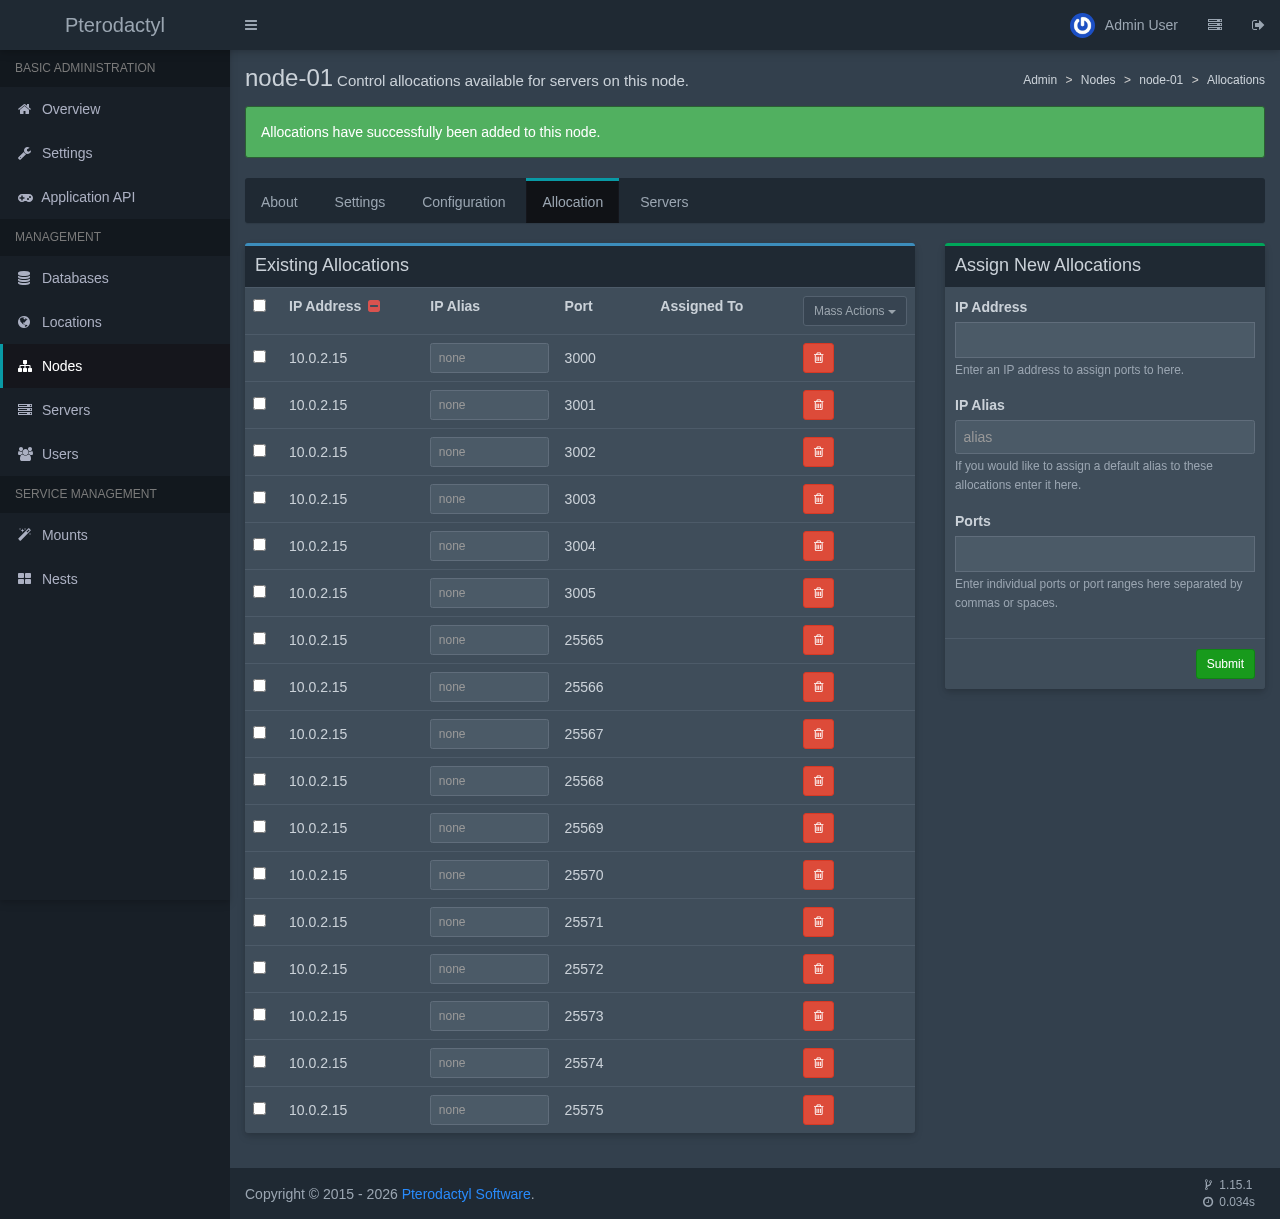
The IP Alias field next to the address is optional. It sets a default alias for those allocations, which becomes useful once you give each server a domain name.
In summary
- Wings needs Docker, a downloaded binary, and a
config.ymlthat the node's Configuration tab generates. - The node's FQDN needs its own HTTPS certificate whenever the panel uses HTTPS.
- A green heart in the node list and a daemon version in the About tab prove that the panel and Wings can talk.
- An allocation is an IP and port pair, and the panel only assigns pairs that you created in advance.
In the next section, you'll create a Minecraft server on this node and watch it start from the panel's console.