
In the previous section, you started a Paper server from an egg that ships with the panel. To host a second game next to it, you'll first import a community egg, because the default nests only cover a handful of games.
This section uses Terraria, a 2D sandbox game where players dig, build, and fight in a shared world. It is a good test of the method: the game uses its own engine, it runs from a plain Linux binary instead of a Java jar, and the community egg for it is a normal JSON file. Every other game in the catalog follows the same steps.
Find an Egg for the Game
An egg is a JSON file that describes how to install a game, which Docker image runs it, which command starts it, and which settings the panel should show. The Pterodactyl project publishes a catalog of eggs at eggs.pterodactyl.io, grouped into games, applications, and programming languages, with a page for each egg and a link to its JSON file in the project's repository. The games list is long. It includes Terraria, Valheim, Palworld, Satisfactory, Minetest, Vintage Story, and Hytale, among many others.
The page for Terraria Vanilla links to the file egg-terraria-vanilla.json. Save it on your computer. The file is plain text, so you can open it in an editor before importing it, and the next callout explains why that is worth doing.
Before importing an egg: make sure you have read its install script. To check, open the JSON file and find the scripts section, or import the egg and read its Install Script tab, because that script runs on your node as part of every server installation and can download and run anything.
Create a Nest and Import the Egg
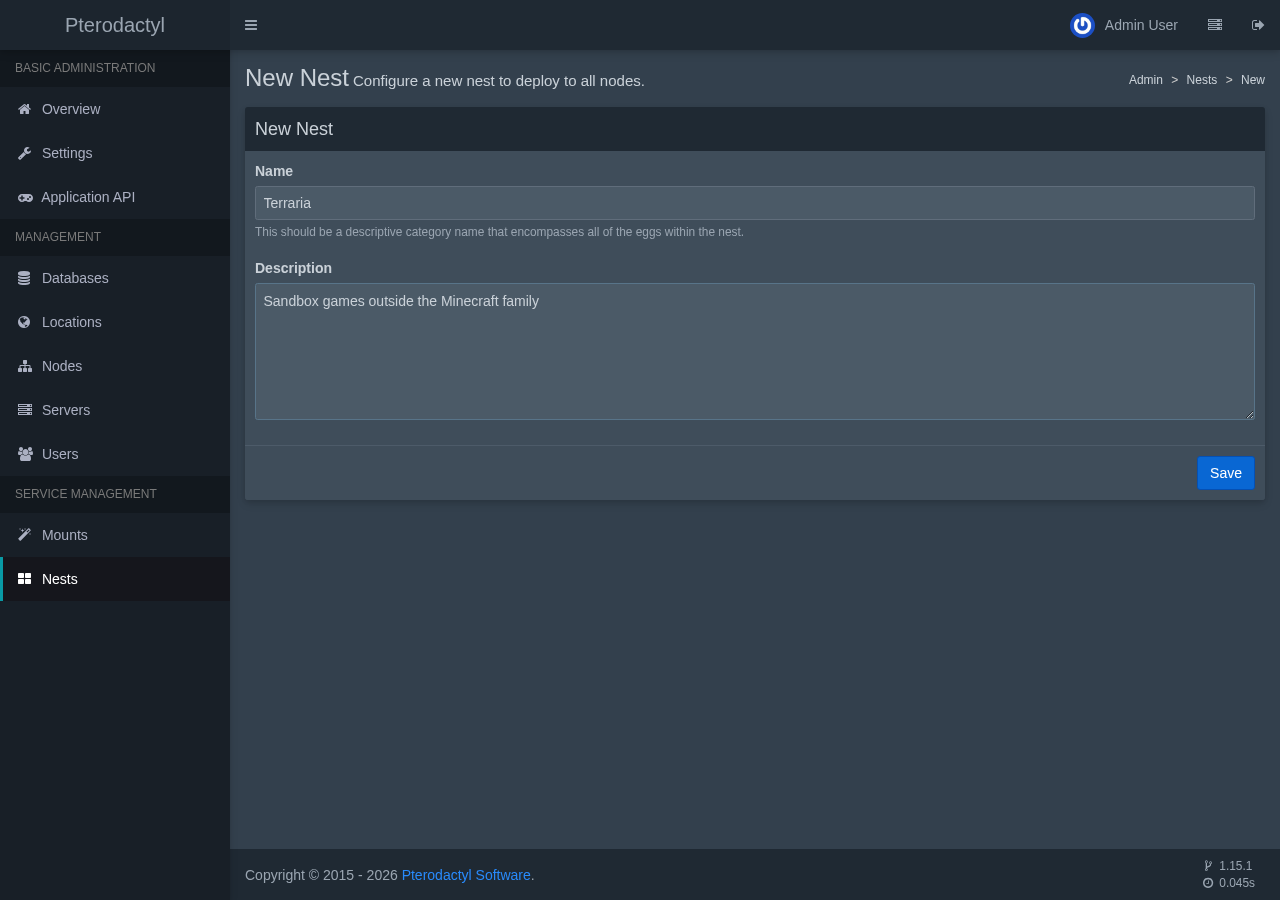
Eggs live inside nests, which are categories. The shipped Minecraft nest holds Minecraft eggs, so Terraria gets a nest of its own. In the admin area, open Nests, choose Create New, and enter a name and a short description.
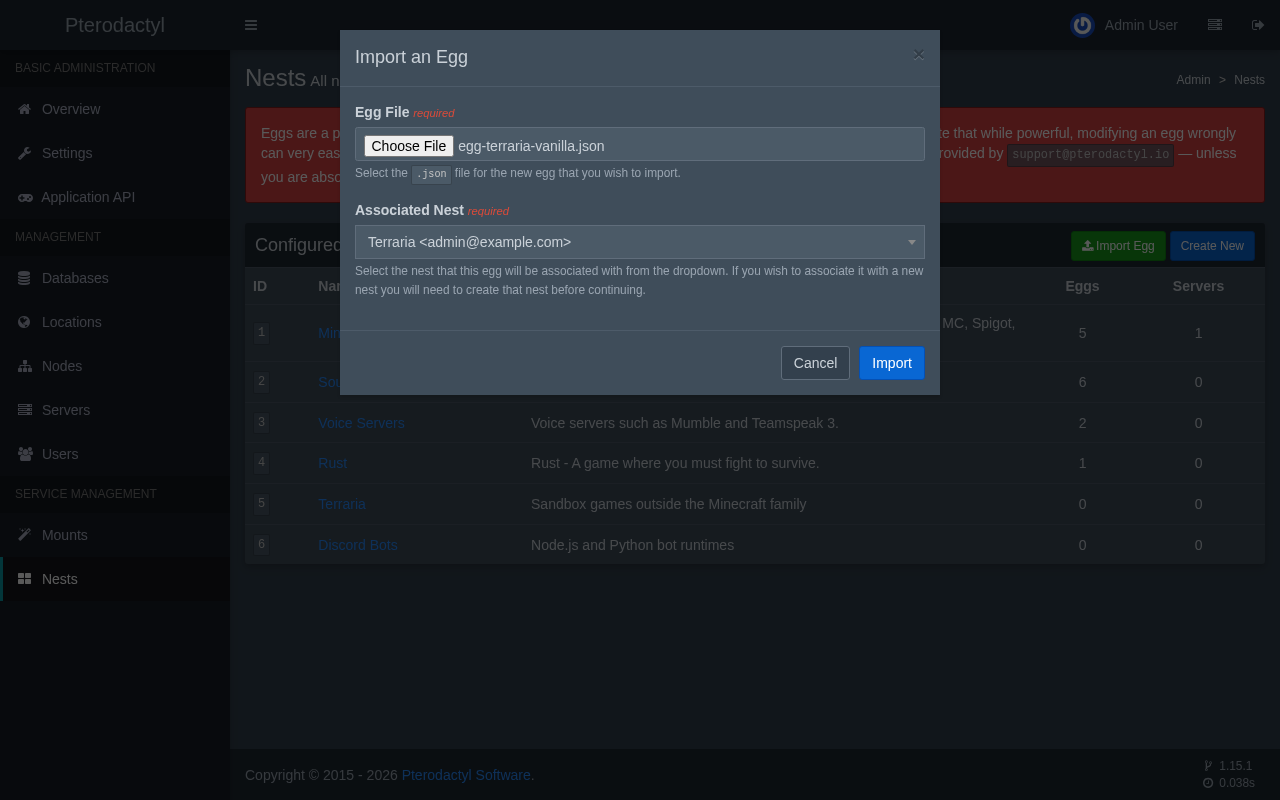
Back on the Nests page, choose Import Egg. The dialog asks for the JSON file and for the nest to place the egg in. Pick the file you saved and the nest you just created, then choose Import.
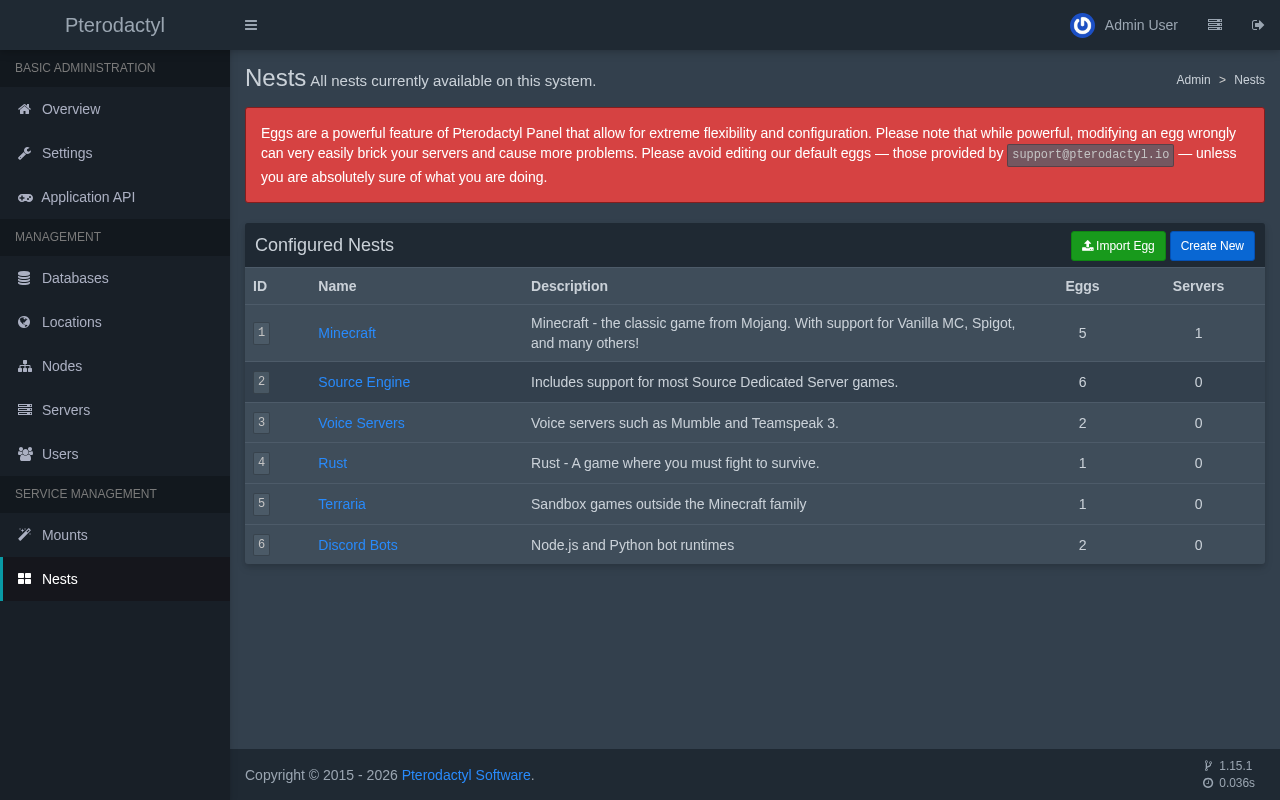
The panel opens the new egg's page. The Nests list now shows the new category next to the shipped ones, and the Eggs column counts the egg you added. The list also contains a Discord Bots nest, which the next section creates.
Read What the Egg Does
An imported egg is worth five minutes of reading, because it explains how the panel runs the game and where to fix problems. The egg page has three tabs: Configuration, Variables, and Install Script.
Check the Configuration Tab
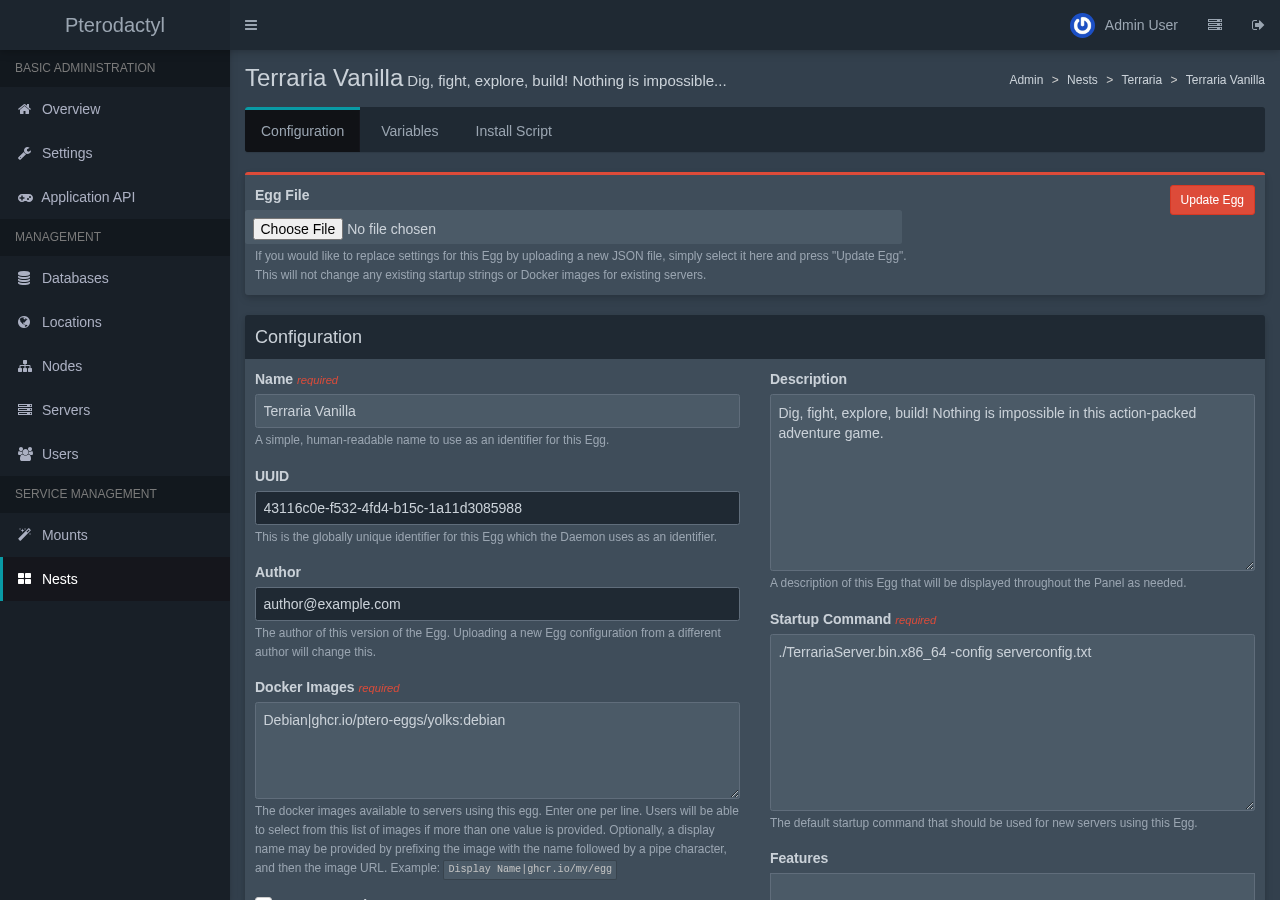
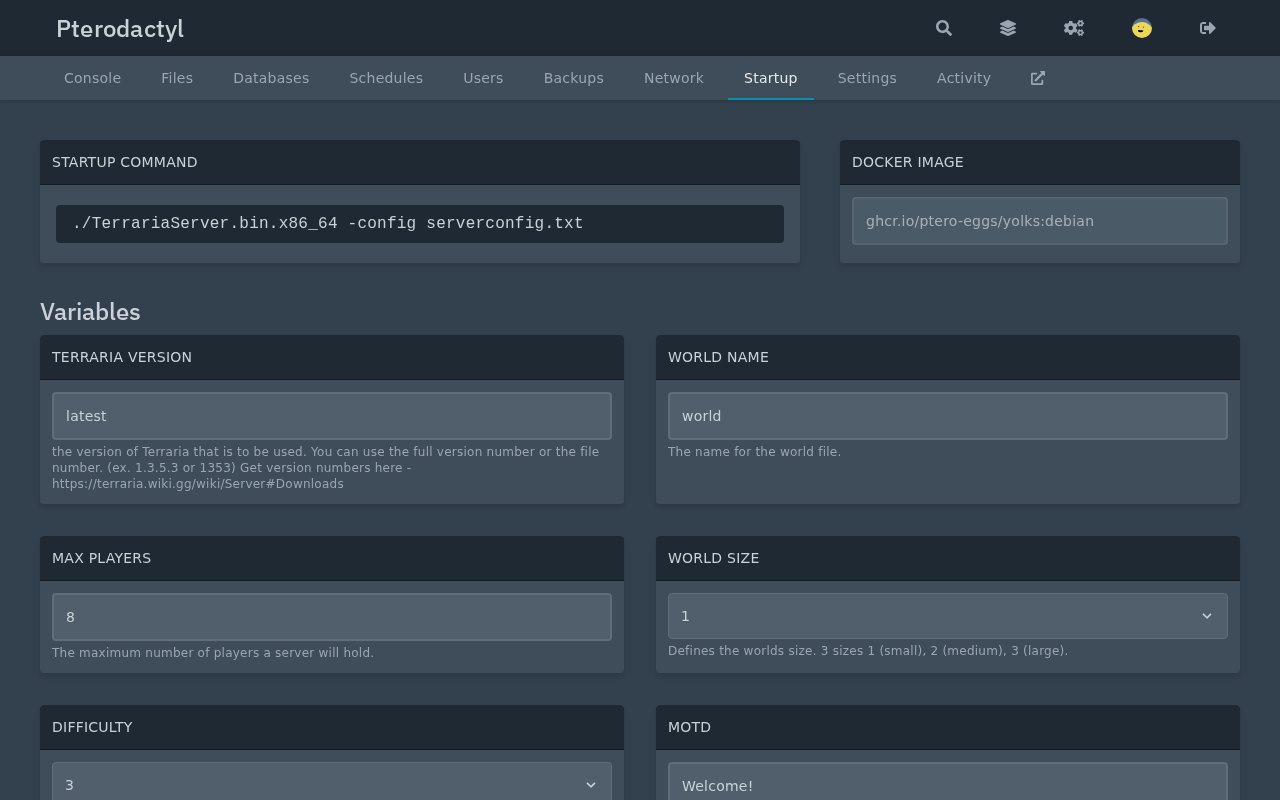
The top of the Configuration tab holds the egg's identity and its defaults. The startup command here is ./TerrariaServer.bin.x86_64 -config serverconfig.txt, which runs the game's own Linux binary. The Docker image is ghcr.io/ptero-eggs/yolks:debian, a plain Debian container, because Terraria needs no Java.
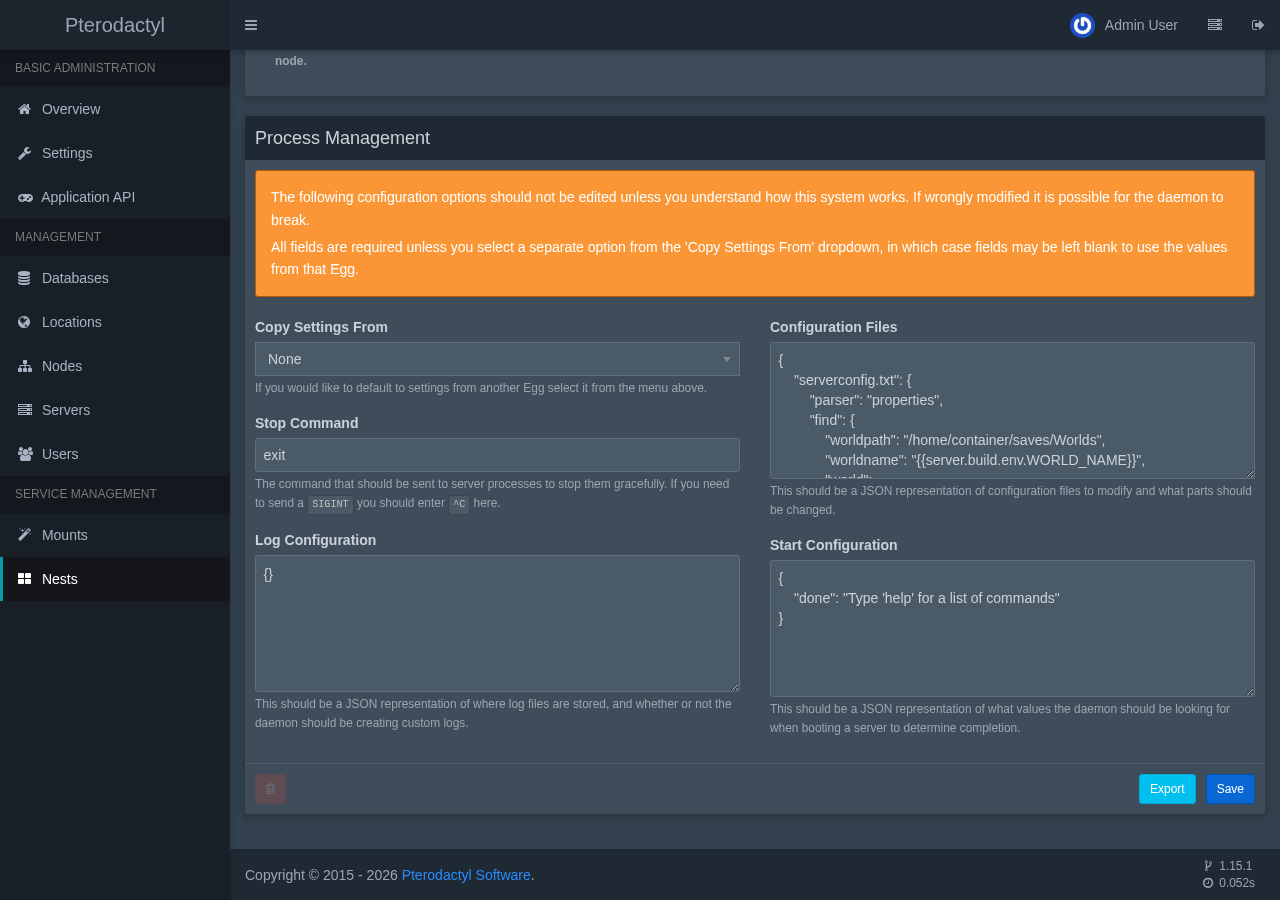
Scrolling down reaches the Process Management panel, which teaches Wings how to talk to the game. Three of its fields do real work:
- Stop Command: the text Wings sends to stop the game politely. Terraria stops on
exit, while Minecraft stops onstop, which is why each egg carries its own. - Start Configuration: the line Wings waits for in the console before it marks the server as running. For Terraria it is
Type 'help' for a list of commands. - Configuration Files: a list of files that Wings rewrites each time the server starts. The entry here edits
serverconfig.txtand fills each setting from a panel variable, such asworldnamefromWORLD_NAMEandportfrom the allocation.
Why does the panel rewrite a game's own configuration file?
So the panel stays the single source of truth. A player with access to the panel changes the world name or the player limit in the Startup tab, and the next start writes the new value into serverconfig.txt before the game reads it. Editing the file by hand would be undone by the following start for every setting that appears in this list.
Check the Variables Tab
The Variables tab lists the settings that the panel shows when someone creates a server from this egg. Each variable has a name, an environment name, a default value, validation rules, and two switches that decide whether the server's owner can see and edit it.
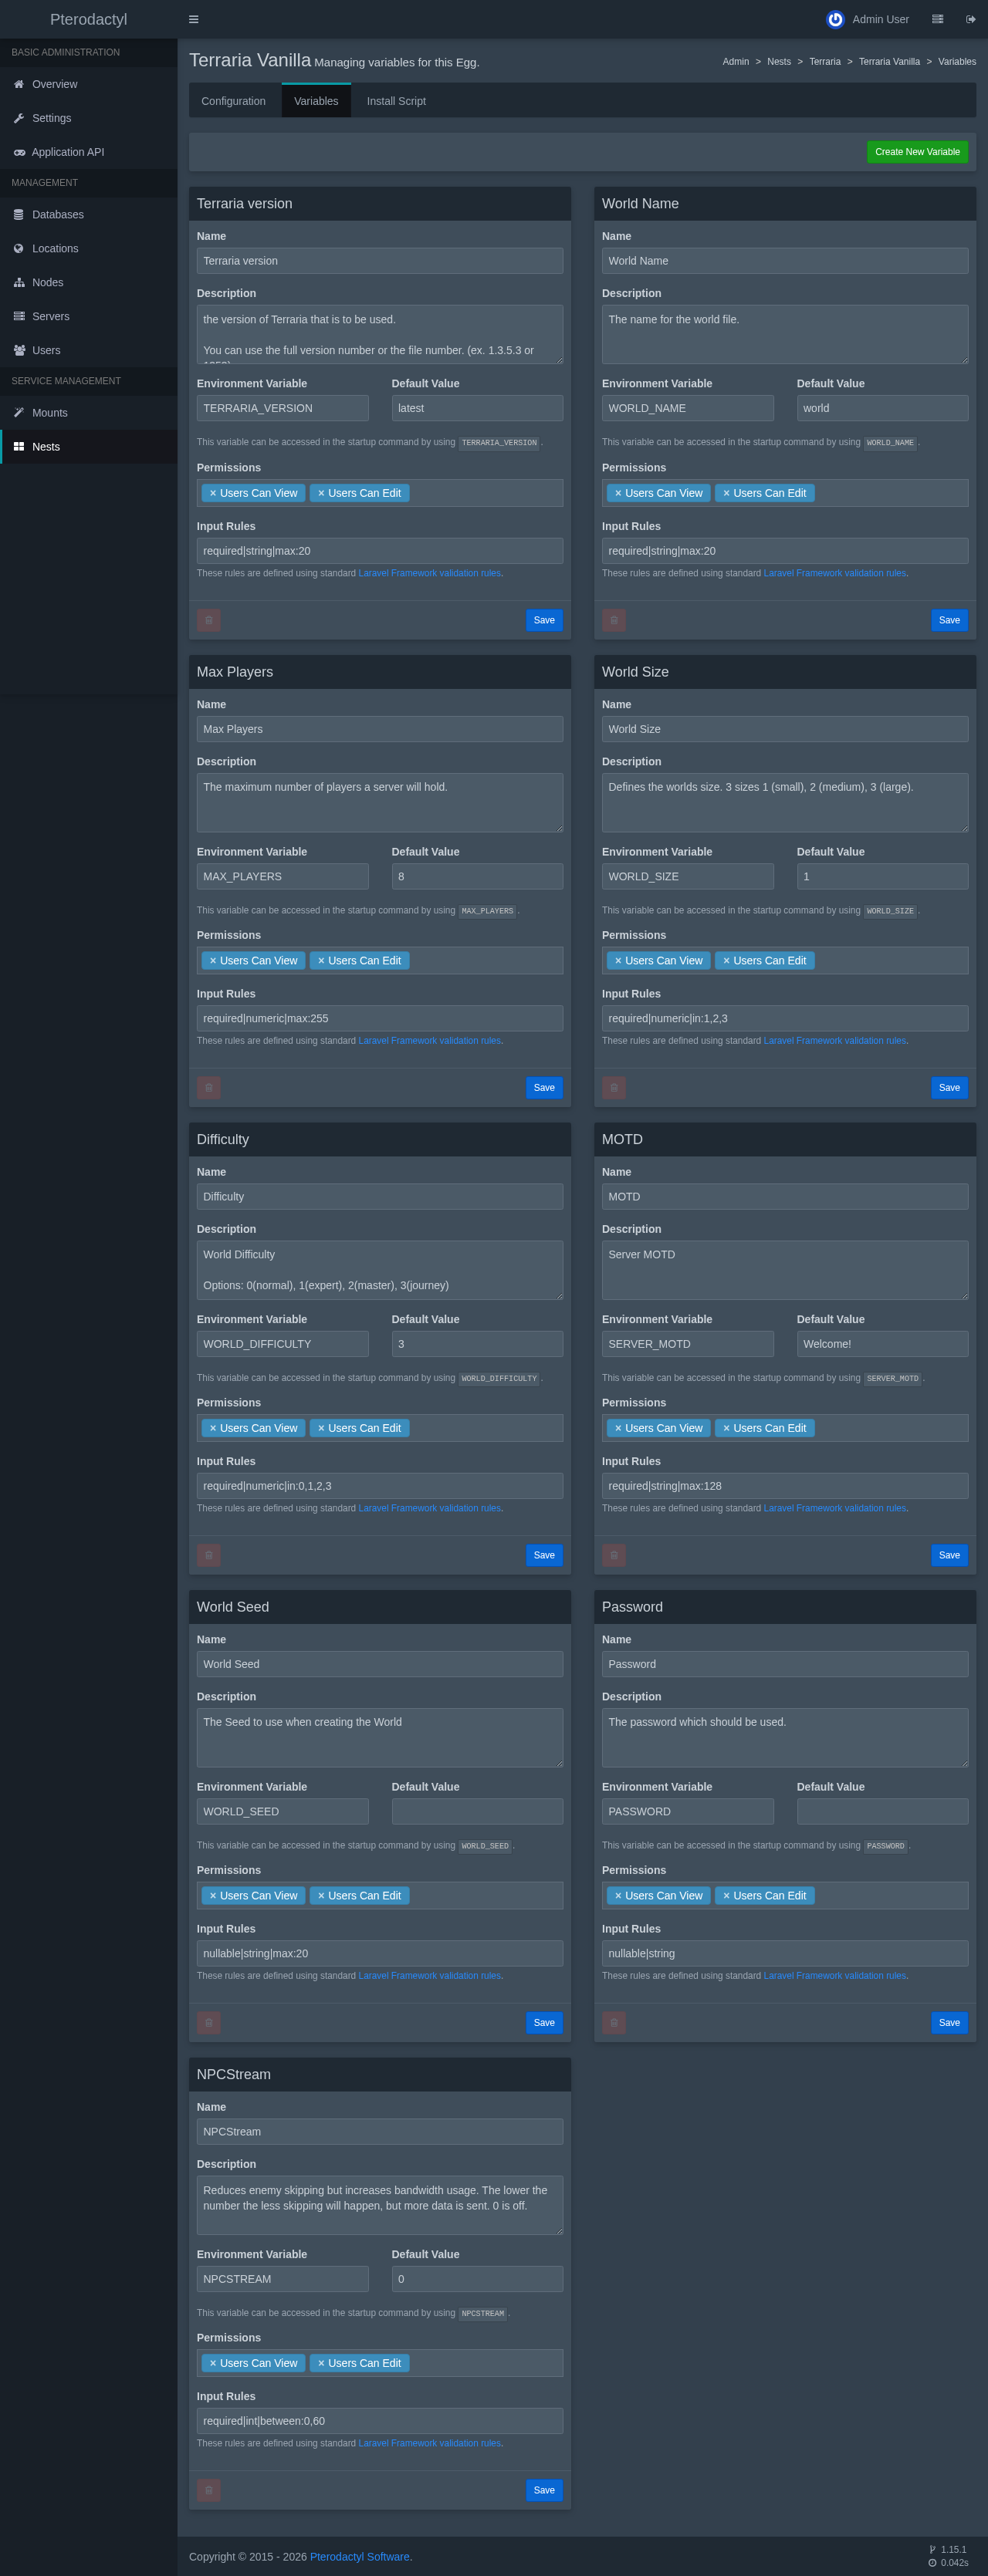
The defaults are sensible for a small private server: the latest Terraria release, a world called world, 8 players, a small world, and the welcome message Welcome!. The difficulty default is 3, which is the Journey mode of the game's own scale, so players who expect the normal mode should change it to 0 before creating the server. The Install Script tab shows the commands that the installer runs. For this egg it asks Terraria's own site for the newest dedicated server, downloads and unpacks it, and writes a first serverconfig.txt.
Add the Game's Port and Create the Server
Every game has a customary port, and players type it from habit or never type it at all. Terraria uses 7777. Open the node's Allocation tab as in Part 2 and add that port to the machine's address, then create the server in the same way as the Minecraft one: Servers, Create New, then the Terraria nest and the Terraria Vanilla egg.
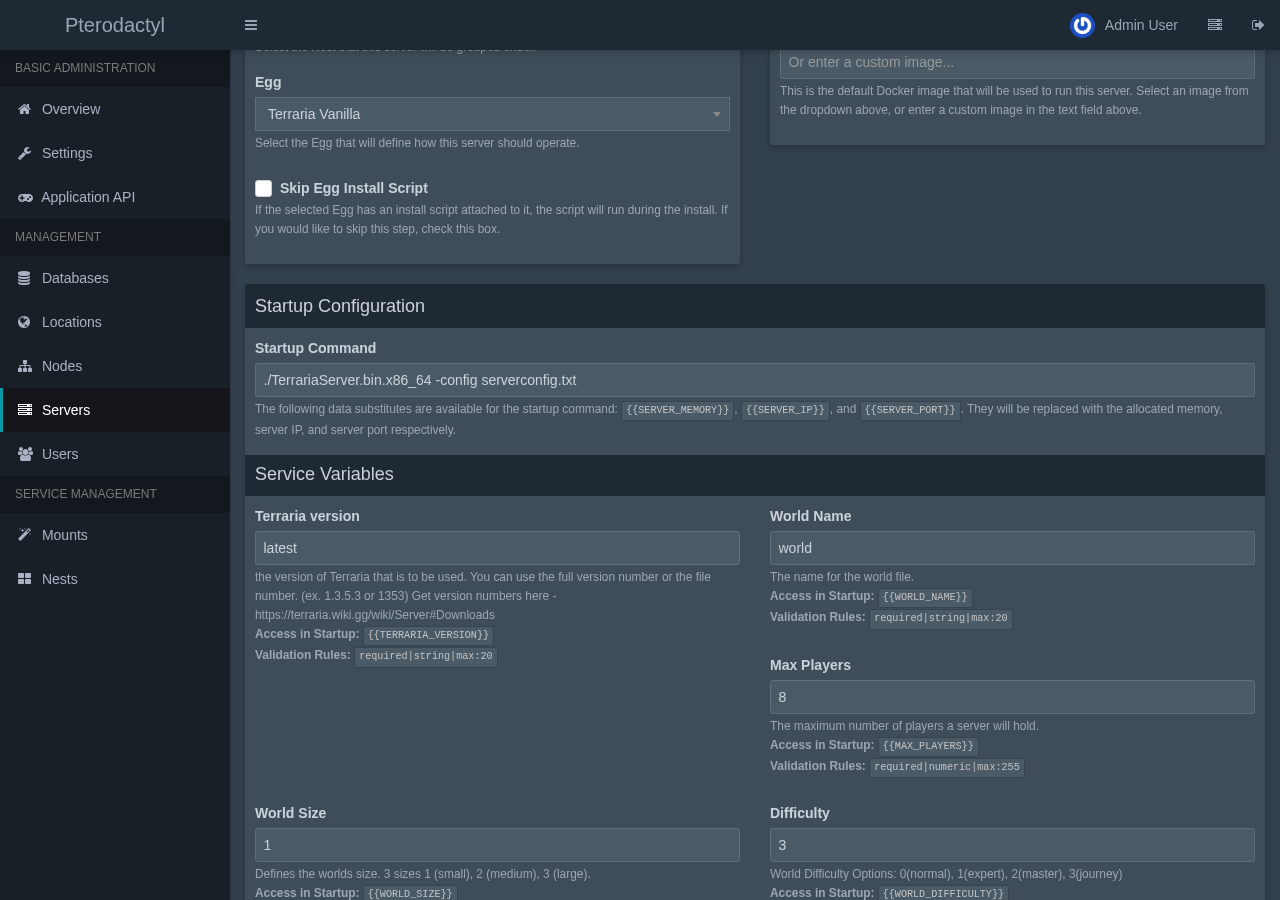
The values for this server are 1536 MiB of memory, 4000 MiB of disk, a CPU limit of 100 percent, and a backup limit of 2. Terraria is lighter than Minecraft, so a smaller limit is enough. The service variables at the bottom of the form show the egg's defaults, and the allocation chosen at the top becomes the game's port through the port line of serverconfig.txt.
The installation pulls the Debian image, which is about 1.8 GB, so the first Terraria server on a node takes a few minutes before it starts. The server starts by itself when the installation ends, because the form's start checkbox is on.
Watch the Game Start
The console of the new server shows the game's own output. Terraria creates a world on the first start, since the install script set it to create one automatically, and prints a progress line for each stage. When it finishes, the console reads Listening on port 7777 and Server started.
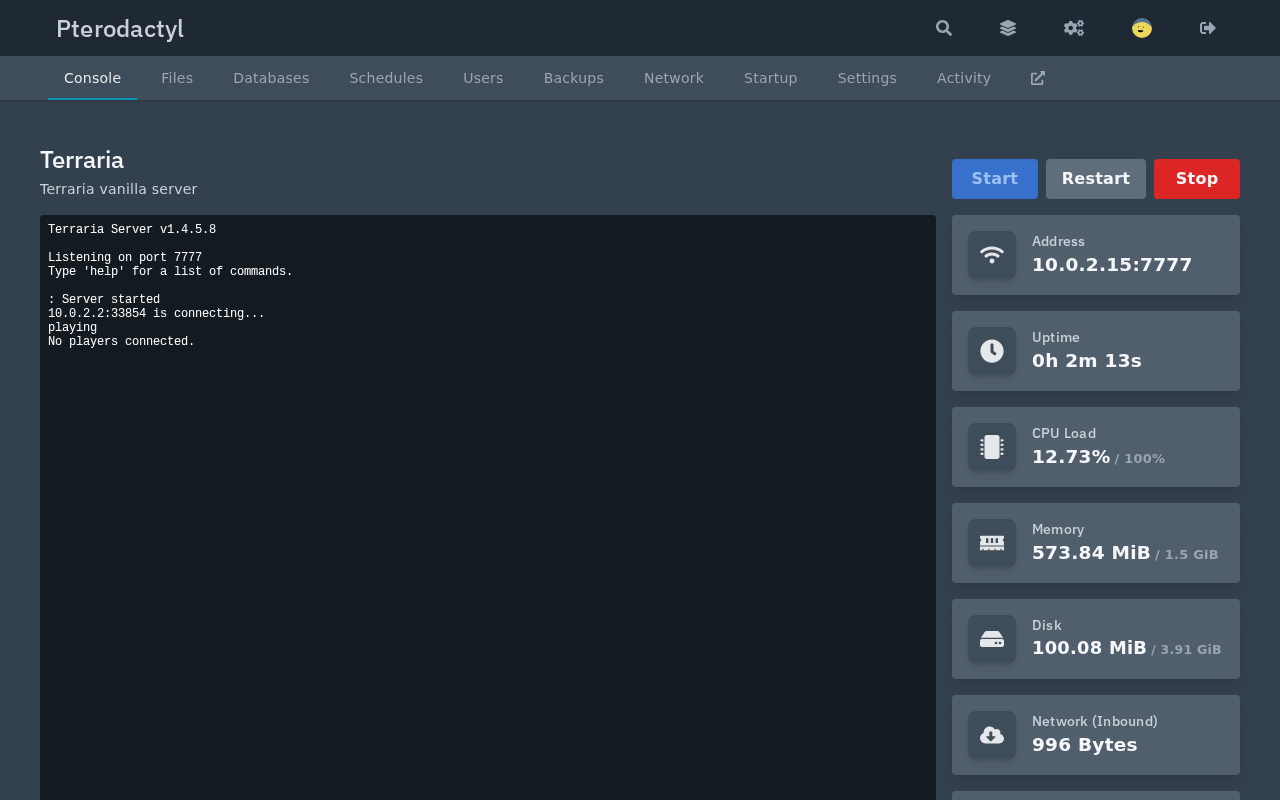
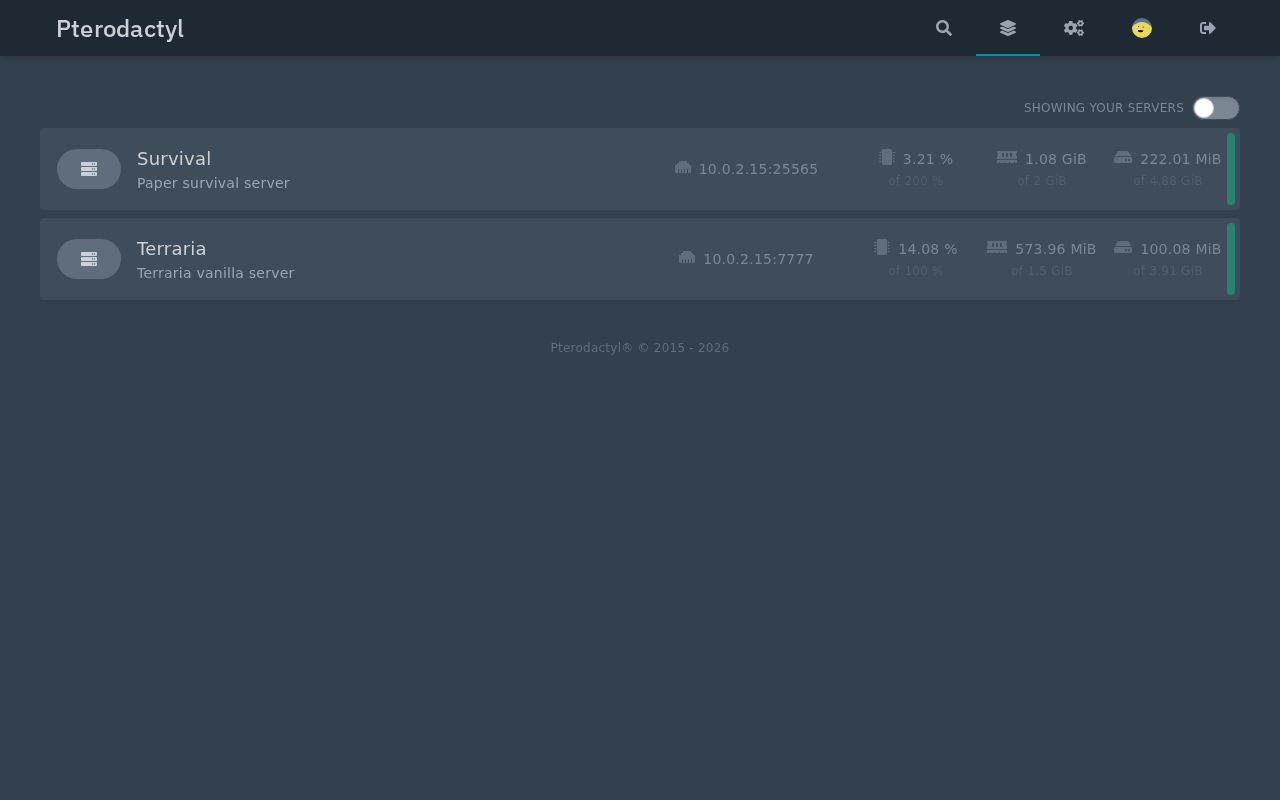
The console also logs each connection attempt, as 10.0.2.2:33854 is connecting... shows here, and the playing command lists the players. The statistics beside the console read about 574 MiB of memory out of the 1.5 GiB limit and 100 MiB of disk, which is about half of what a Paper server uses at rest.
The Startup tab shows the same variables to the server's owner. A change to World Name or Max Players applies at the next start, through the rewritten serverconfig.txt.
Back on the dashboard, both servers sit side by side, each with its own address, port, and resource limits.
If a game server starts but nobody can join, check that the game's client and the server run the same version, since both Terraria and Minecraft refuse mismatched clients. The egg's Terraria version variable accepts a full version number such as 1.3.5.3 when you need to match an older client, and the variable's own description shows the accepted formats.
In summary
- A community egg is a JSON file that turns any game into a template the panel can install and run.
- The Process Management panel of an egg sets the stop command, the running detection, and the files Wings rewrites at each start.
- Importing an egg needs a nest, and reading its install script first is worth the time.
- A second game on the same node costs one allocation and one server form, with its own limits.
In the next section, you'll use the same import step for programming runtimes and host a Discord bot written in Node.js or Python.