
In the previous section, you added a game to the panel by importing an egg. To keep a Discord bot online around the clock, you'll first create the bot in Discord, then run its code the same way, as a server built from a Node.js or Python egg.
A Discord bot is an ordinary program that opens a long-lived connection to Discord and reacts to events. It has no web page and accepts no incoming traffic. That makes it a natural tenant for a game hosting platform: the panel keeps it running, restarts it after a crash, shows its logs, and limits its memory, exactly as for a game.
Create the Bot in Discord
Everything that identifies a bot to Discord lives in the Discord Developer Portal. Sign in with your Discord account, create an application, add a bot to it, and generate its token. The token is the bot's password: anyone who holds it can control the bot, and Discord shows it only when it is generated, so copy it straight into a password manager.
Before putting any bot code in Git: make sure the token appears nowhere in the code or in the repository. To check, search the files for the token's first characters, because a token pushed to a public repository must be treated as leaked and regenerated in the portal.
This section keeps the token out of the code altogether. The panel stores it in a variable and hands it to the bot as an environment variable named DISCORD_TOKEN, which both examples below read.
Write a Minimal Bot
The same tiny bot in two languages is enough to test the whole pipeline: it registers a /ping command and answers Pong!. The bot's files go into a Git repository, on GitHub or any other Git host, because the egg installs the bot by cloning that repository.
Node.js with discord.js
A Node.js bot has two files. The first is package.json, which lists the dependency. It pins discord.js to the 14 series, and the current 14.27.0 release requires Node 18 or newer:
{
  "name": "my-discord-bot",
  "version": "1.0.0",
  "main": "index.js",
  "dependencies": {
    "discord.js": "^14.27.0"
  }
}
The second is index.js. It creates a client, registers the command once the client is ready, answers it, and logs in with the token from the environment:
const { Client, Events, GatewayIntentBits } = require("discord.js");

const client = new Client({ intents: [GatewayIntentBits.Guilds] });

client.once(Events.ClientReady, async (readyClient) => {
  await readyClient.application.commands.create({
    name: "ping",
    description: "Replies with Pong!",
  });
  console.log("Logged in as " + readyClient.user.tag);
});

client.on(Events.InteractionCreate, async (interaction) => {
  if (interaction.isChatInputCommand() && interaction.commandName === "ping") {
    await interaction.reply("Pong!");
  }
});

client.login(process.env.DISCORD_TOKEN);
Python with discord.py
A Python bot also has two files. requirements.txt lists the library, whose current release is discord.py 2.7.1:
discord.py>=2.4And bot.py does the same work as the JavaScript version:
import os

import discord
from discord import app_commands

client = discord.Client(intents=discord.Intents.default())
tree = app_commands.CommandTree(client)


@tree.command(name="ping", description="Replies with Pong!")
async def ping(interaction: discord.Interaction):
    await interaction.response.send_message("Pong!")


@client.event
async def on_ready():
    await tree.sync()
    print(f"Logged in as {client.user}")


client.run(os.environ["DISCORD_TOKEN"])
Push each bot to its own repository. A public repository clones without credentials. A private one needs a username and an access token, and the egg has variables for both, which appear below.
Import the Node.js and Python Eggs
Neither runtime ships with the panel, so import them as in the previous section. The generic eggs from the project's catalog cover both: node.js generic and python generic. Download the two JSON files, create a nest named Discord Bots, and import both eggs into it.
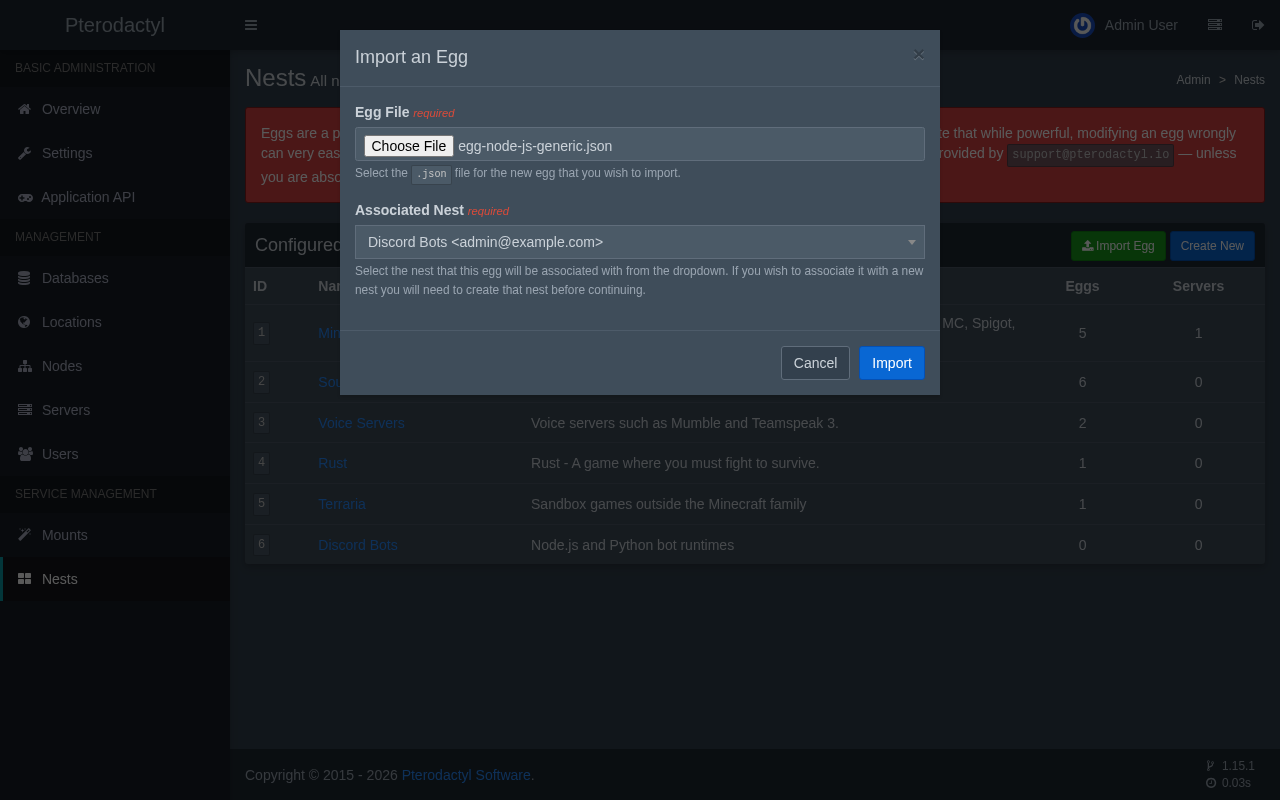
Both eggs work the same way. At installation they clone the Git repository into the server's folder and install the dependencies, and at every start they pull the latest code if the Auto Update variable is on, install any missing packages, and run the main file. The Node.js egg offers Docker images from Node 12 to Node 25, and the Python egg offers Python 2.7 and 3.7 to 3.13.
Add a Variable for the Token
The generic eggs know about a Git address, a branch, and the main file, and they know nothing about Discord. A new variable on each egg carries the token. Open the egg's Variables tab and choose Create New Variable. The environment variable name must be exactly DISCORD_TOKEN, because that is what the code reads.
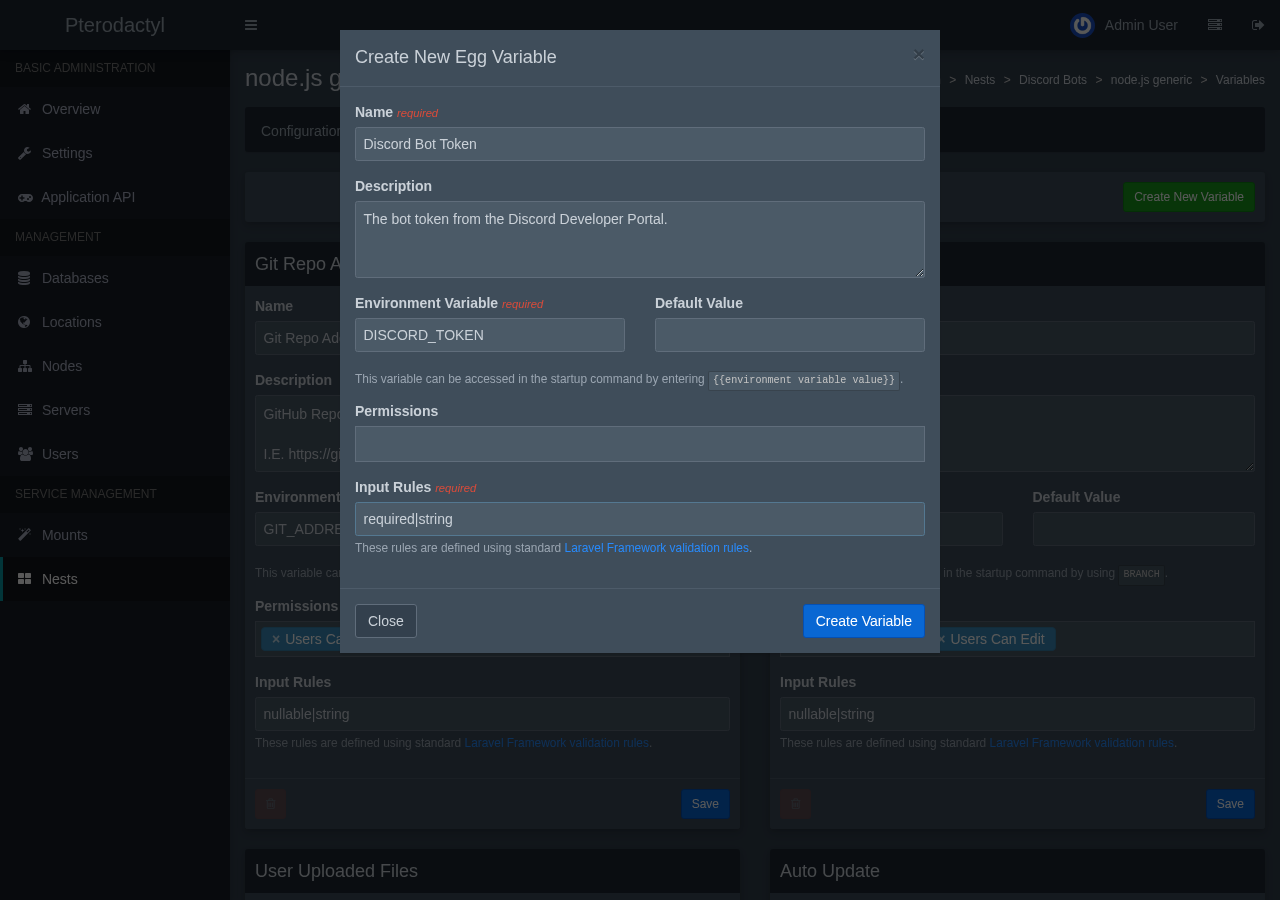
The input rule required|string makes the panel refuse to create a server without a token. The Permissions field decides what the server's owner can do with the variable. A new variable starts with neither permission, which hides it from the owner entirely, so select Users Can View and Users Can Edit if the bot's owner pastes their own token. Leave them off to keep the token under the administrator's control.
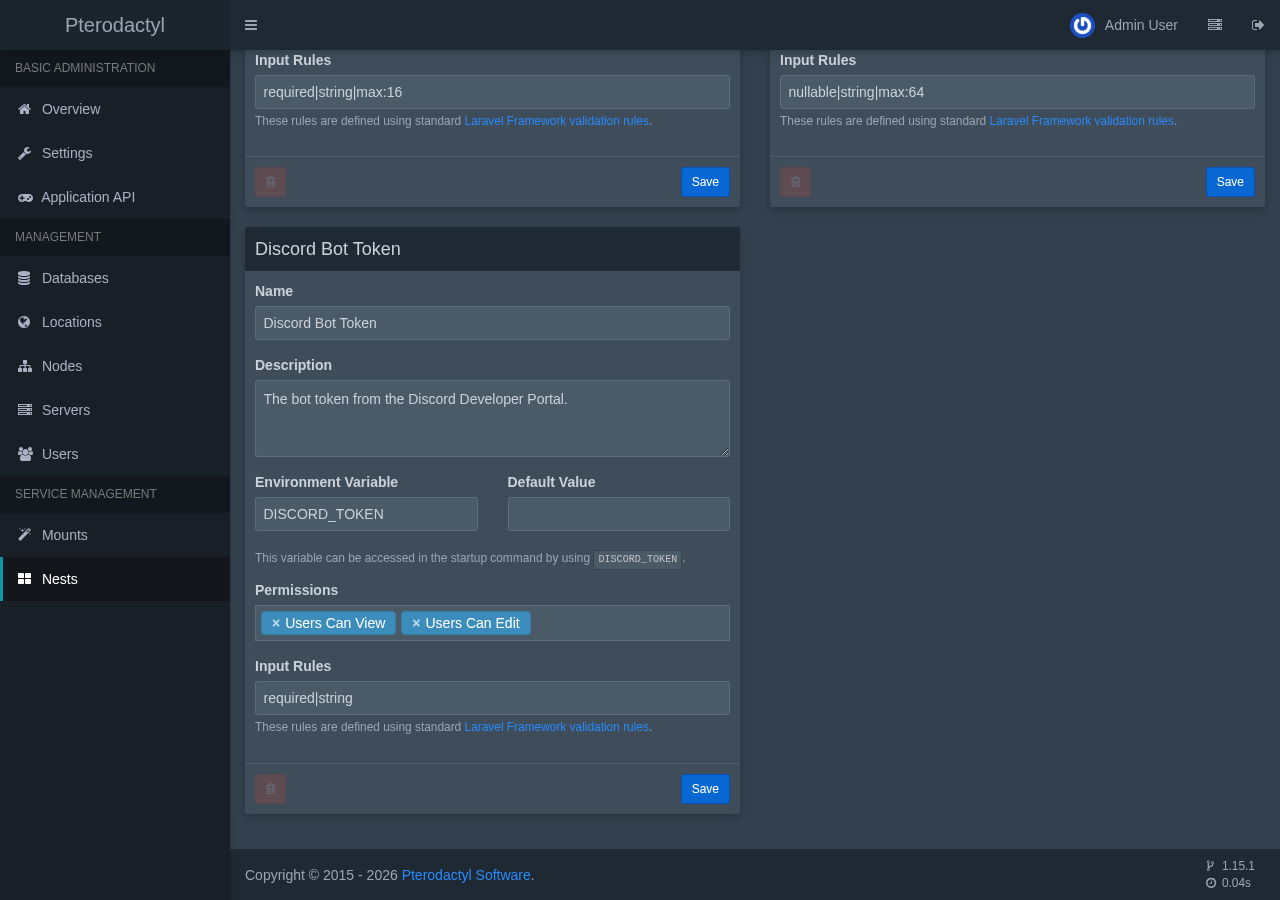
Repeat the variable on the Python egg, with the same name and the same rule.
Create the Bot Servers
Creating a bot server uses the same form as before, with smaller limits. This guide gives each bot 512 MiB of memory, 1500 MiB of disk, and half a thread of CPU, which suits a bot that only waits for events. Choose the Discord Bots nest, then the egg, then the Docker image, which is Node 24 for the first bot and Python 3.13 for the second.
Does a bot need a port?
No. A bot opens an outgoing connection to Discord and nothing connects back to it. The panel still asks for one allocation for every server, so the bots take 3000 and 3001 from the range created in Part 2, and nothing ever listens on them. A bot needs no public IPv4 address of its own.
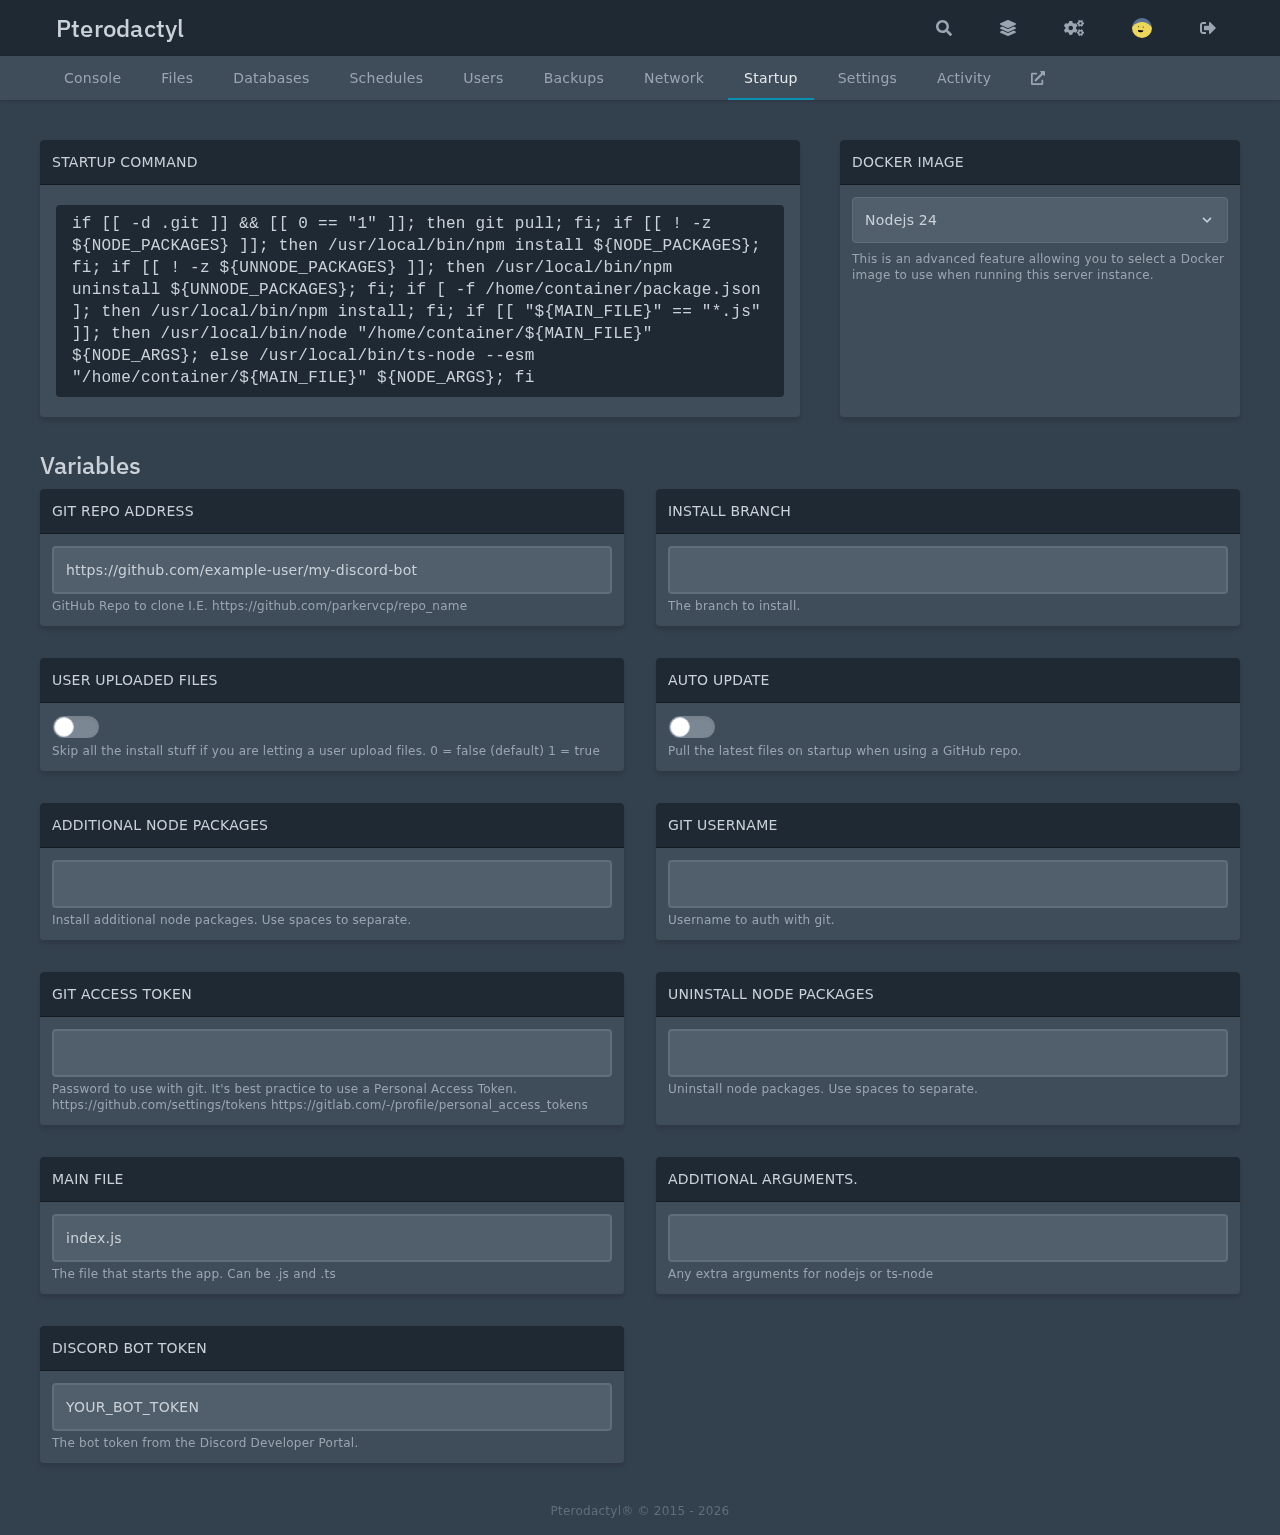
The variables at the bottom of the form are the ones that matter. For the Node.js bot, set Git Repo Address to the HTTPS address of the repository, Main File to index.js, and Discord Bot Token to the token from the portal. For the Python bot, the main file variable is called App py file and holds bot.py.
For a private repository, fill in Git Username and Git Access Token. The install script rewrites the address to include them, so use the repository's HTTPS address in that case.
Read the Startup Tab and the Console
Once the install container has cloned the repository and installed the dependencies, the server starts by itself. The Startup tab shows what the server will run and with which values. For the Node.js egg, the startup command pulls the repository if Auto Update is on, installs any extra packages, runs npm install when a package.json exists, and starts the main file.
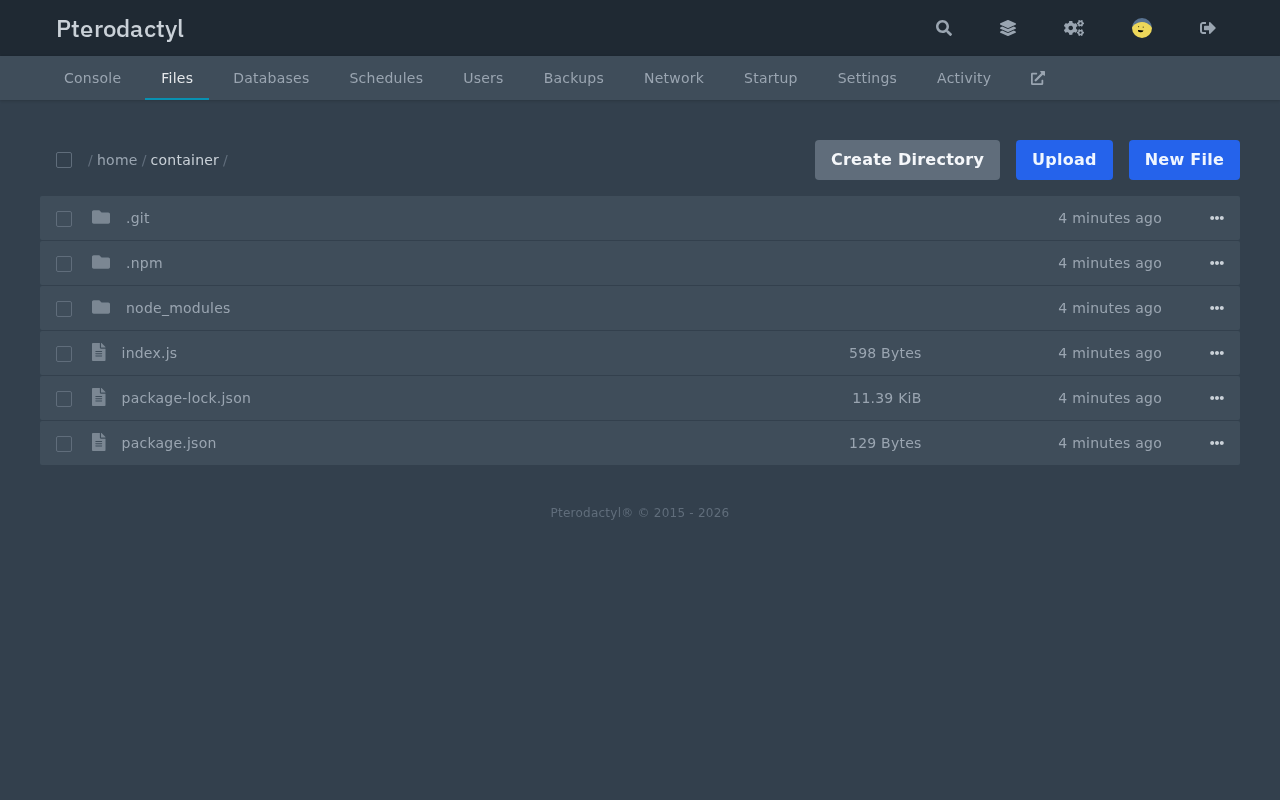
The Files tab shows what the installer cloned. For the Node.js bot that is index.js, package.json, and the node_modules folder, along with the hidden .git folder, which is how the Auto Update variable can pull later.
The console is where the bot reports that it is online. With a valid token, the first line after startup is the Logged in as message from the code, and the bot answers /ping in any server it has joined. If the token is ever rejected, the console shows Discord's own message, such as An invalid token was provided, so paste the token again on the Startup tab and press Start.
The daemon also watches the process. It declines to restart a server whose last crash was less than a minute ago, which stops a faulty bot from restarting in a loop, and the Auto Update variable set to 1 pulls new commits from the repository on every start.
If you see ts-node in a Node.js stack trace, nothing is wrong: the egg's startup command checks the main file name against the quoted text *.js, so it runs files through ts-node, which handles plain JavaScript too. Use a file name that ends in .ts if you write the bot in TypeScript.
In summary
- A Discord bot is a long-running program that connects outward to Discord, so it needs an allocation but no public IPv4 address.
- The Node.js and Python generic eggs clone a Git repository, install its dependencies, and run the main file.
- A
DISCORD_TOKENvariable on the egg keeps the token out of the repository. - The console shows the bot's login line, and the daemon does not restart a server that crashed less than a minute earlier.
In the next section, you'll give the Minecraft server a public IPv4 address of its own through a Taipan tunnel.