
In the previous guide, you ordered a routed IPv4 and a WireGuard tunnel, namely five addresses now reachable through the Proxmox host and routed down to its first VM. To bring a second VM online without repeating that entire installer walkthrough, you'll first turn the VM already running into a reusable template.
Convert the VM into a Template
A template starts out as an ordinary VM, one already installed, configured, and confirmed working: the same VM built two guides ago. Converting it locks that exact state in place. Once a VM becomes a template, Proxmox no longer lets it boot on its own, it exists only to be cloned from.
The VM has to be stopped first, since a template captures a disk image rather than a live running state. Proxmox's own panel offers this as a single action: select the stopped VM in the left tree, open More in the top right of its Summary page, and Convert to template sits right at the top of that menu, the same menu a right-click on the VM in the tree reaches directly. The command line behind it is worth knowing too, since it's what any provisioning script actually calls once this stops being a one-off:
qm template 100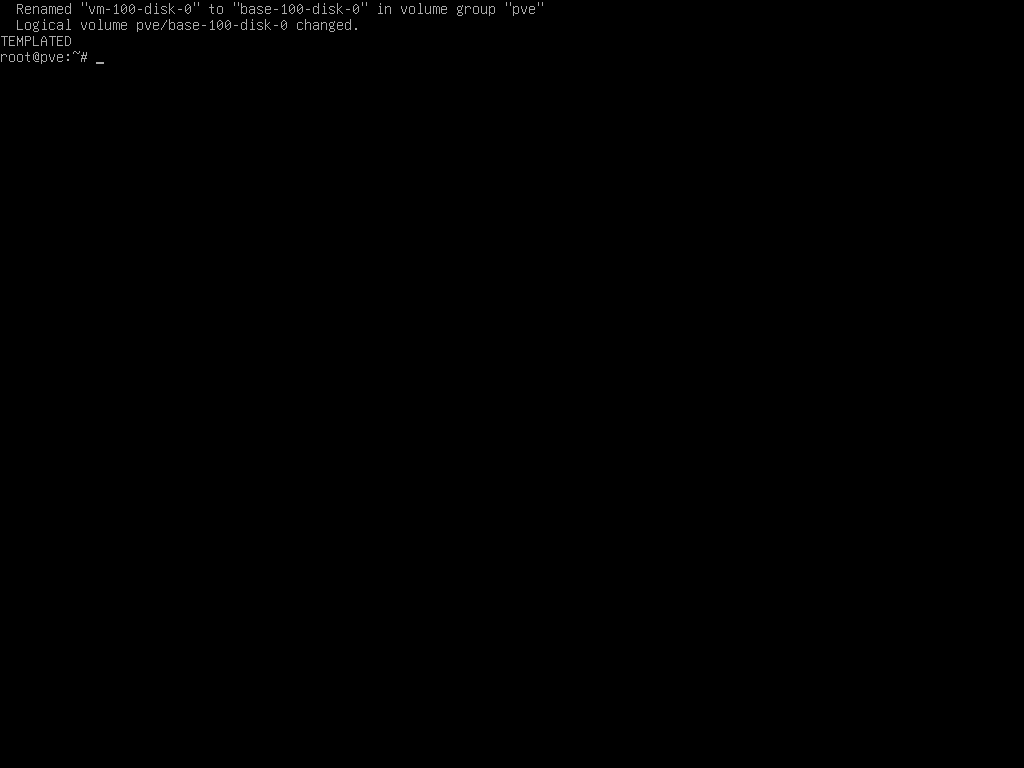
That rename is the actual mechanism behind a template: the disk volume itself becomes base-100-disk-0, read-only backing that every future clone reads from instead of copying outright by default.
Can that VM still be started once it's templated?
No. Proxmox removes Start from a template's own menu entirely, and the panel shows exactly what's left in its place once web01 is templated:
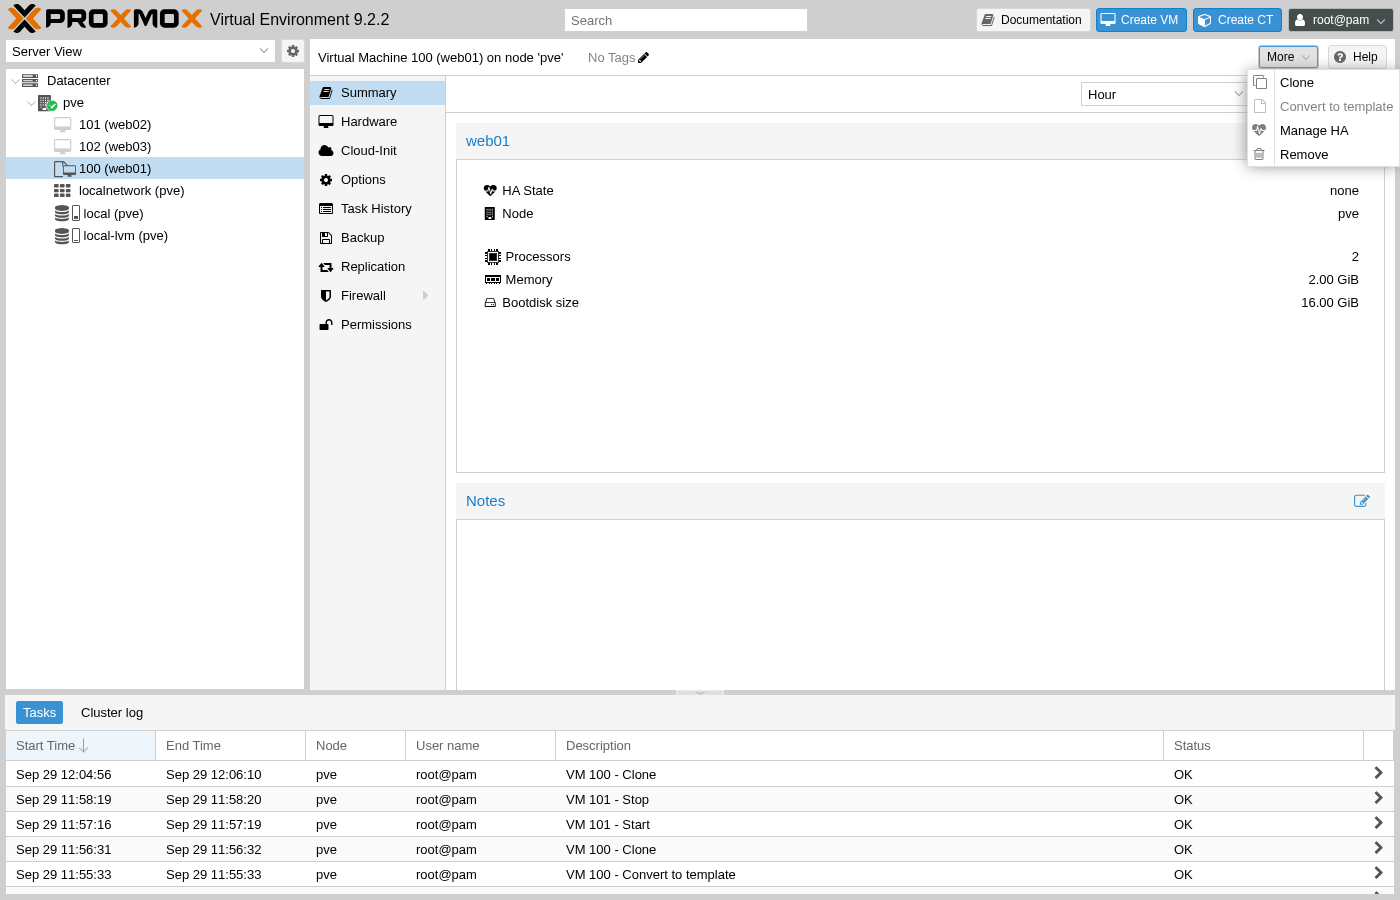
Convert to template itself stays visible but greyed out, Proxmox's way of confirming the VM already is one rather than hiding the option entirely. The left-hand tree marks the same fact visually: web01 keeps a plain box icon where web02 and web03, both ordinary VMs, show a small monitor screen instead. The config file backs up what the menu already shows: a new line, template: 1, appears in /etc/pve/qemu-server/100.conf alongside everything else already there.
Clone the Template
Cloning is the entire point of templating a VM in the first place. Instead of feeding a fresh installer through Language, Keyboard, Partitioning, and every other screen from two guides ago, a clone reaches a running, identically configured VM in seconds.
Choose a Full Clone or a Linked Clone
Clicking Clone in that same More menu opens a small dialog rather than another eight-tab wizard: a target node, the next free VM ID filled in automatically, a Name field, and a Mode dropdown that offers a choice mattering more than it looks.
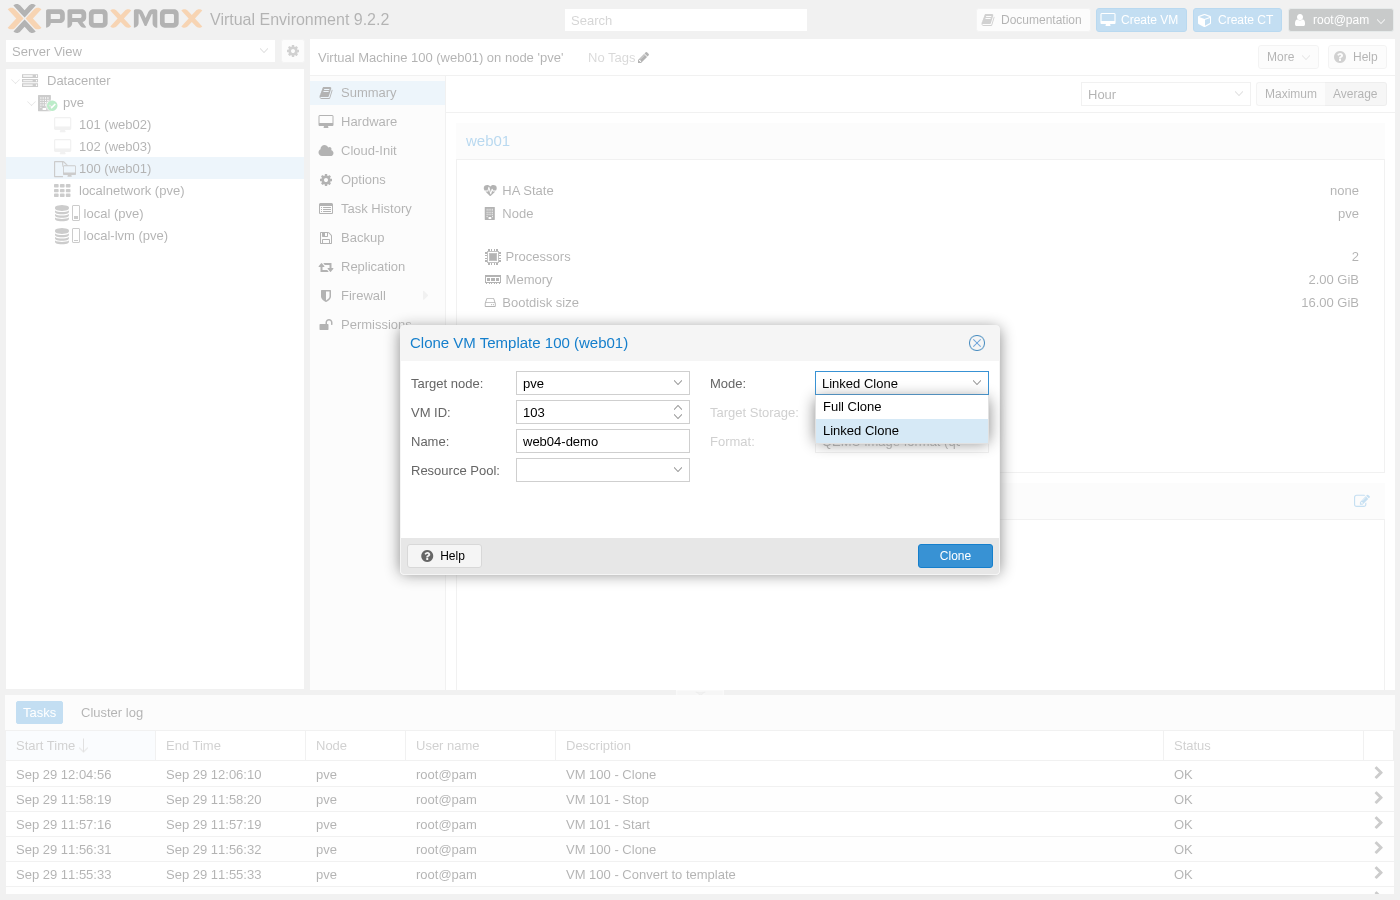
Target Storage and Format, both greyed out in that screenshot, only wake up once Mode switches to Full Clone: a linked clone has no independent storage decision to make, it always lands wherever the template's own disk already sits.
- Full Clone: an entirely independent copy of every block on the template's disk, allocated fresh on whatever storage the clone targets. Nothing about the template can affect it again once the copy finishes, at the cost of that copy actually having to happen: a 16 GiB disk cloned this way took over a minute.
- Linked Clone: a thin snapshot that only stores what the clone changes, reading everything unmodified straight from the template's own blocks. The same 16 GiB disk cloned this way finished in under two seconds, since nothing was actually copied yet.
Run the Clone
Leaving --full off defaults to a linked clone wherever the storage backend supports it, which local-lvm does here. Naming the new VM web02, after the pattern already set by web01, keeps the two consistent:
qm clone 100 101 --name web02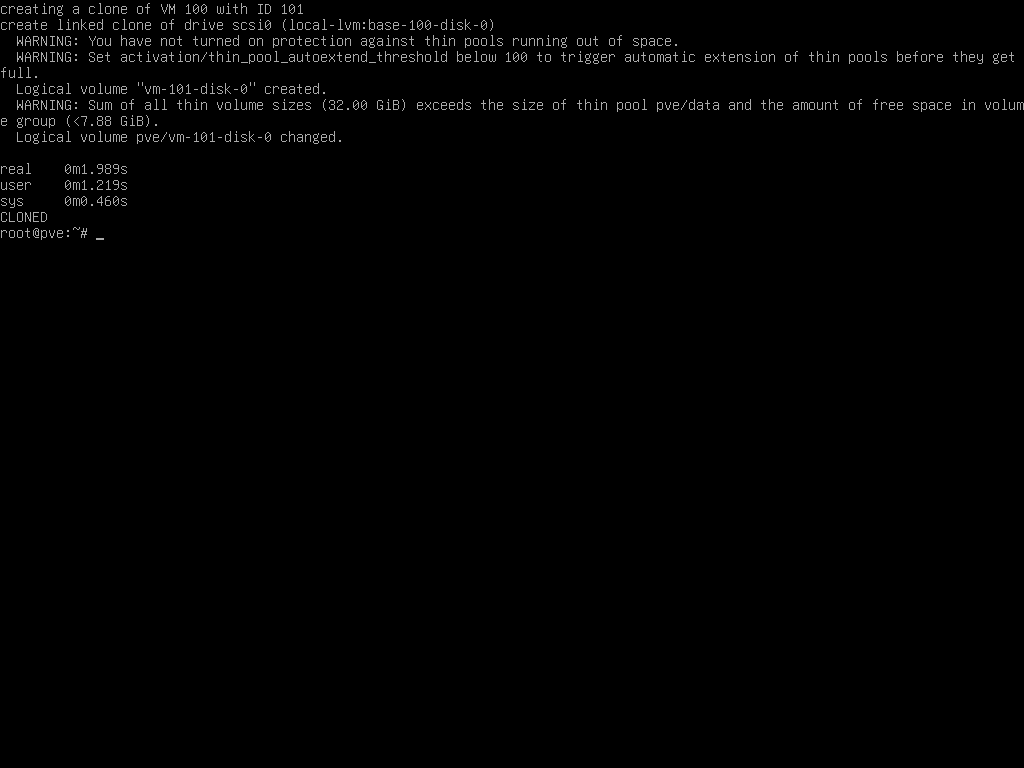
Those two WARNING lines are worth reading rather than dismissing: this lab's thin pool is genuinely small enough that Proxmox is right to flag it, the same warning a production node shows once enough linked clones exist to theoretically exceed its own physical capacity if every one of them wrote to every block at once. It's a capacity-planning note about what would happen in the worst case, confirmed harmless here by the real elapsed time right below it.
Confirm the Relationship in LVM
The dependency that warning refers to is visible directly at the storage layer. Querying the volume group's own logical volumes shows it in a single column:
lvs -o lv_name,origin,lv_size pve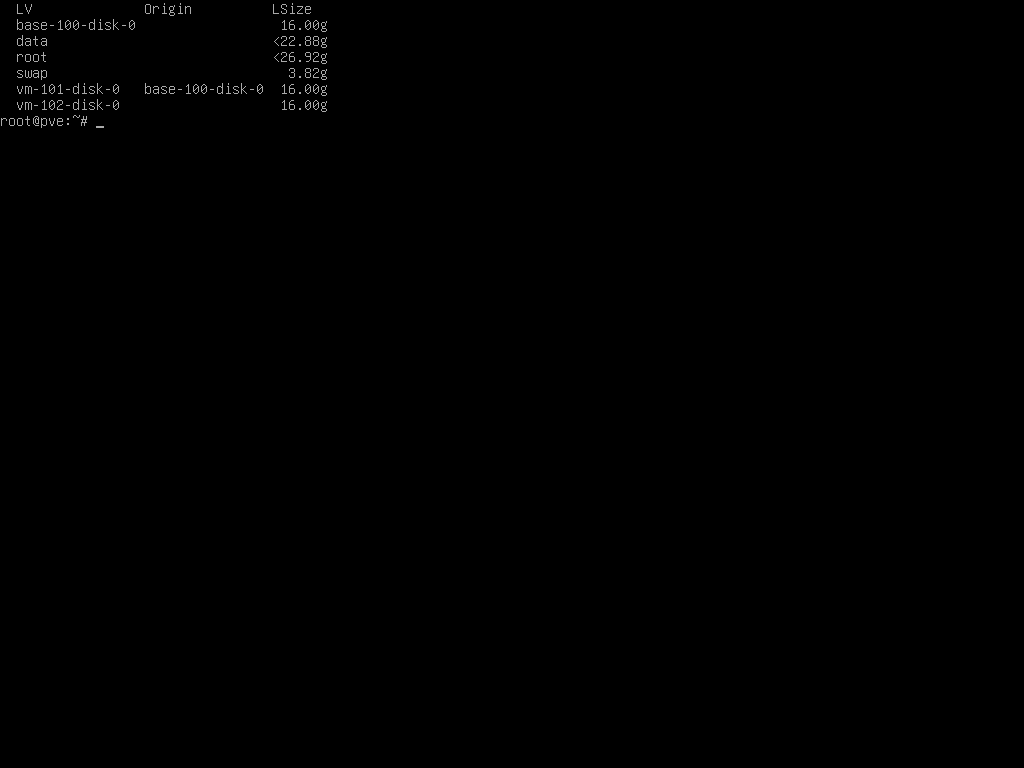
That Origin column is the actual, storage-level proof of what a linked clone means: vm-101-disk-0 holds nothing of its own yet beyond whatever the guest OS has changed since the clone, and every unmodified block still resolves back to base-100-disk-0.
Before removing a template that already has linked clones: make sure none of them still depend on it. Proxmox refuses to delete a base volume that a linked clone's Origin still points to, so the template stays in place until every clone made from it is either removed or converted to a full clone of its own.
Fix What the Clone Still Shares With the Template
Proxmox itself only randomizes what it manages directly: a new MAC address on net0, a new UUID in smbios1, a new vmgenid. Comparing the two config files side by side shows exactly that and nothing more:
web01 (100): net0 virtio=BC:24:11:40:09:E7   smbios1 uuid=8874d2ab-e9ec-4094-9b59-611829e70ccb
web02 (101): net0 virtio=BC:24:11:33:95:ED   smbios1 uuid=fd463a04-aa85-4015-9b6d-884d34db4b1c
Everything Proxmox tracks outside the disk itself, in other words, is already unique. What sits inside that disk is a different story: the clone is a bit-for-bit copy of the template's filesystem, so anything the guest OS itself uses to identify itself travels along unchanged.
So does that actually cause a problem in practice?
Yes, in two concrete ways. systemd's own machine-id, meant to be unique per installation, and any SSH host key generated during setup both survive a clone completely intact, which is exactly what mounting both disks read-only and comparing them confirms:
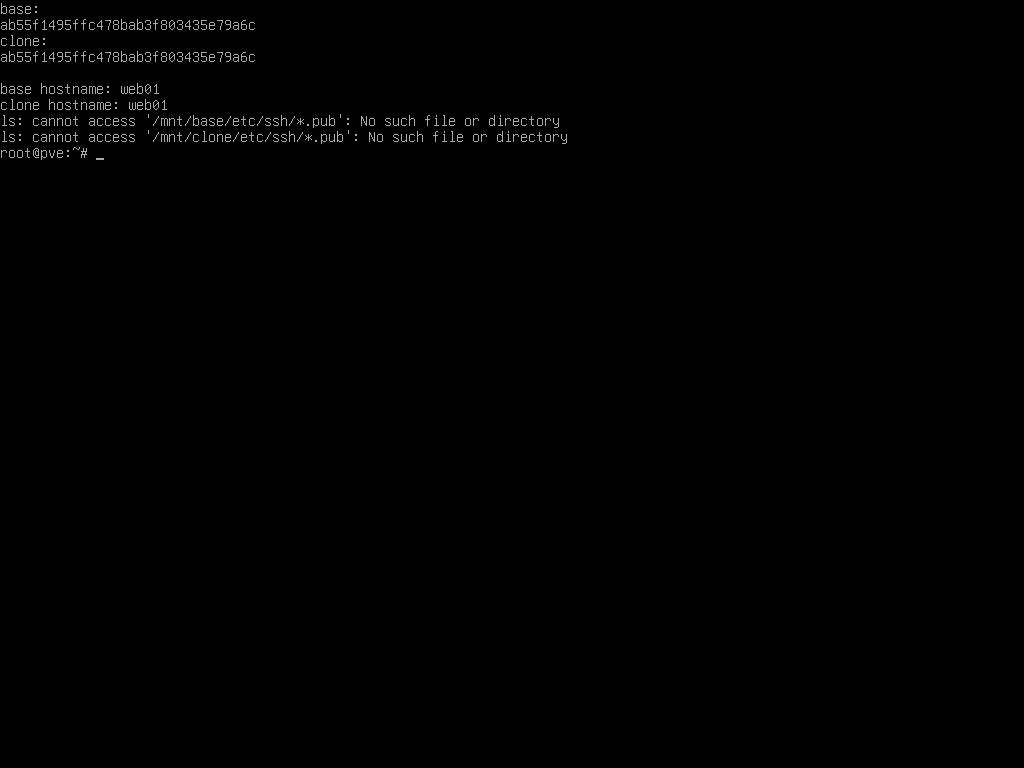
A shared machine-id confuses anything that keys off it, from D-Bus's own machine registry to a DHCP client using it as a stable identifier, and a shared hostname makes two VMs indistinguishable from a monitoring dashboard's point of view. Both are a few real commands to fix, run once inside the fresh clone before it ever reaches a customer:
rm -f /etc/machine-id
systemd-machine-id-setup
rm -f /etc/ssh/ssh_host_*
ssh-keygen -A
hostnamectl set-hostname web02
That last line also needs its counterpart in /etc/hosts, matching the new hostname to the loopback address the same way the installer already set it up for web01 two guides ago.
Automate Cloning for a Sales Workflow
None of the steps above need a person clicking through a dialog once they're worth running for every VM a platform actually sells. The same qm clone command reaches the Proxmox API directly, the same API this guide has already called for creating a VM and fetching an ISO:
curl -k -X POST "https://pve.example.com:8006/api2/json/nodes/pve/qemu/100/clone" \
  -H "Authorization: PVEAPIToken=opsadmin@pve!automation=<token-secret>" \
  --data-urlencode "newid=102" \
  --data-urlencode "name=web03" \
  --data-urlencode "full=1"
That call returns immediately with a task ID rather than waiting for the clone to finish, the same asynchronous pattern behind every other long-running action in Proxmox. That task ID takes a fixed, recognizable format:
UPID:pve:00002FD6:000590CA:6ABB8D48:qmclone:100:root@pam:Polling /nodes/pve/tasks/<that UPID>/status with the same token is how a provisioning script actually knows a full clone, over a minute for a 16 GiB disk, has finished, rather than guessing from a fixed delay.
A complete provisioning script chains four of these pieces in order: qm clone to create the VM, the machine-id and SSH host key commands from the previous section run once inside it, a route added for whichever address from the tunnel's pool this customer's order assigned, and finally qm start. Everything between the first call and a customer receiving working credentials runs unattended, the same sequence a human operator only worked through by hand the first time.
In summary
- Converting a VM to a template locks its disk in place and blocks it from booting directly.
- A linked clone finishes in seconds by referencing the template's disk instead of copying it.
- Proxmox randomizes network and hardware identity automatically; the guest OS's own identity still needs fixing by hand.
- The same qm clone command reaches the Proxmox API directly, the one piece a sales workflow actually needs to automate.
In the next guide, you'll back up both VMs before either one holds anything worth losing.