
In the previous section, you installed Proxmox VE and reached its web interface for the first time, namely the login screen behind a self-signed certificate warning. This section turns that bare install into a platform actually ready for VMs: real package updates, the network bridge, storage, and the memory optimization that starts to matter once several VMs are running side by side.
Fix the Package Repositories
Logging into the node for the first time surfaces a warning before anything else: the enterprise repository is enabled, but there's no active subscription attached to it, so every package operation against it fails.
Why is a paid repository even turned on by default on a server with no subscription?
Because it's the safer default. The enterprise repository is the most heavily tested one Proxmox ships, and the installer has no way to know in advance whether a given server does or doesn't have a subscription behind it, so it enables the same repository either way and leaves the correction to whoever sets the server up.
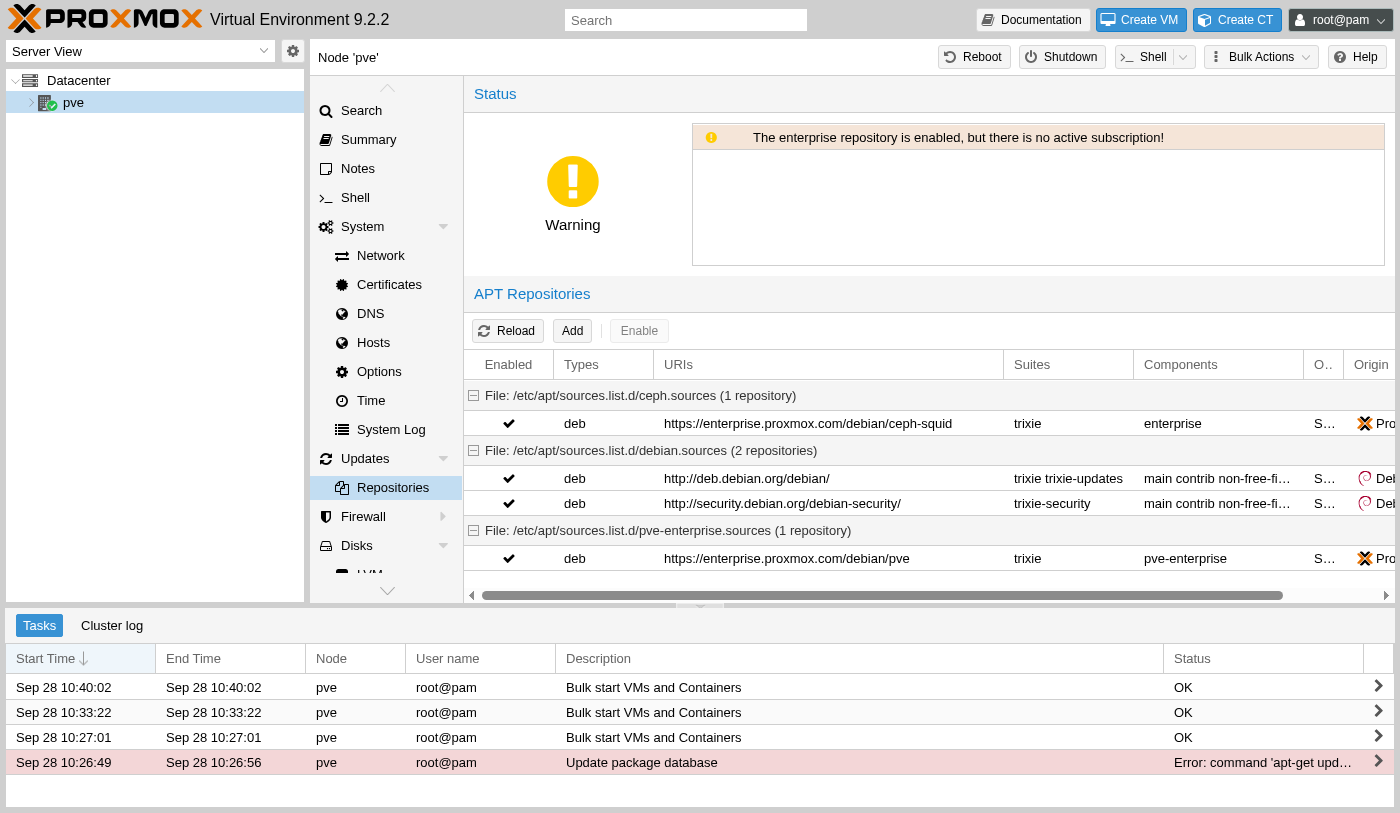
The fix actually takes two steps: disabling the enterprise repository alone actually makes things worse, since it leaves the node with no Proxmox repository enabled at all.
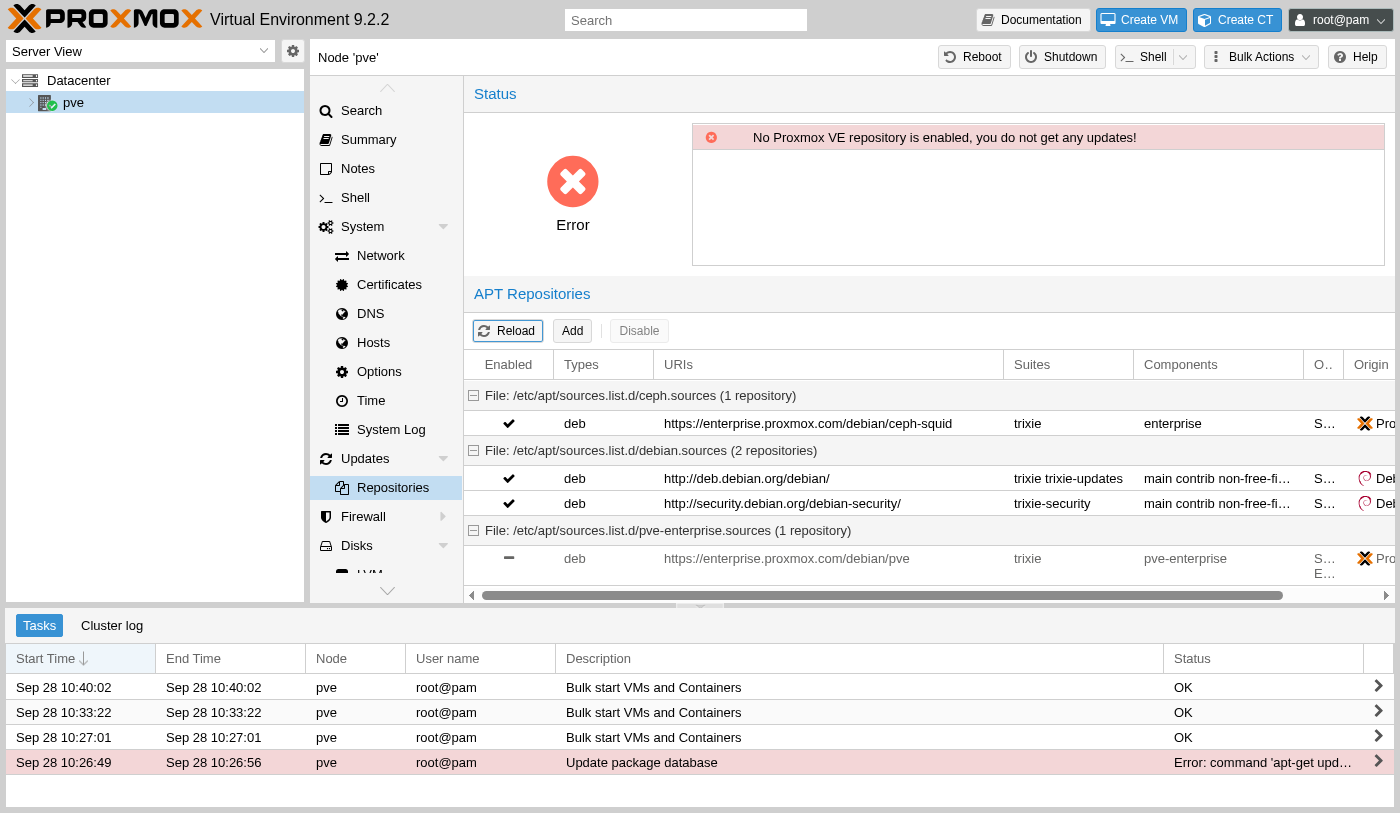
The Add button on the same screen offers the missing piece: the no-subscription repository, built for exactly this situation.
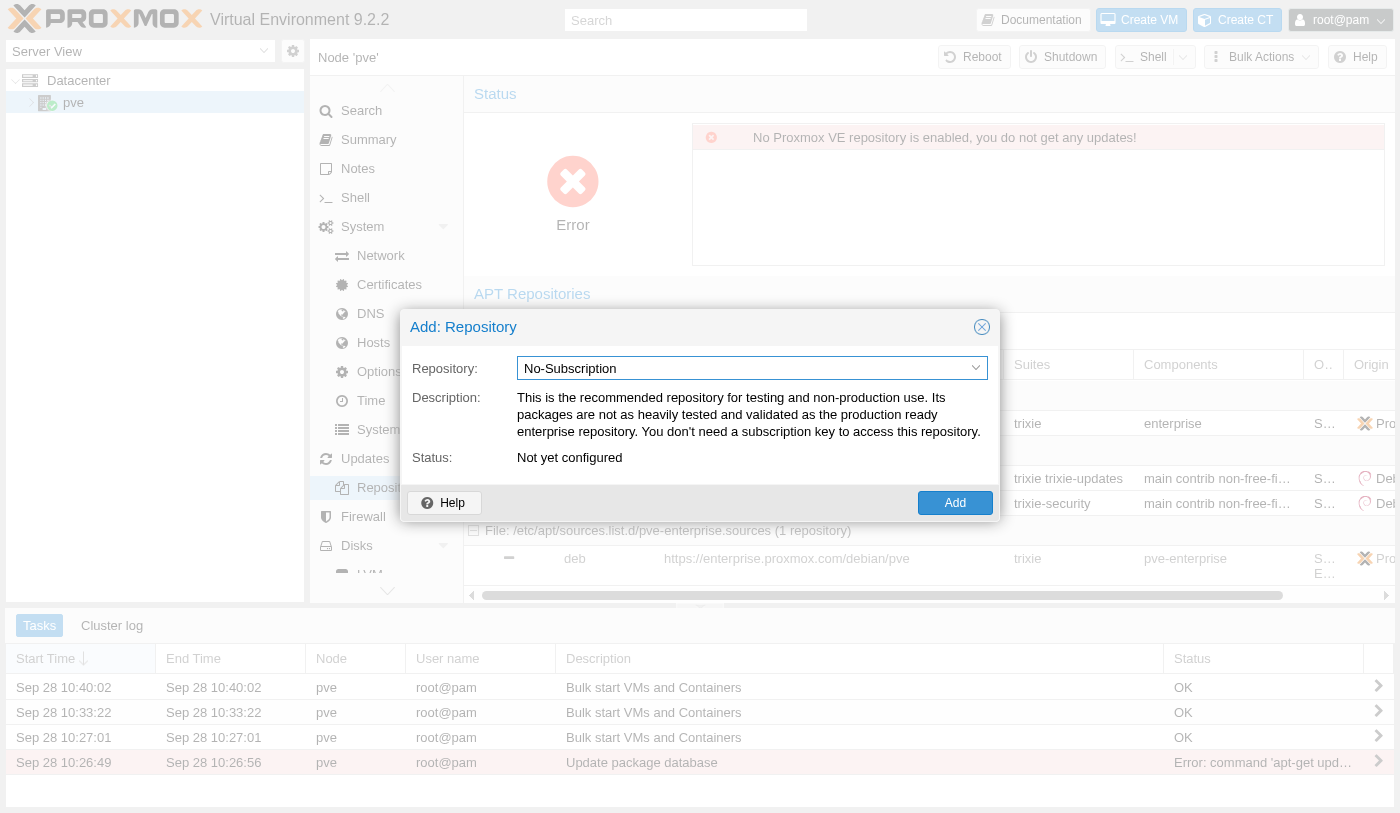
A second, separate enterprise repository for Ceph packages stays enabled even after this fix and will still error on update; it's safe to leave alone unless Ceph storage is actually part of the plan, which is outside what this guide covers.
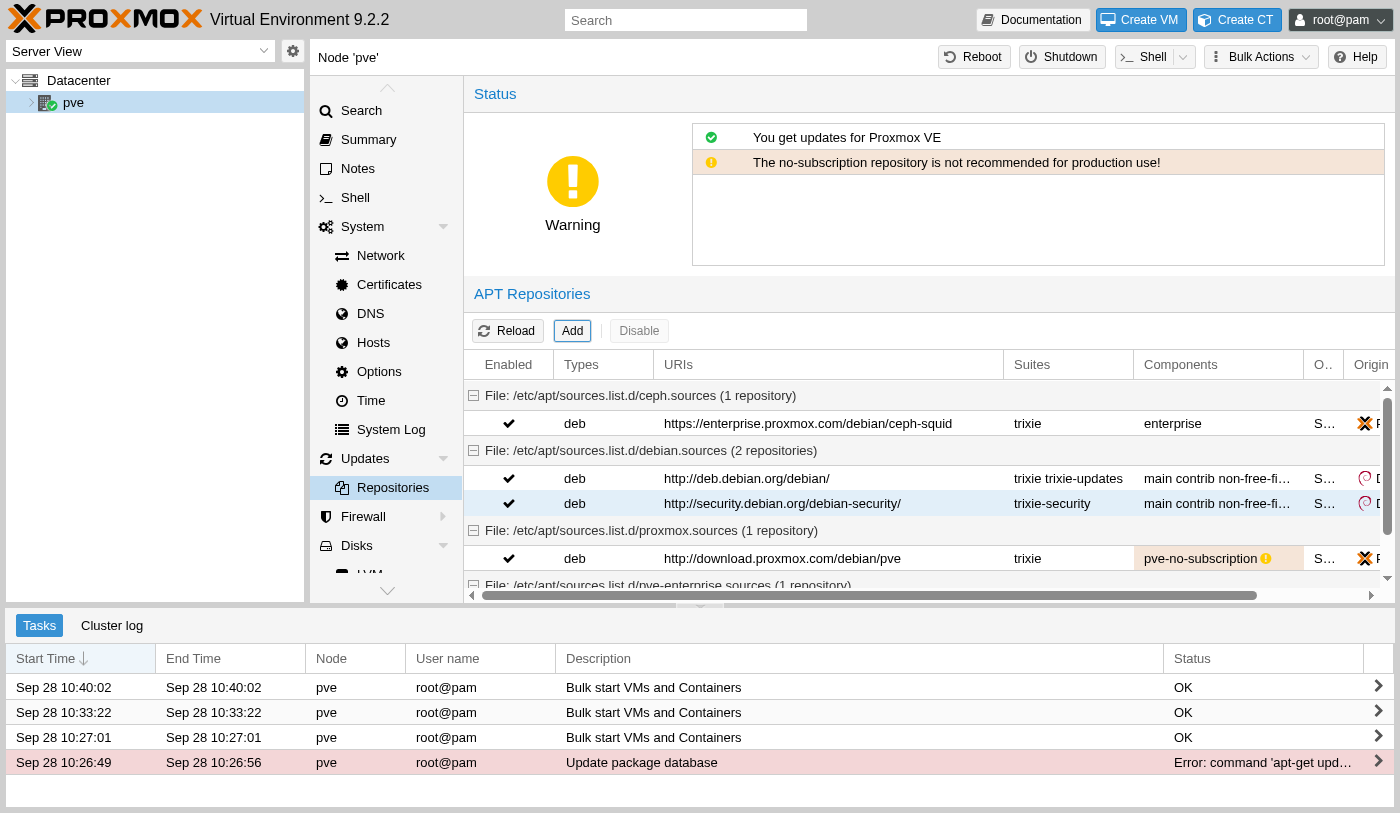
With the no-subscription repository added, the node status flips from a single warning to a pairing that's worth learning to recognize: updates work now, alongside a reminder that this repository isn't the one Proxmox recommends for a production cluster.
Update the System
With a working repository in place, the Updates panel can actually refresh the package list instead of failing outright. The task log behind that refresh is worth reading once, since it shows exactly which repositories responded and which didn't.
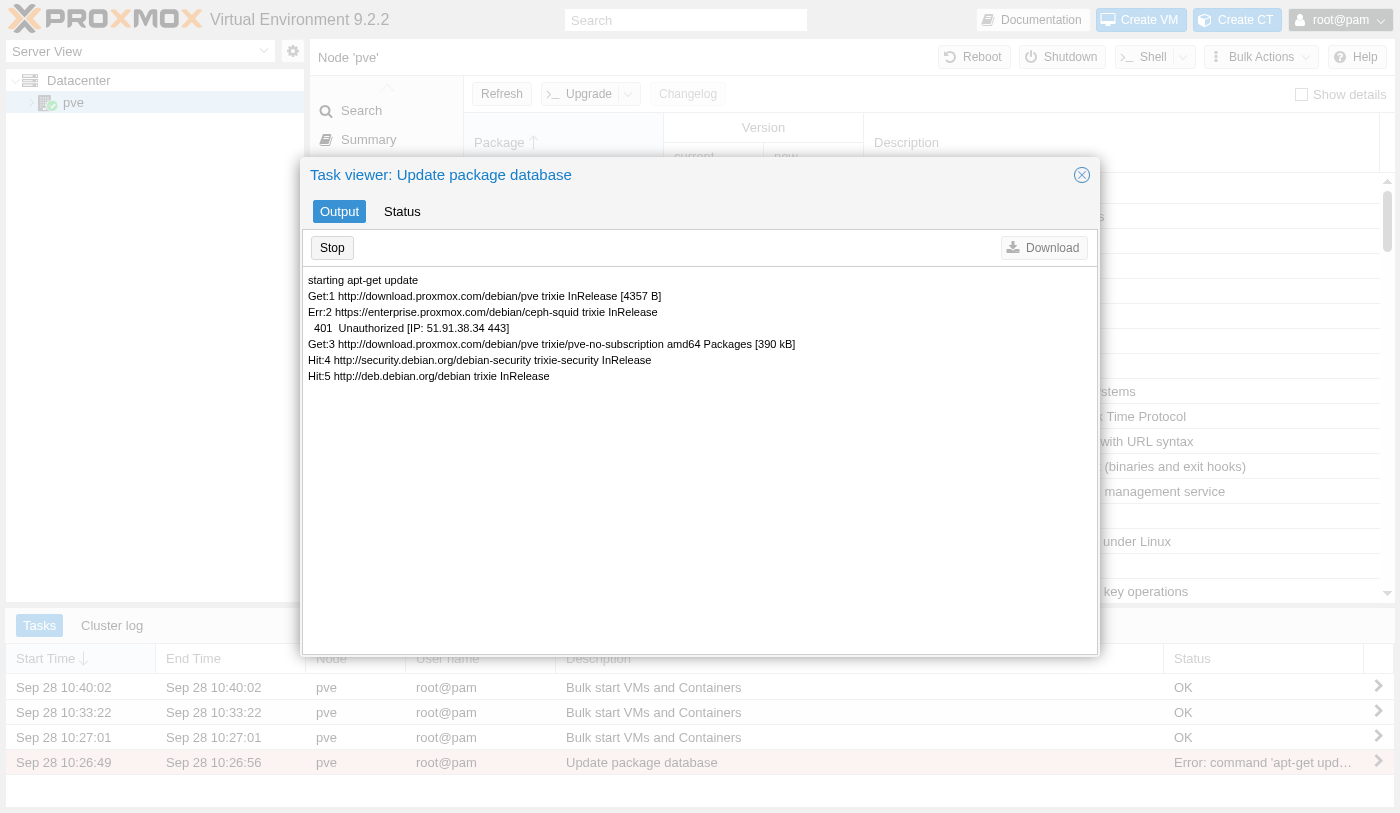
From here, the Upgrade button on the same screen runs the actual package upgrade, the same operation as apt full-upgrade on the command line. Running it right after a fresh install, before any VM exists, means a restart if the kernel itself gets upgraded won't interrupt anything real yet.
Review the Network Bridge
The installer already created one network interface config beyond the physical card: vmbr0, a Linux bridge sitting on top of the physical nic0 and holding the management IP set during install.
Why put a bridge between the VMs and the physical network instead of just using the NIC directly?
Because a physical NIC can only belong to one place at a time. A bridge acts like a small virtual switch instead: the physical NIC plugs into one side of it, and every VM's virtual network interface plugs into the other side, each with its own MAC address, each able to send and receive traffic on the same physical link independently.
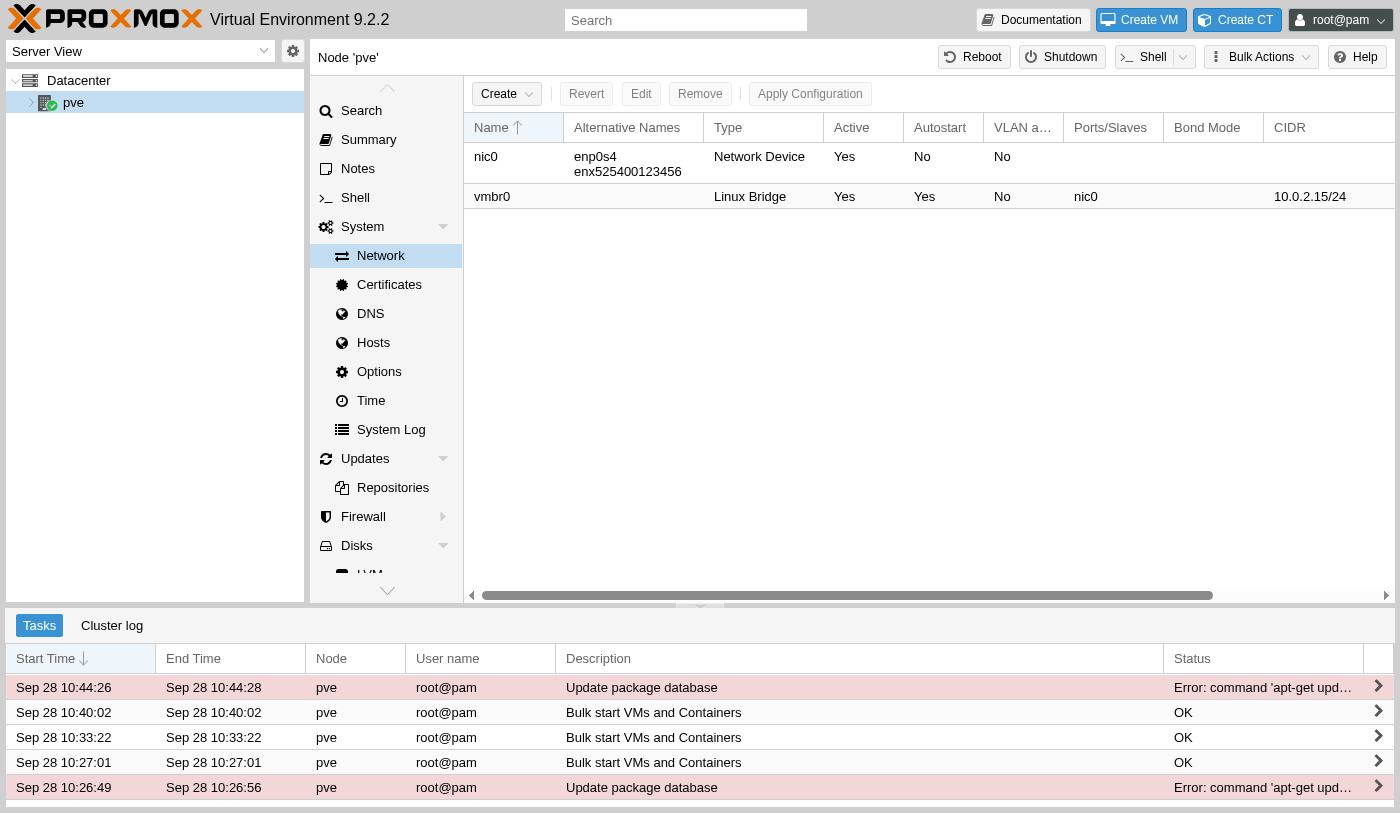
This is also the exact bridge the routed IPv4 section later in this guide attaches a second address to, so nothing further needs changing here yet, only recognizing it when it comes up again.
Review Storage
Two storage entries exist right after install, both living on the same disk chosen during setup but serving different purposes.
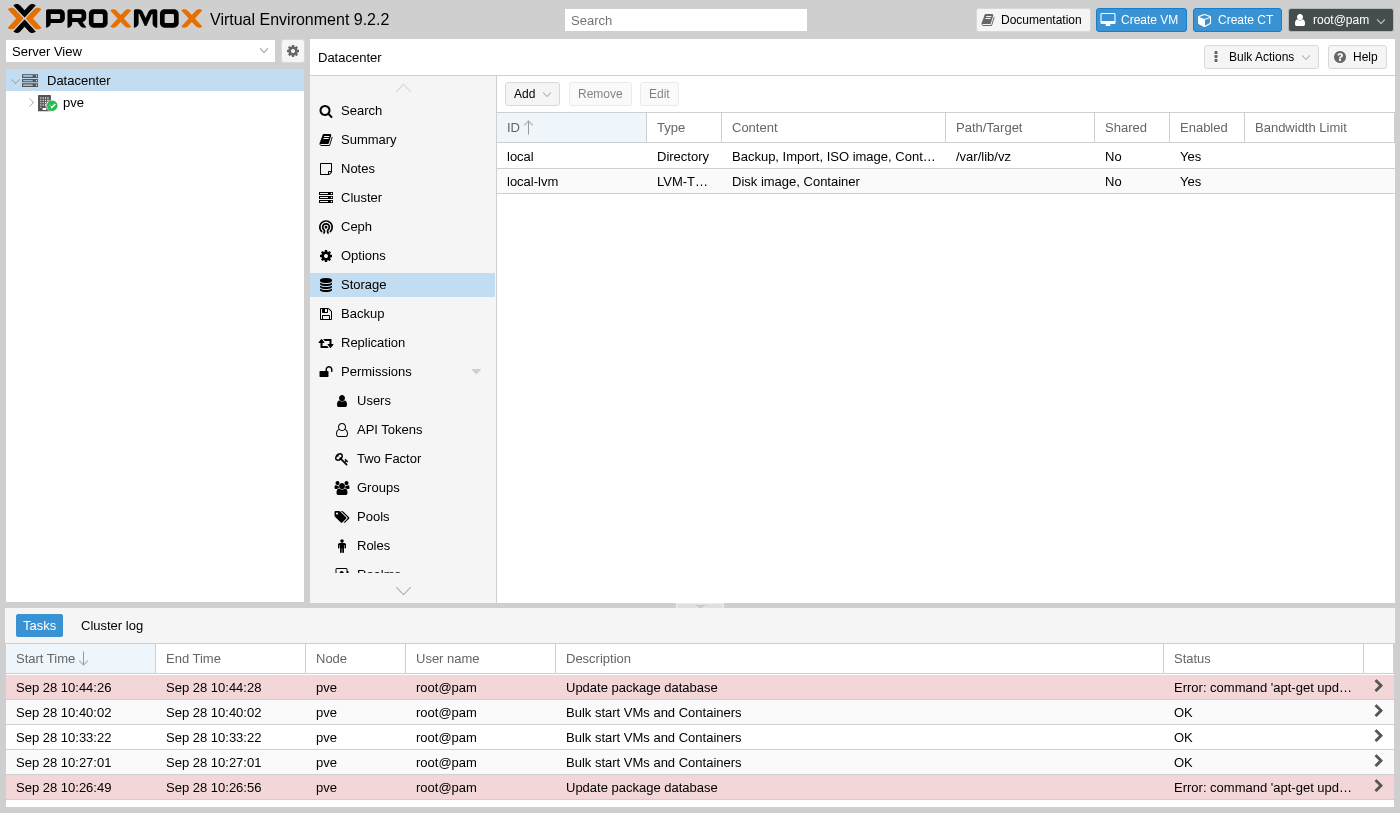
Before creating VMs in the next part: if the server has more than one physical disk, add the others under Datacenter, Storage, Add now. To check what's already visible to Proxmox, compare this list against the disks seen during the install summary; anything missing here needs adding by hand, since Proxmox never assumes a second disk's purpose automatically.
Tune Memory and CPU for VM Density
Two settings decide how many VMs actually fit in the RAM this server has, and neither one is something the installer configures for a hosting workload specifically, since it has no way to know that's what the machine is for.
Turn On Memory Deduplication with KSM
Kernel Samepage Merging, KSM, is what lets several VMs running the same guest OS share memory pages instead of each holding its own separate copy of largely identical content. Proxmox runs it through a tuning daemon, ksmtuned, that watches memory pressure and turns actual merging on only when it's worth doing.
On a freshly installed node with no VMs running yet, that daemon is active but idle, which is worth confirming directly rather than assuming.
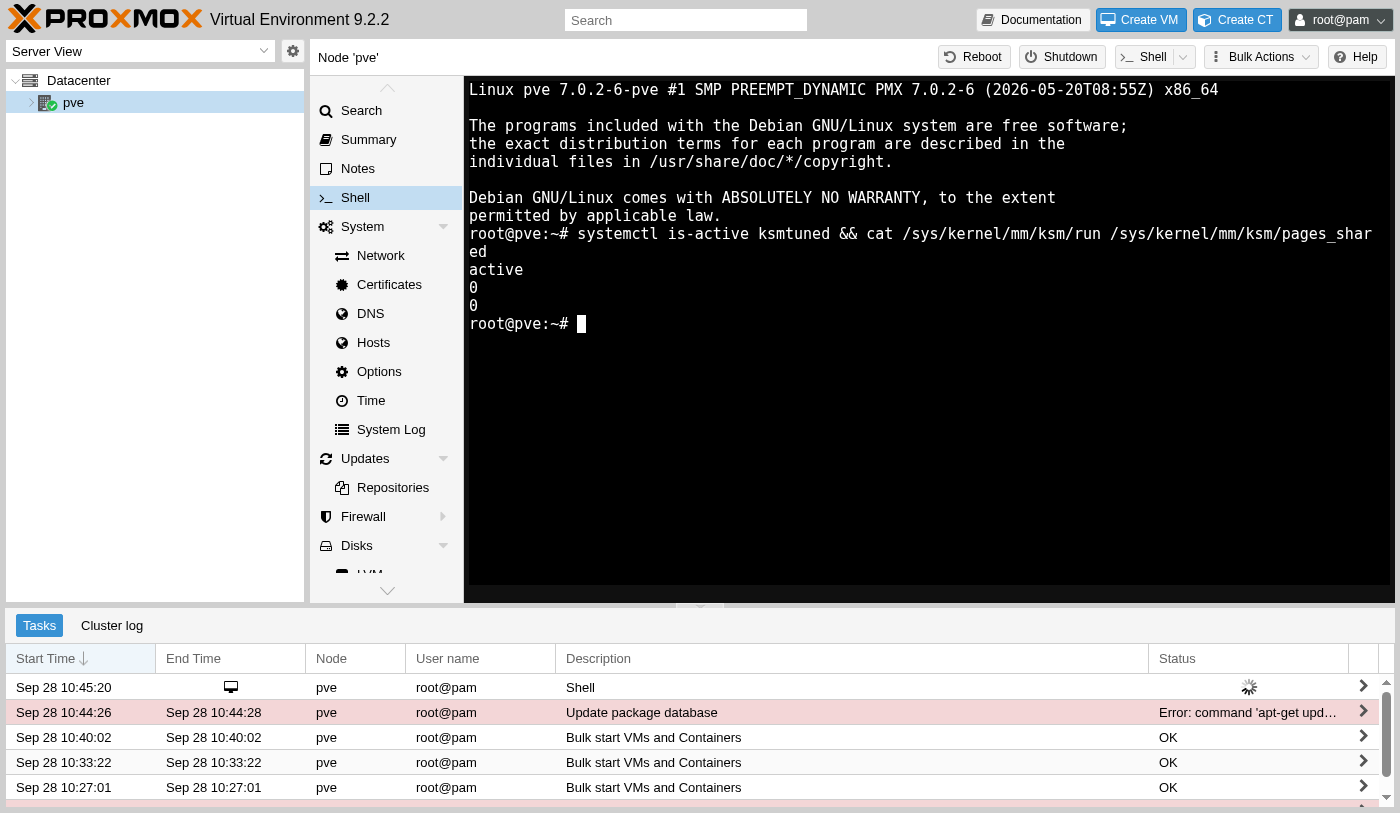
Those zeros aren't a sign anything's misconfigured, they're the expected state on a host with no memory pressure to respond to. Once several VMs running the same OS exist, ksmtuned flips run to 1 on its own and pages_shared starts climbing, all without any manual step; the tuning thresholds themselves live in /etc/ksmtuned.conf if they ever need adjusting later, though the defaults are a reasonable starting point for a first platform.
Lower Swappiness and Check CPU Microcode
Swappiness controls how eagerly the kernel moves memory to swap instead of keeping it in RAM, and Debian's default of 60 was picked for a general-purpose desktop, well before several VMs each needing their own RAM entered the picture. Checking it directly, alongside what CPU microcode is actually loaded, takes one command.
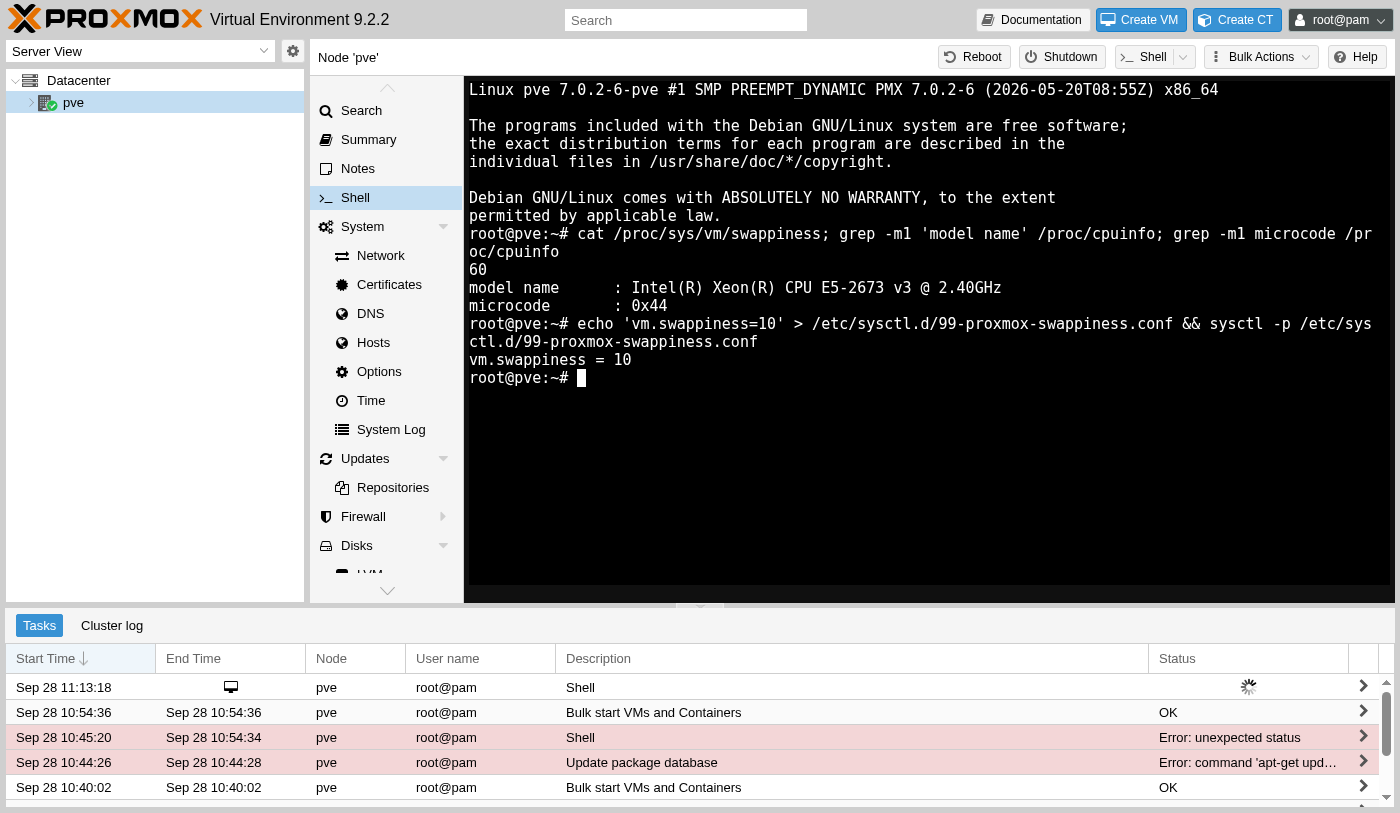
A lower value keeps the kernel from swapping out VM memory just because it hasn't been touched in the last few seconds, which matters more on a hypervisor than almost anywhere else: a swapped-out VM feels frozen to whoever's using it. Writing the setting to a file under /etc/sysctl.d/ makes it survive a reboot, rather than a one-off value that resets itself.
The two extremes are both worth understanding rather than just picking a number blindly. At swappiness 60, the kernel starts swapping proactively well before RAM actually runs out, trading a little file-cache performance for headroom that a desktop rarely misses; on a host running VMs, that same proactive swapping can quietly page out a VM that's simply been idle for a moment, and the VM's own guest OS has no idea any of this happened, it just feels slow. At swappiness 0, the kernel avoids swap almost entirely and leans on the out-of-memory killer instead once RAM genuinely runs out, which is a harder failure than a bit of swapping would have been. A low but nonzero value, 10 here, keeps swap as a safety net for genuine exhaustion without using it as a first resort.
Used enterprise servers, the kind Part 1 recommends, often already carry an up-to-date microcode package from their last real deployment; running the installer for it costs nothing even when it turns out there's nothing to do, and catches the CPUs that do need it.
On this server, checking for the Intel microcode package confirmed it was already at the newest version available, since Debian's own base install already includes it: nothing to install, which is itself useful information rather than a wasted step. Microcode itself is firmware for the CPU, patching real hardware bugs Intel or AMD found after a given chip already shipped, some of them purely about correctness, some of them security-relevant; a server bought used, per Part 1's own advice, may have sat in a warehouse or run untouched for years between owners, long enough for several such patches to accumulate unapplied. Running this one command costs nothing to check either way, and it's the only way to know for certain rather than assume a used machine is current.
Create a Non-Root Admin Account
Every screen so far in this guide has used the root account, which is fine for the first hour of setting a server up, but not something worth keeping as the daily habit once the platform is actually running.
Isn't root just the normal way to manage a single-node Proxmox host?
It works, but a single leaked root password then owns the entire platform outright, with no separate account to disable, no separate login to audit in the task log. A dedicated admin account fixes that without losing any capability root has.
Adding one starts with a choice that isn't obvious the first time: which realm the account belongs to. A Linux PAM account needs a real Unix user to exist on the server already; a Proxmox VE authentication server account, pve for short, exists only inside Proxmox itself, with its own password, needing nothing on the underlying OS.
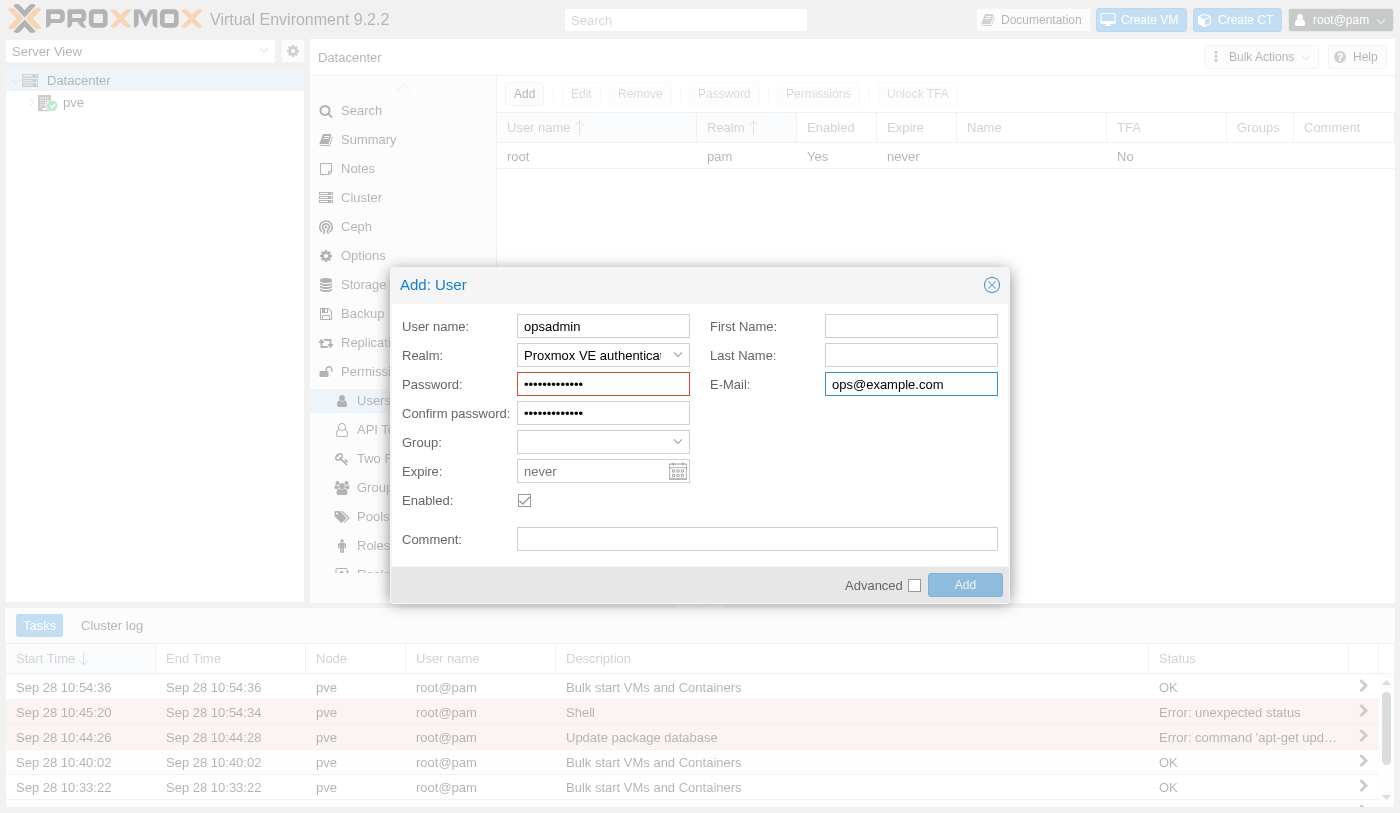
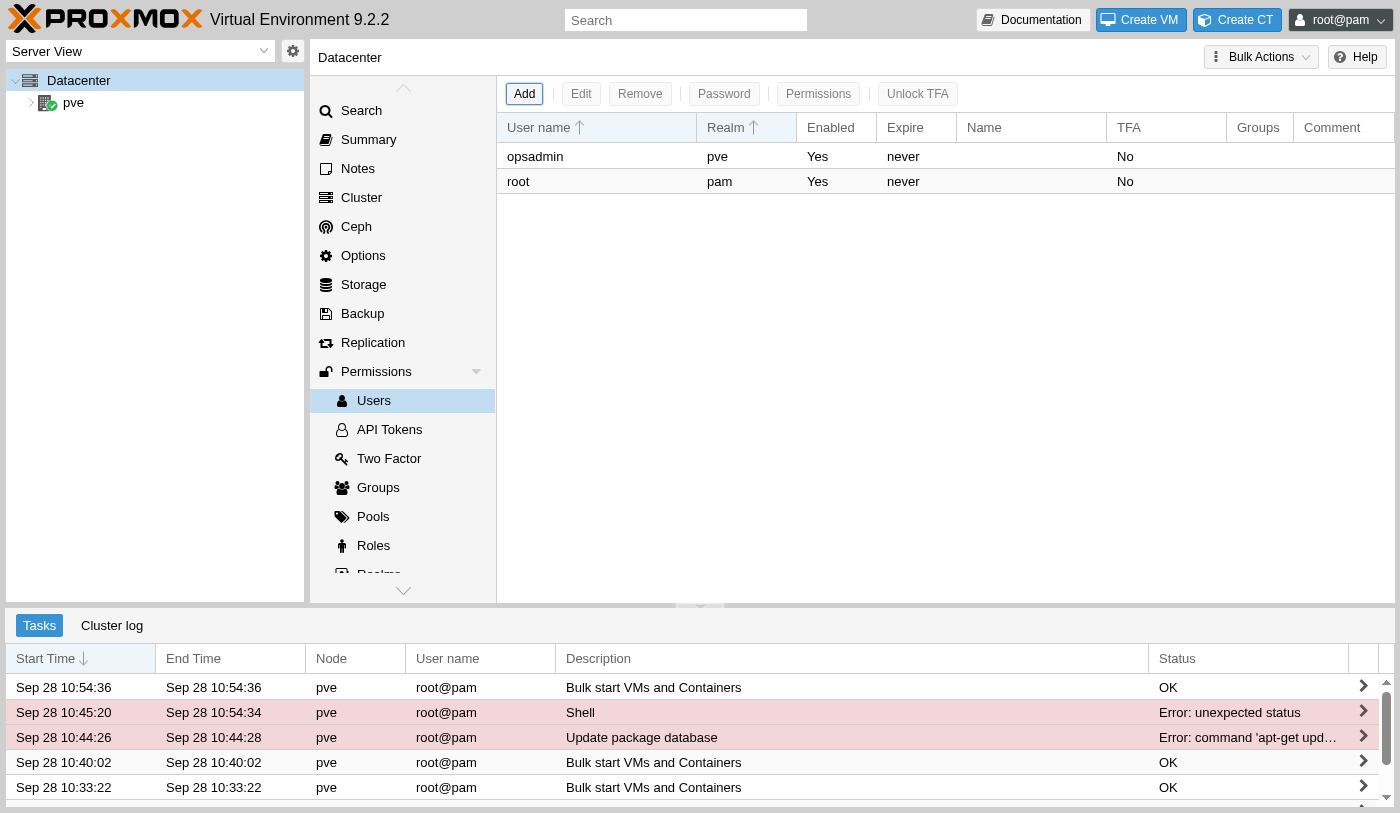
For an admin account that only ever needs the web interface, the pve realm is the simpler pick, and it's what shows up in the user list right after creating it. The tradeoff is worth spelling out rather than glossing over: a PAM account, because it maps to a real Unix user, can also SSH into the server and get a real shell, the same as root can, while a pve-realm account exists purely inside Proxmox's own authentication system and has no shell access at all, no matter what role it's given inside the web interface. For an account that's meant to manage VMs and storage through the browser and nothing else, that's not a limitation, it's exactly the boundary worth having: losing this account's password never hands over a login shell on the underlying OS the way a compromised PAM account would.
Grant It a Role
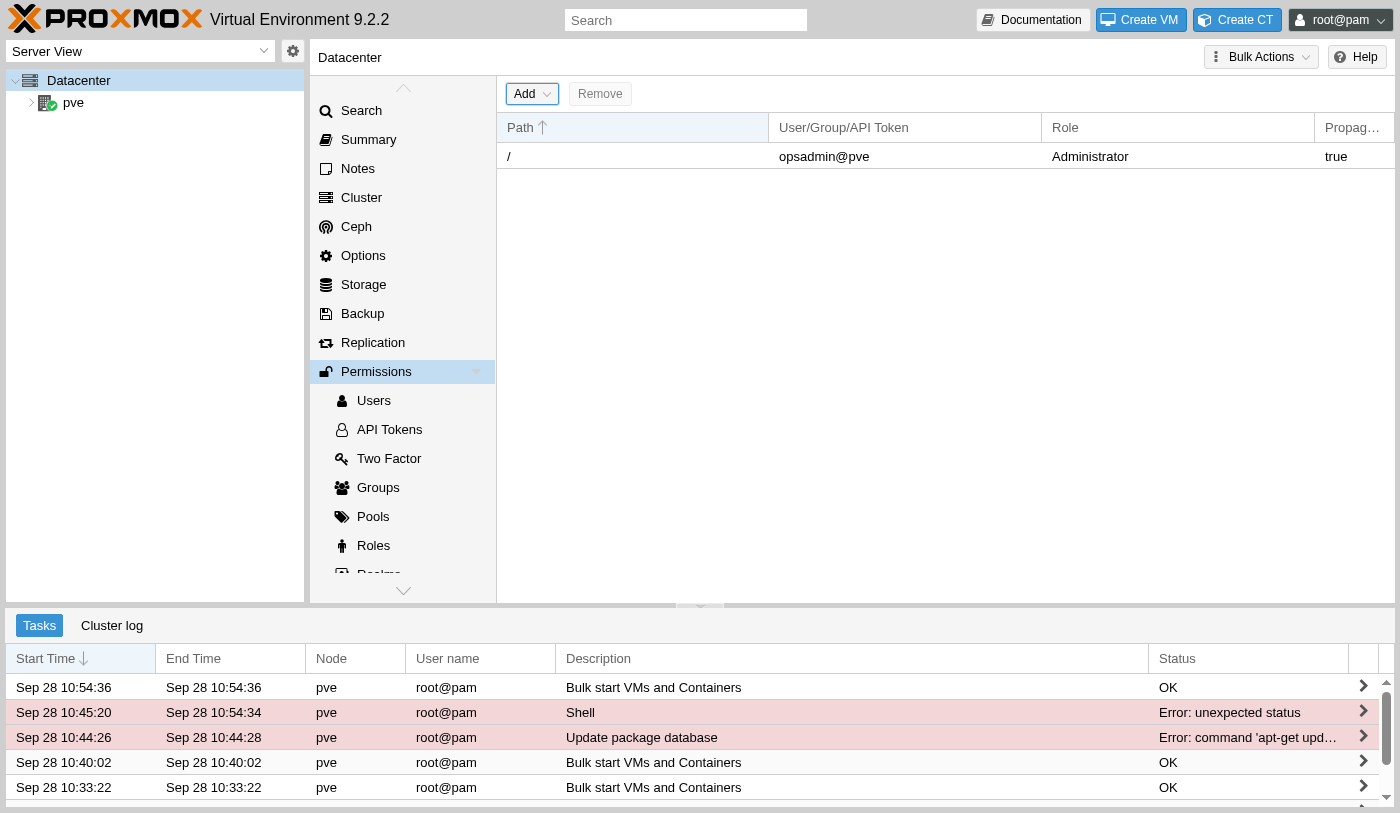
A freshly created user in Proxmox starts with no access to anything at all; existing is separate from being allowed to do something, which is exactly what the Permissions section under Datacenter connects. A permission ties one path in the resource tree to one user and one role.
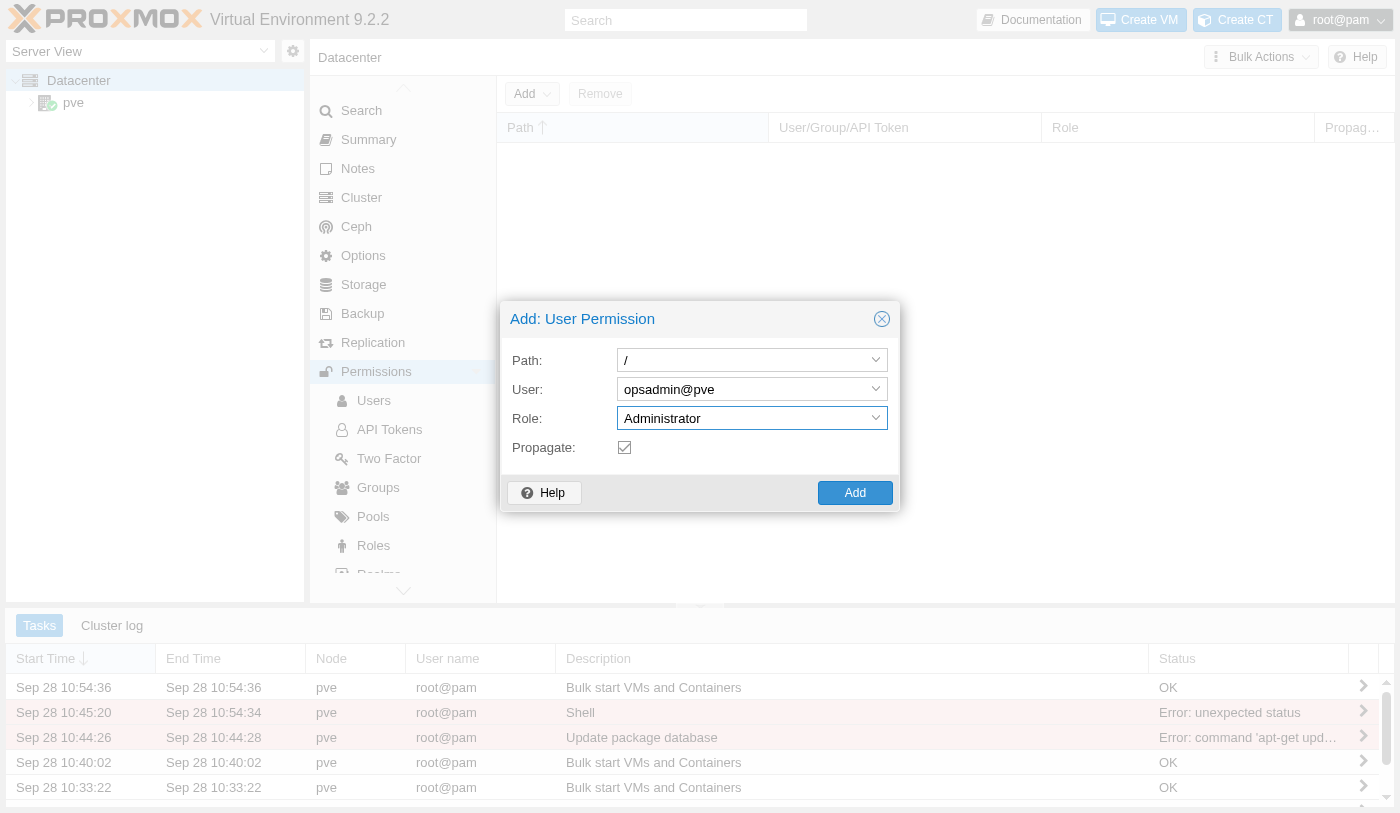
Path / means the whole resource tree, every VM and every storage together; Propagate, checked by default, extends the same role to everything underneath that path too, current and future. The result is an account with the same reach root has, logged under its own name.
Administrator is the broadest role that exists, and it's the right choice for a solo operator's own account, but it isn't the only shape a permission can take once this platform stops being a one-person project. Proxmox ships narrower built-in roles too, PVEVMAdmin for someone who should only manage VMs without touching storage or users, PVEAuditor for read-only visibility with no ability to change anything at all; the same Add: User Permission dialog accepts any of them in place of Administrator, and the path doesn't have to be the root / either; scoping it to a single VM's own path instead limits that grant to exactly that VM and nothing else. None of that is needed yet with one admin account on one node, but the mechanism is the same one that later separates what a customer-facing operator can touch from what only the platform owner should.
Add Two-Factor Authentication
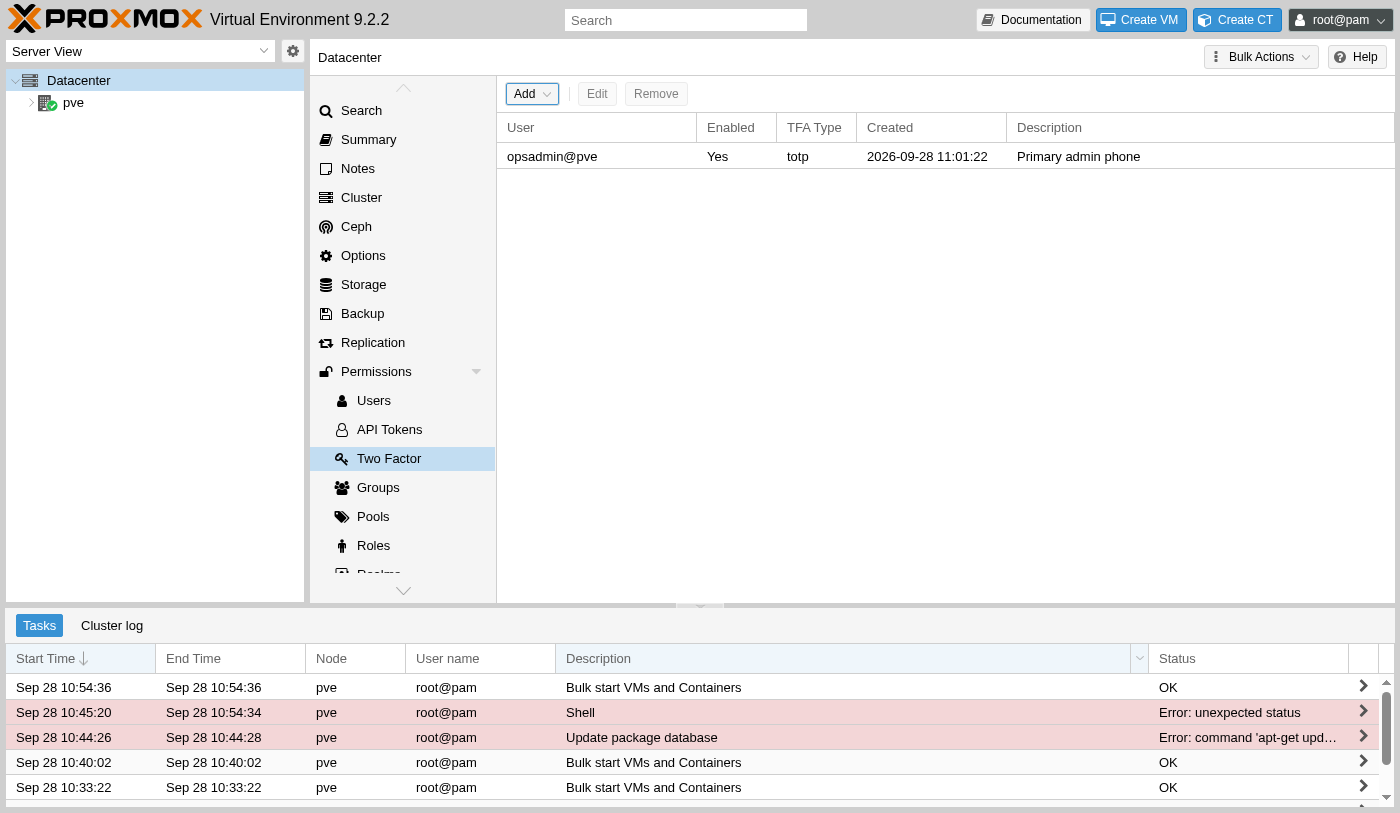
Proxmox supports four second factors: TOTP codes from an authenticator app, WebAuthn hardware keys, one-time recovery keys, and Yubico OTP; TOTP needs nothing extra to buy, which makes it the natural first one to set up.
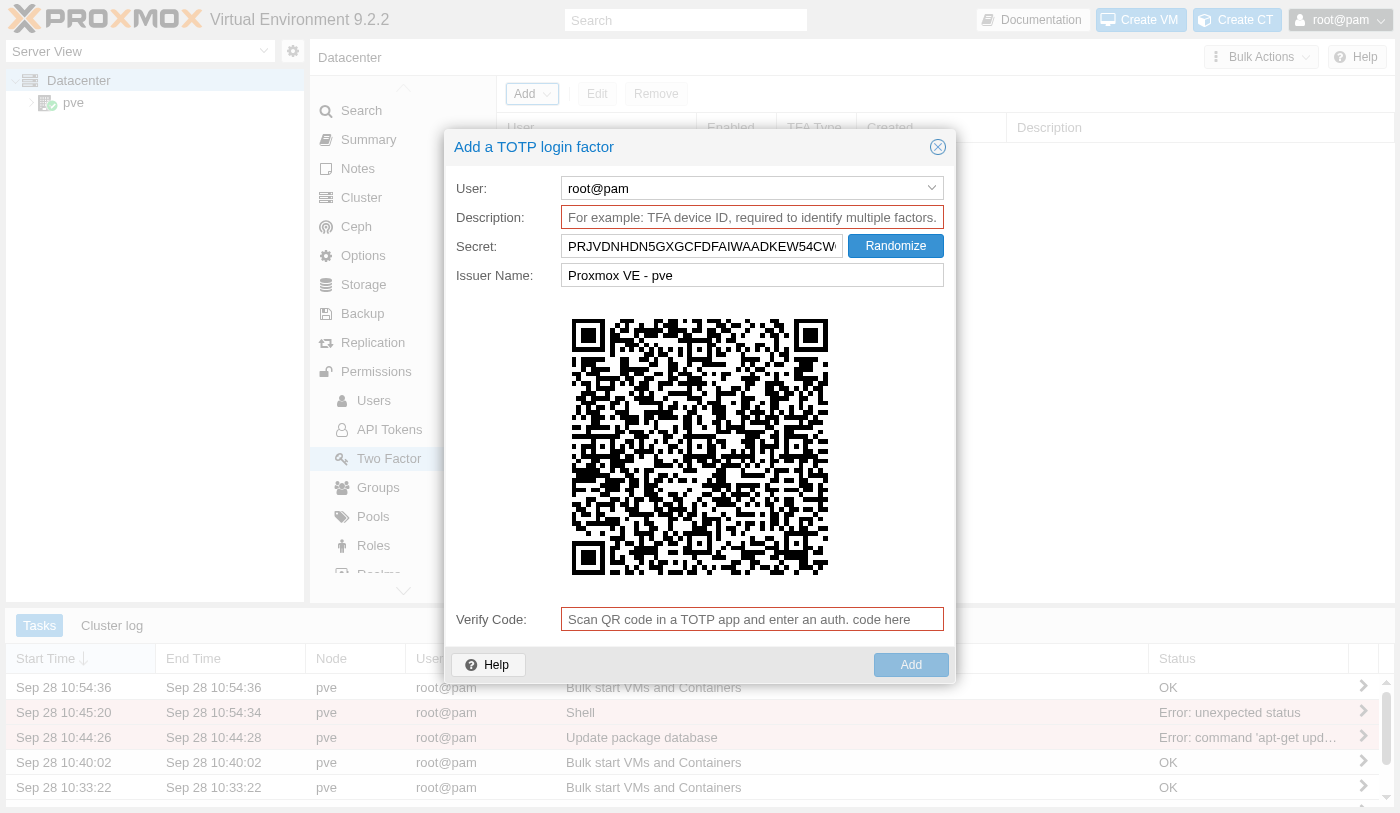
Scanning that code into an authenticator app and typing back the six digits it generates is what actually confirms the setup; Proxmox won't enable TFA on an account until a real code has proven the secret works.
Worth thinking through before it becomes urgent: what happens if the phone holding that authenticator app is lost, wiped, or simply out of battery at the wrong moment. That's exactly what Recovery Keys, one of the other three factor types, exist for, a set of one-time codes generated in advance and stored somewhere other than the phone itself, each usable exactly once to log in without the TOTP app at all. Without a recovery method set up ahead of time, losing the only TOTP device locks that account out entirely until another administrator account, or root itself, removes the TFA entry from inside the Two Factor screen shown earlier.
Turn On the Firewall
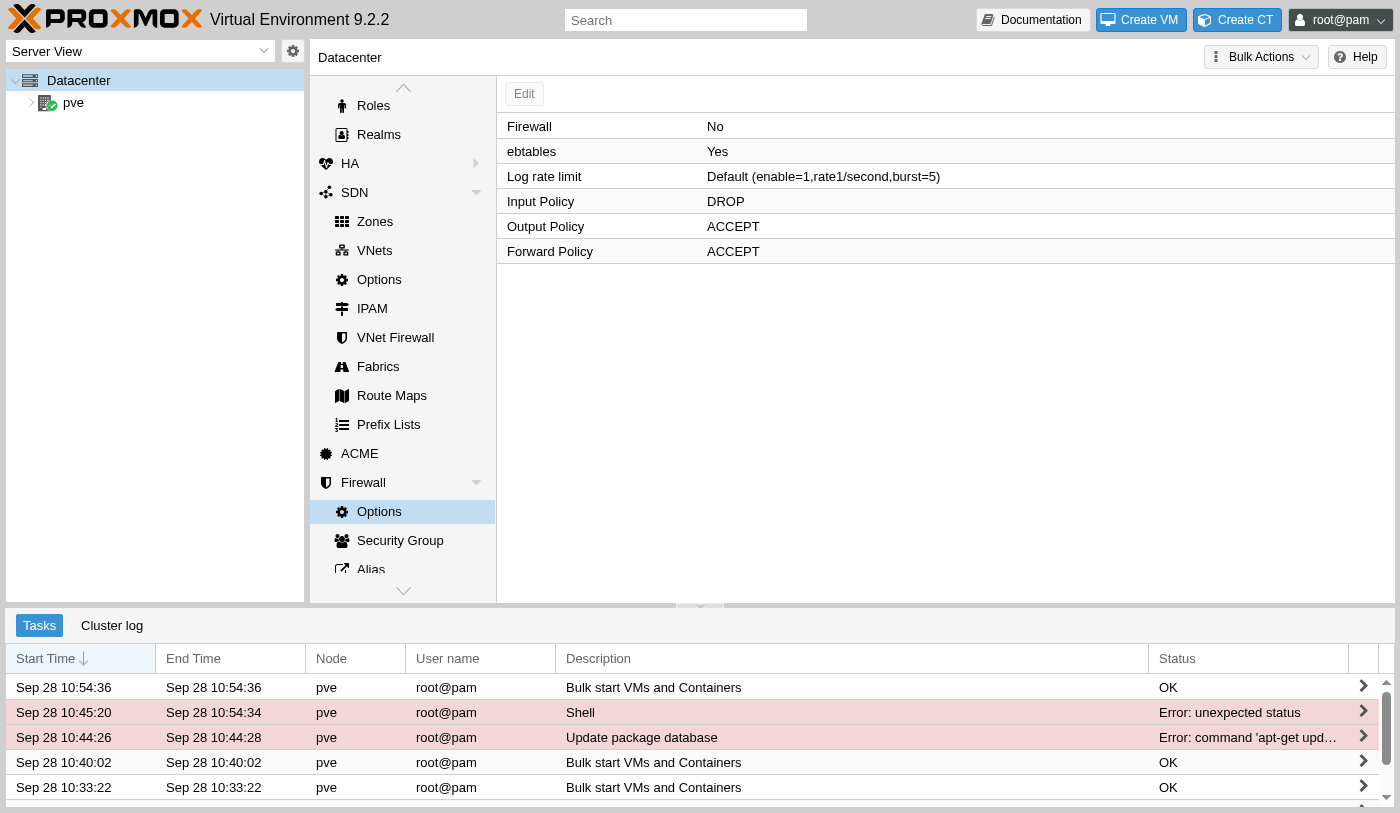
Proxmox ships a full firewall, off by default at every level, node and VM alike. Before touching the on switch, its default policies are worth reading once, since they decide what happens the moment it's flipped on.
Before flipping Firewall to Yes: make sure a rule already allows the management port through, or this exact web interface becomes unreachable the moment the firewall turns on. To check, add and enable the rule first, confirm it appears in the list, and only then switch the firewall itself on.
Two other settings on that same screen matter more once VMs enter the picture than they do right now. ebtables, enabled by default, filters at the network bridge itself rather than just at the host's own network stack, which is what later lets a VM's own traffic get filtered even though it never technically reaches the host's input chain at all; that's also why Forward Policy exists as its own setting separate from Input Policy, traffic passing through the host on its way to or from a VM counts as forwarded rather than as input, and the two get evaluated against entirely different rule sets. A rule written for the management port belongs under Input; a rule meant to filter what a VM itself can send or receive belongs somewhere else, a detail that only starts mattering once the first VM in Part 3 actually exists.
Adding a rule for the web interface needs a protocol as well as a port; leaving Protocol blank while setting a destination port fails outright, a real error worth knowing about ahead of time rather than debugging cold.
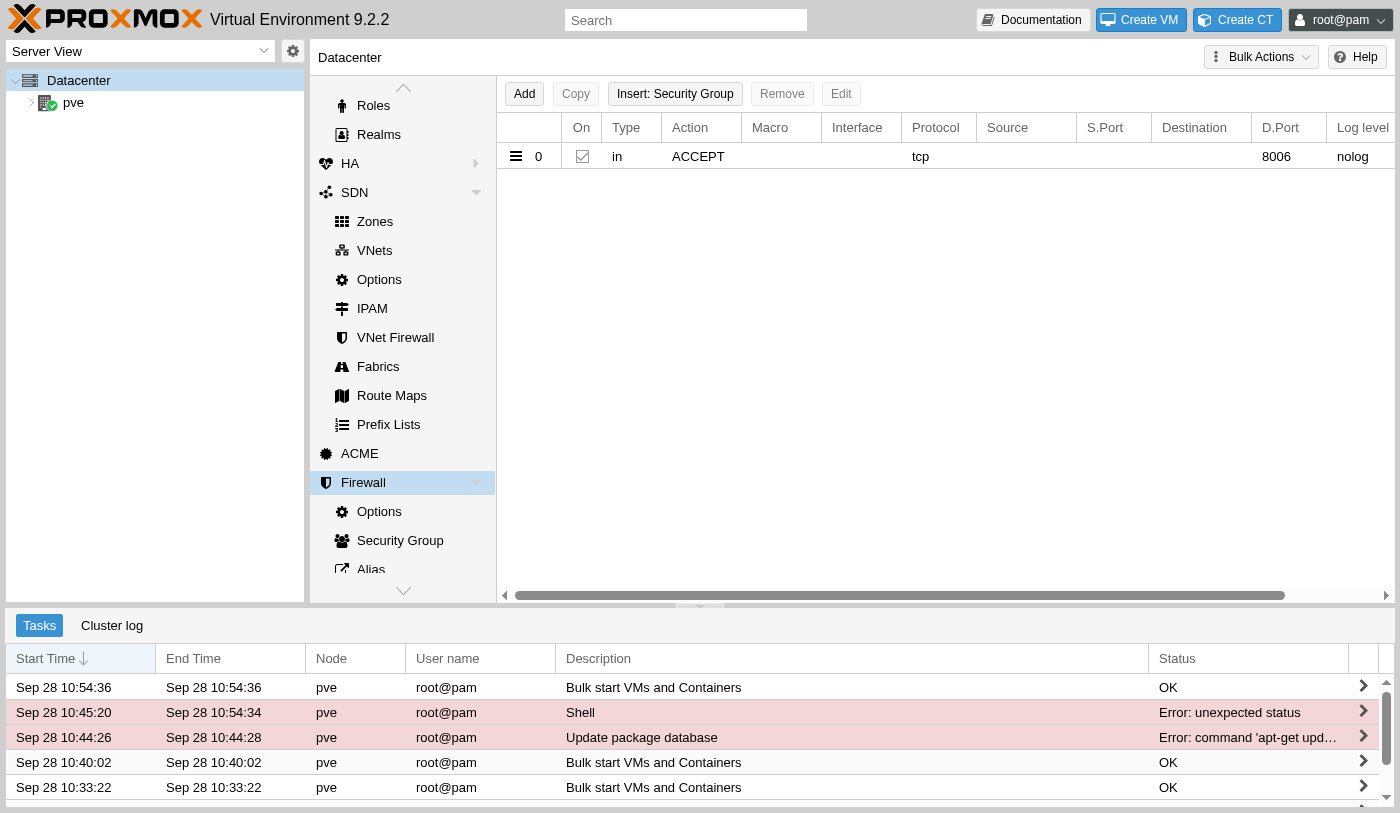
Getting a rule wrong after the firewall is already on isn't as permanent a mistake as it sounds, since the physical or virtual console this guide used back in the install chapter never goes through the network firewall at all; it's a direct console session that bypasses the network stack entirely, so it stays reachable even with Input Policy blocking every port. A rule edit or an outright pve-firewall stop typed there is always the way back in, which is worth remembering before treating a firewall lockout as something that needs a full reinstall.
Automate Certificates with ACME
The self-signed certificate warning from the previous section doesn't have to stay permanent. Proxmox has ACME support built in, the same protocol Let's Encrypt uses, and it can request and renew a real certificate on its own once pointed at a real public domain.
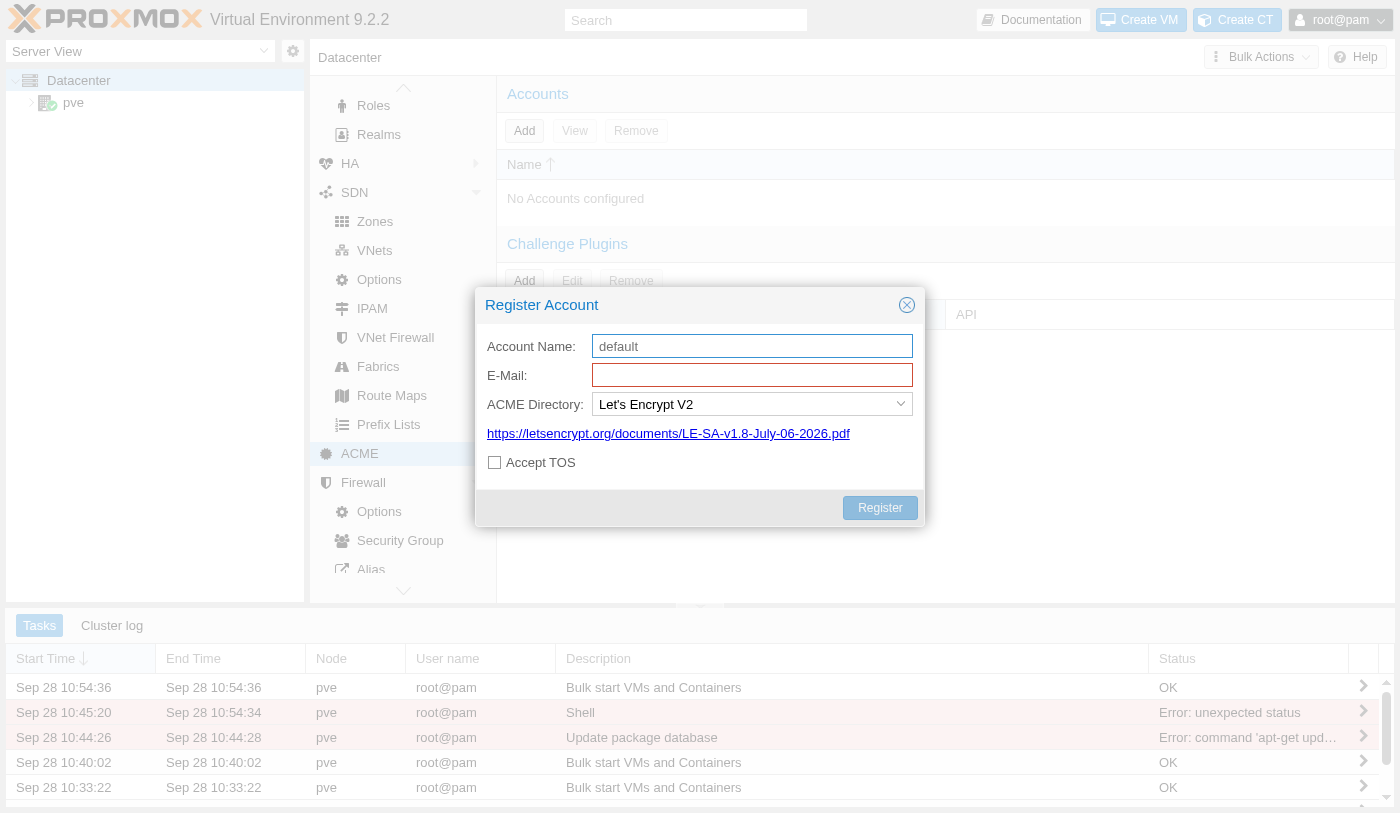
Two directories are available, and the difference matters before committing to either one.
- Let's Encrypt V2: issues real, trusted certificates, and counts every attempt against Let's Encrypt's public rate limits. Worth using only once the setup is expected to work.
- Let's Encrypt V2 Staging: issues certificates browsers don't trust, but with far higher limits, built specifically for testing the setup without burning through the real quota.
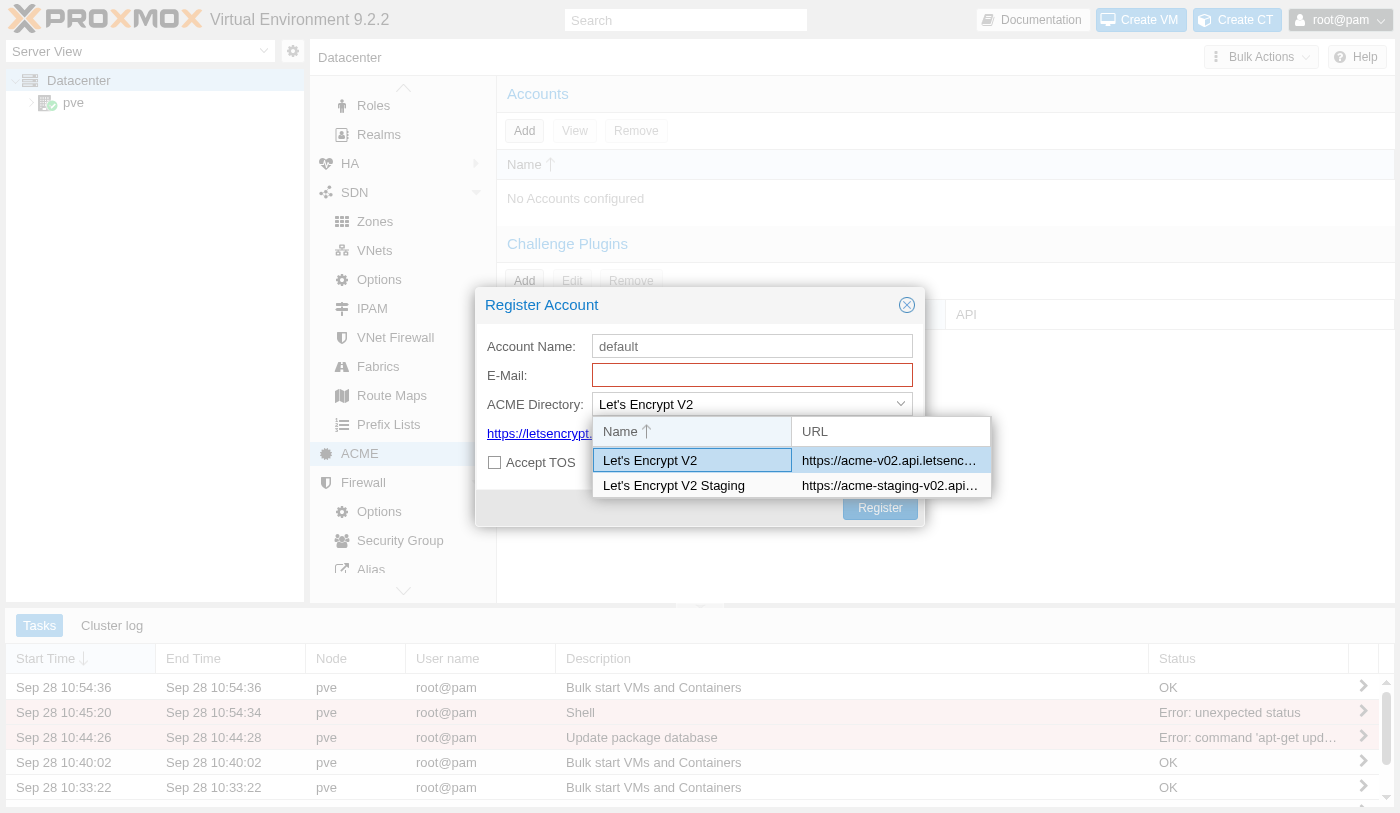
Completing this step for real needs a domain that actually resolves to this server from the public internet, which a lab or homelab setup rarely has; the account registration above is as far as this guide takes it, with the rest picking up naturally once a real domain is pointed at a real deployment.
What that rest actually involves is worth understanding even without completing it here. Let's Encrypt has to prove the server requesting a certificate genuinely controls the domain it's asking about, and it does that with a challenge: for the common HTTP-01 method, Proxmox briefly serves a specific file at a specific URL under that domain on port 80, and Let's Encrypt's own servers fetch it to confirm; only then does it issue the certificate. That has a direct consequence for the firewall section above, since a host with the firewall on and only port 8006 allowed would fail that challenge outright, port 80 has to be reachable too, at least during the request. Once issued, Proxmox checks the certificate's expiry on its own and renews it automatically well before the 90 days Let's Encrypt certificates are valid for run out, logging a failure in the task log rather than silently leaving an expired certificate in place if something goes wrong.
Set Up Real Notifications
The email address entered during install already does something: Proxmox pre-wires a notification target called mail-to-root, and a matcher that routes every notification to it, before anyone configures anything by hand.
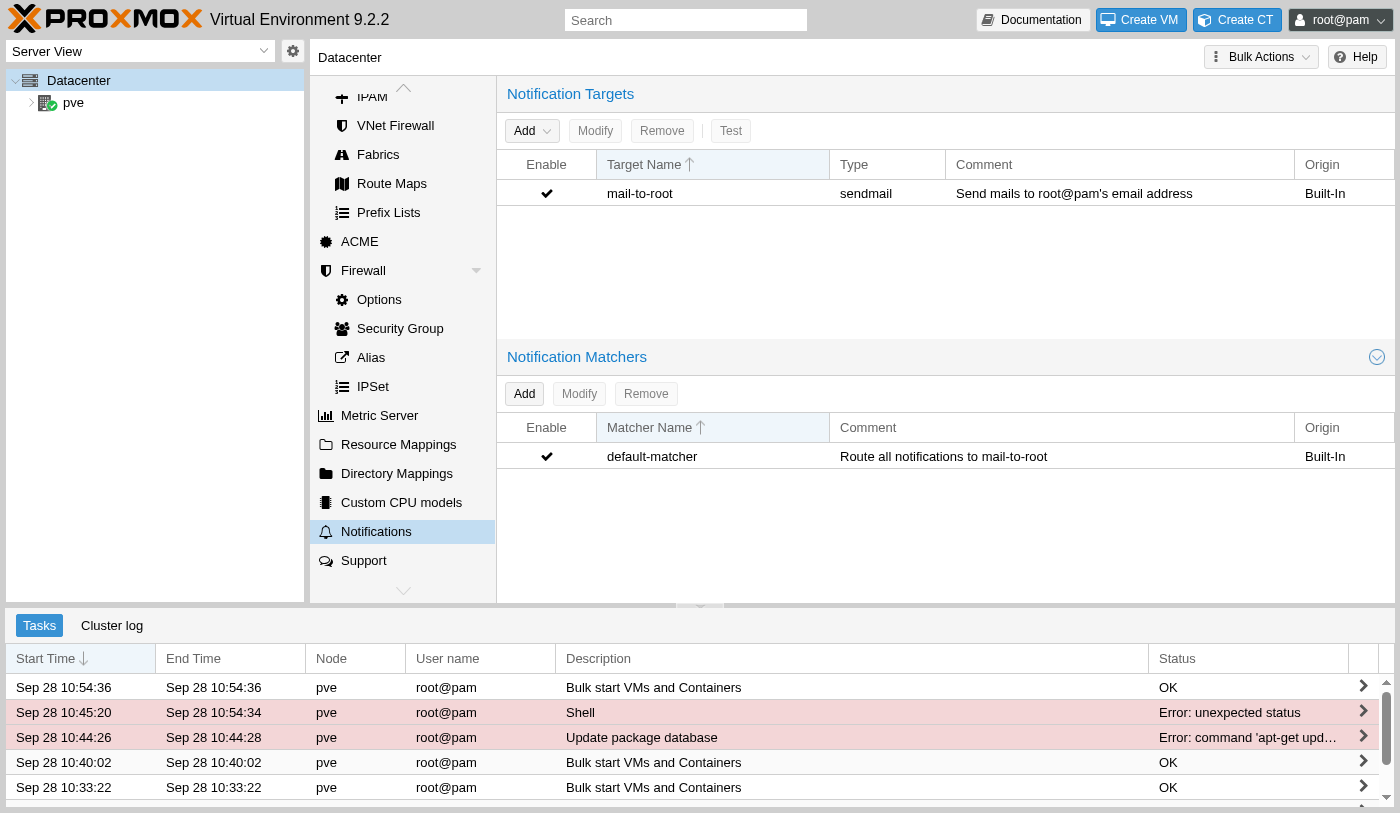
Targets and matchers being separate things, rather than one combined setting, is deliberate: a target only defines where a notification could go, a matcher decides which notifications actually go there. The default-matcher shown above routes everything to mail-to-root because it has no filter conditions at all, but a matcher can just as easily key off severity or the type of event, sending only failed backups or failed replication jobs to a webhook that pages someone, while routine success notices stay in email that nobody has to react to in real time. That split is what keeps a growing platform from either drowning an inbox in routine noise or, worse, burying the one notification that actually needed a response.
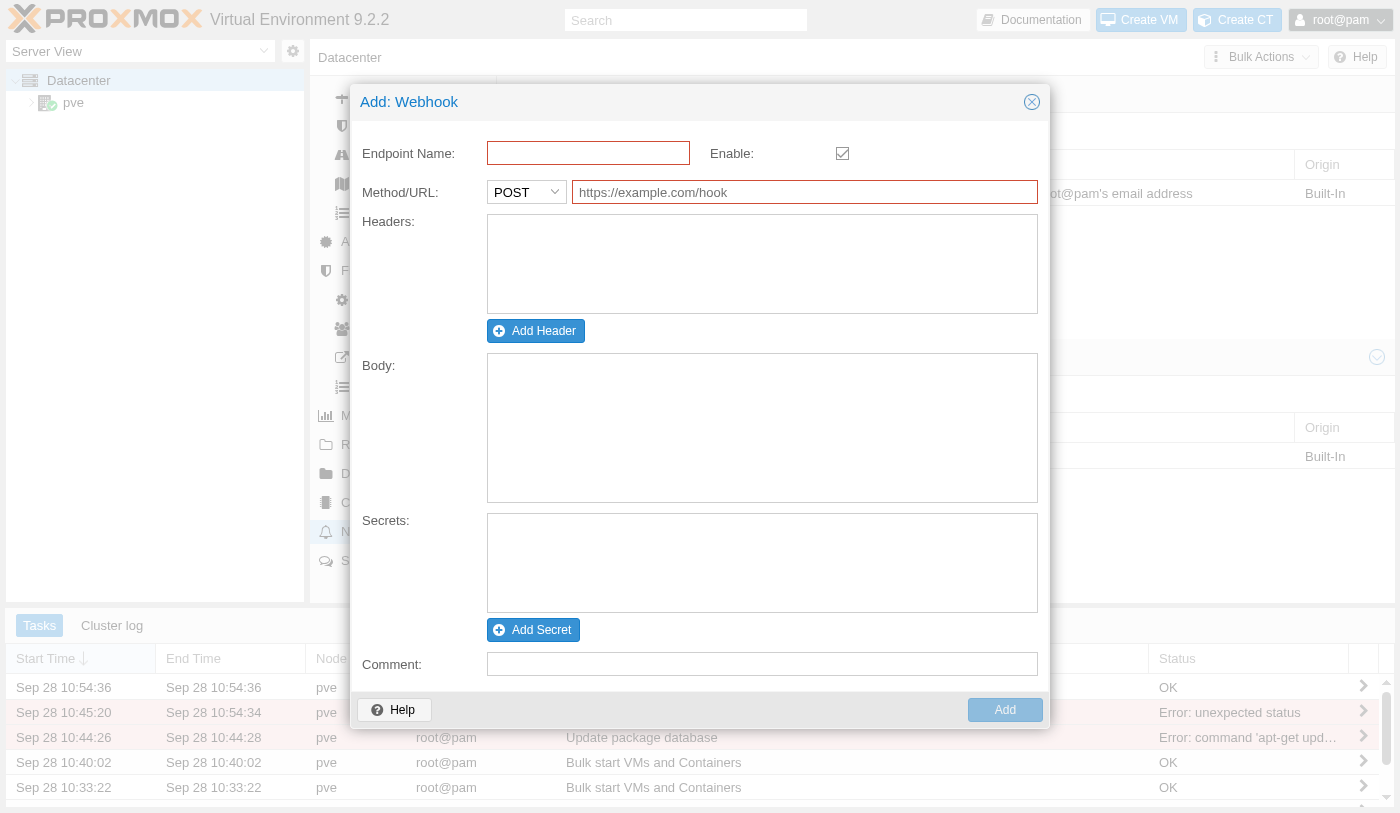
For anything beyond email, a webhook target covers most real alerting stacks: a URL, a method, custom headers, and a body, with secrets like auth tokens kept in their own field instead of sitting in plain text inside the body.
Review the Datacenter and Node Options
A handful of settings that don't fit anywhere else in the interface live under Datacenter, Options, most of them set once during install and rarely touched again.
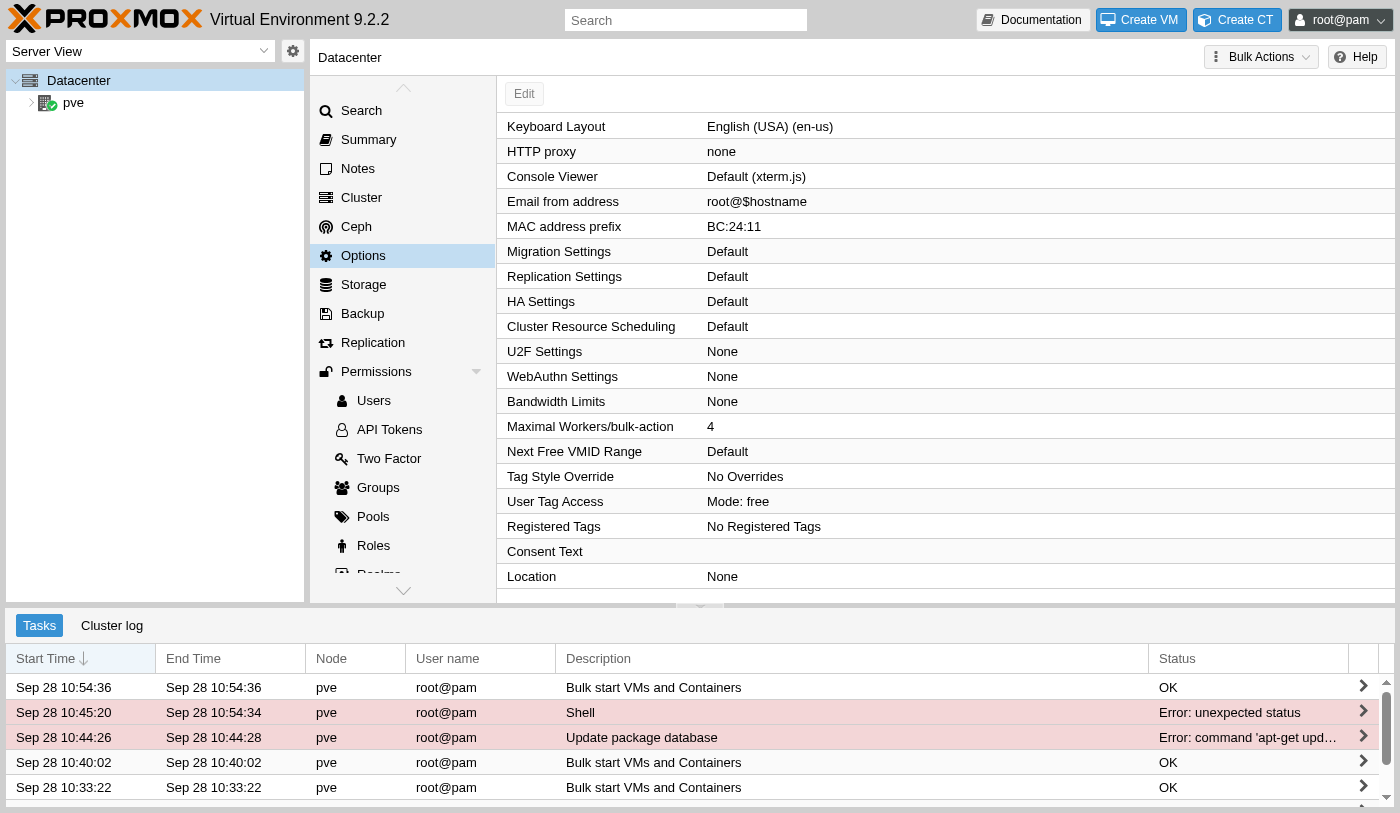
One line is worth a second look: the MAC address prefix, BC:24:11 by default, is what every auto-generated VM network interface starts with; it's how a packet capture on a shared network can tell a Proxmox VM's traffic from anything else on the wire. On a network with several hypervisors from different vendors sharing the same switch, that prefix is often the fastest way to answer "which box is this traffic actually coming from" without cross-referencing anything else, since every major hypervisor vendor registers and uses its own distinct prefix the same way.
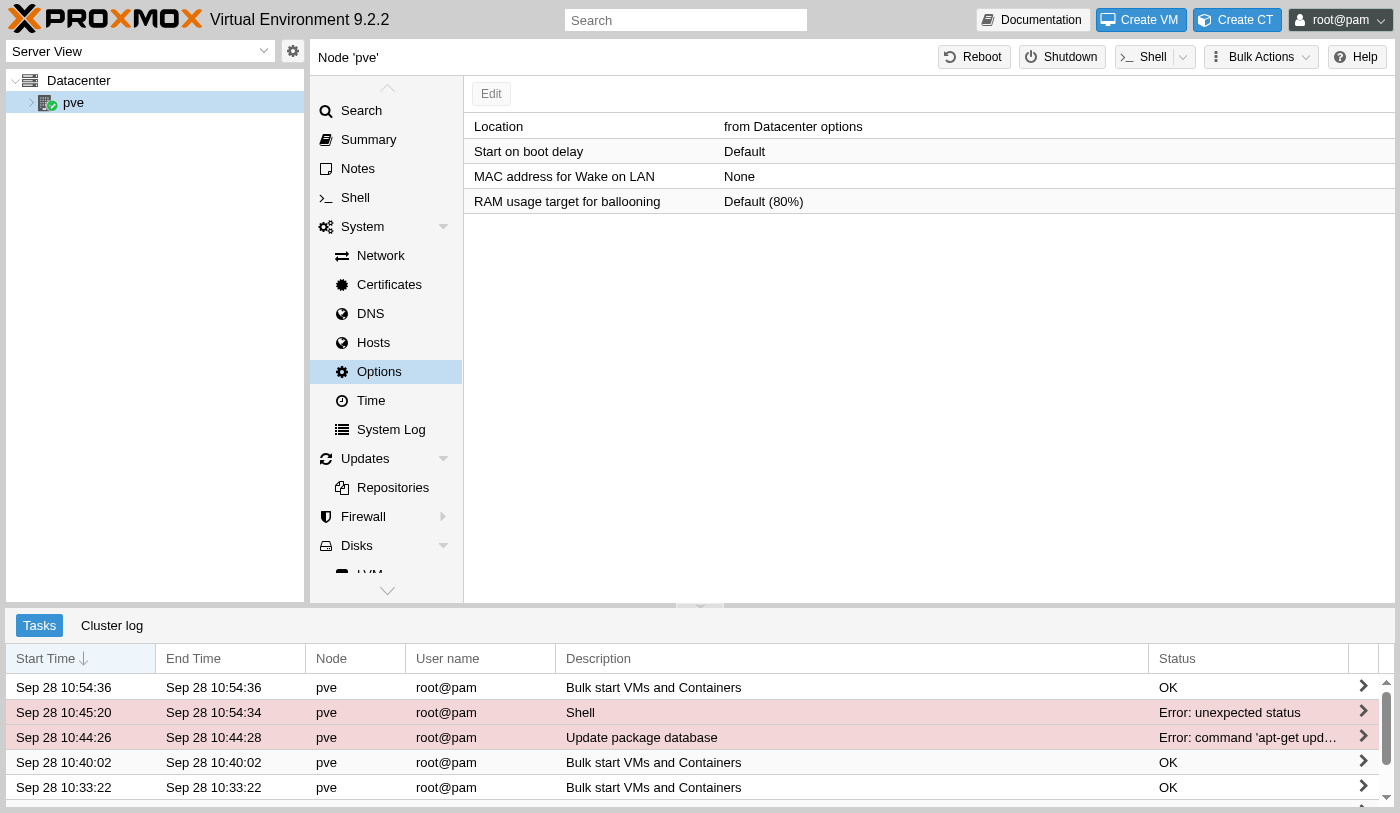
A second RAM optimization sits at the node level, next to ballooning's default of 80 percent: the target amount of a VM's assigned RAM the balloon driver tries to actually keep reserved, giving back the rest to the host under memory pressure, the same kind of pressure that also triggers KSM.
Ballooning only works when the guest OS cooperates with it, though, which is easy to assume and wrong to assume blindly. It relies on a driver running inside the VM itself, the balloon driver, usually installed alongside the QEMU guest agent on modern Linux and Windows guests, that inflates a balloon of memory pages the guest OS agrees not to use, freeing them back to the host. A VM without that driver, an older or minimal guest OS especially, simply doesn't participate: the host can ask, but nothing gets reclaimed from it. On a platform running a mix of guest operating systems, ballooning's real effectiveness ends up bounded by whichever VMs are the least cooperative, regardless of the 80 percent target set here.
Create an API Token for Automation
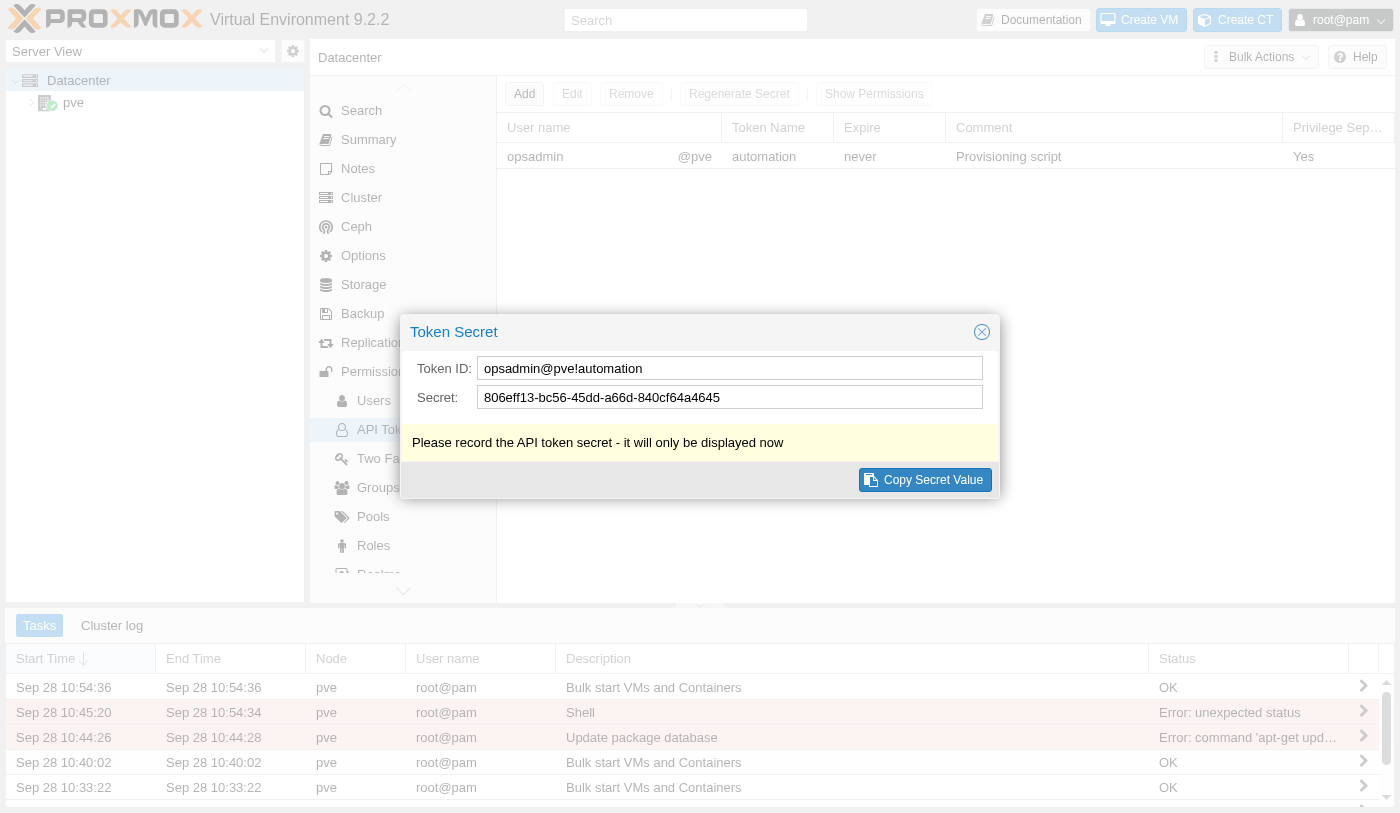
Scripting against Proxmox's API without typing a password into a script starts with a token, tied to a user but kept separate from that user's own login.
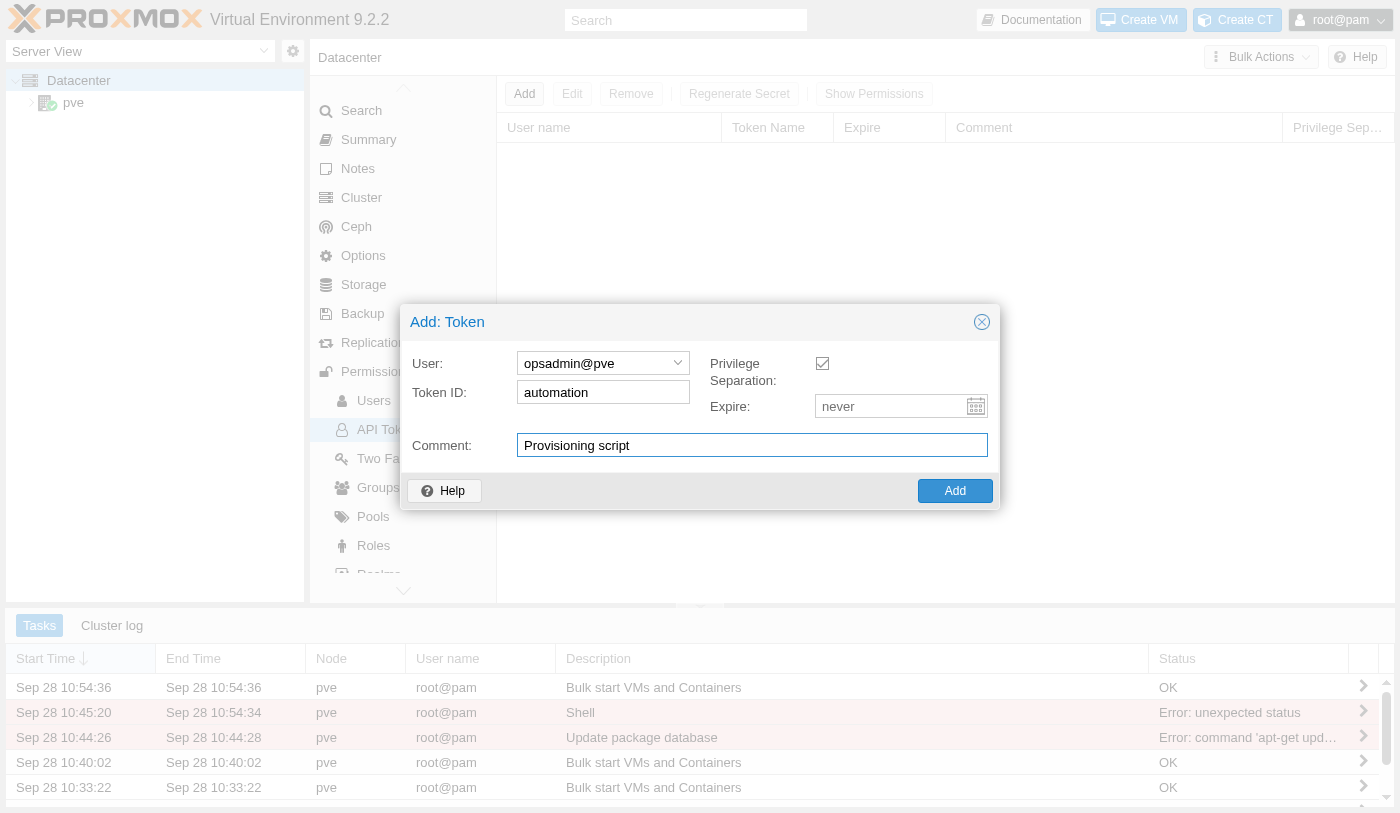
With Privilege Separation on, this token starts with no access at all, the same as a brand-new user; the same Permissions screen used for opsadmin itself grants the token its own, narrower rights when the time comes.
The secret only ever appears once, right after creation, which is the whole point: nothing about this design lets it be recovered later, only regenerated as a new value.
That separation from the user's own password is exactly what makes tokens genuinely worth using for automation, rather than a purely bureaucratic step. If this token's secret ends up somewhere it shouldn't, committed into a script by mistake and pushed to a repository, say, the fix is deleting or regenerating that one token from the API Tokens list; opsadmin's own password, its own login sessions, its own TFA setup all stay completely untouched by that, since the token never shared credentials with the account it belongs to in the first place. A leaked user password, by contrast, means resetting that password and potentially every session tied to it. Privilege Separation compounds that same isolation one step further: even a fully leaked token secret is limited to whatever narrow permissions were explicitly granted to the token itself, a much smaller blast radius than opsadmin's own full account.
Check DNS, Hosts, and Disk Health
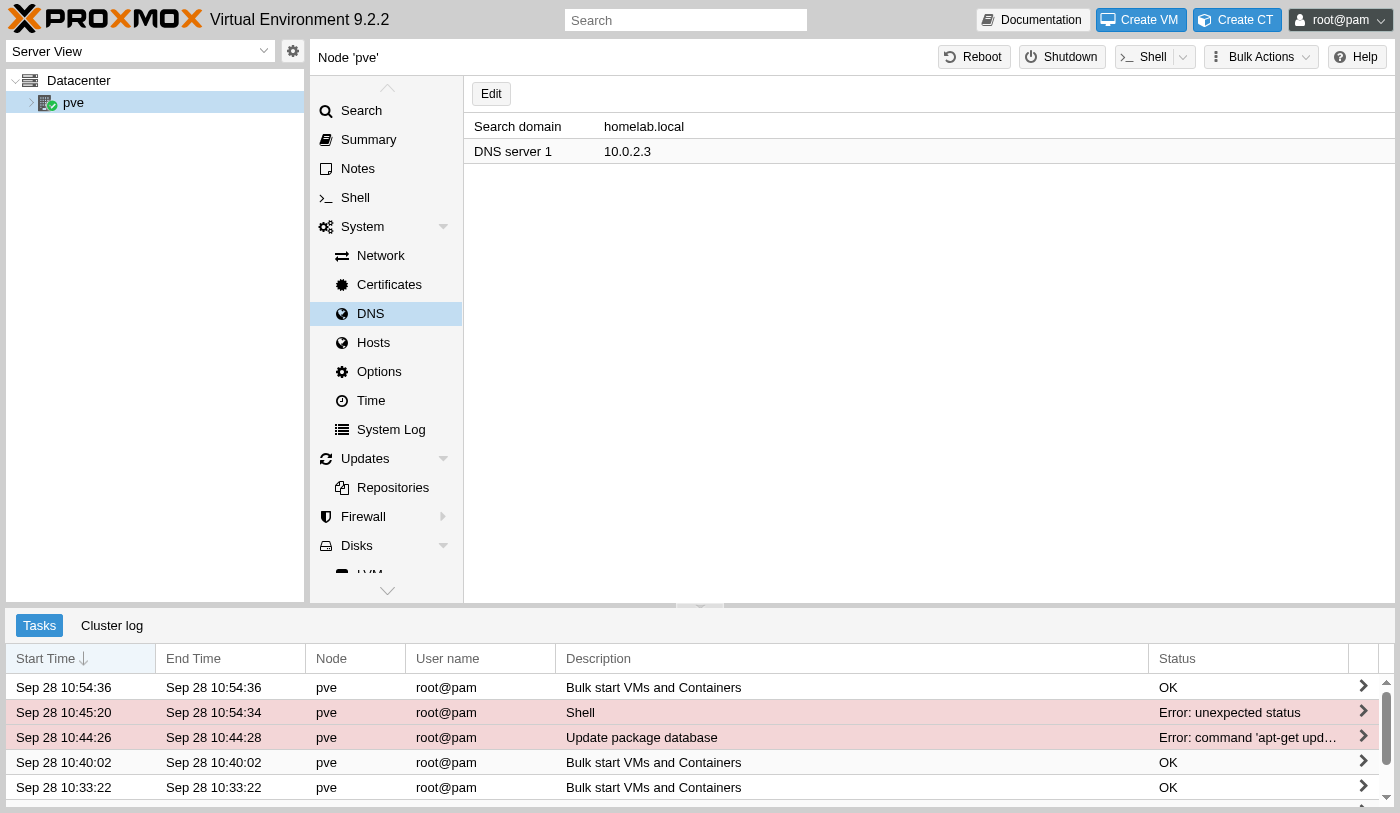
A handful of smaller checks round out a fresh install, quick to look at and easy to skip past without realizing they matter.
A single-node host with no other server to talk to yet can make DNS feel like it barely matters, but it's already doing real work every time this node reaches out for anything by name rather than by raw IP. The no-subscription repository fetched by hostname back in Part 2's Update step, an NTP pool used to keep the clock accurate, a future second node joining as a cluster member by its own hostname instead of its IP, all of that depends on the DNS server set here actually working. A wrong or unreachable DNS server here is a common, confusing cause of an apt update failing with what looks like a network problem, when the network itself is fine and only name resolution is broken.
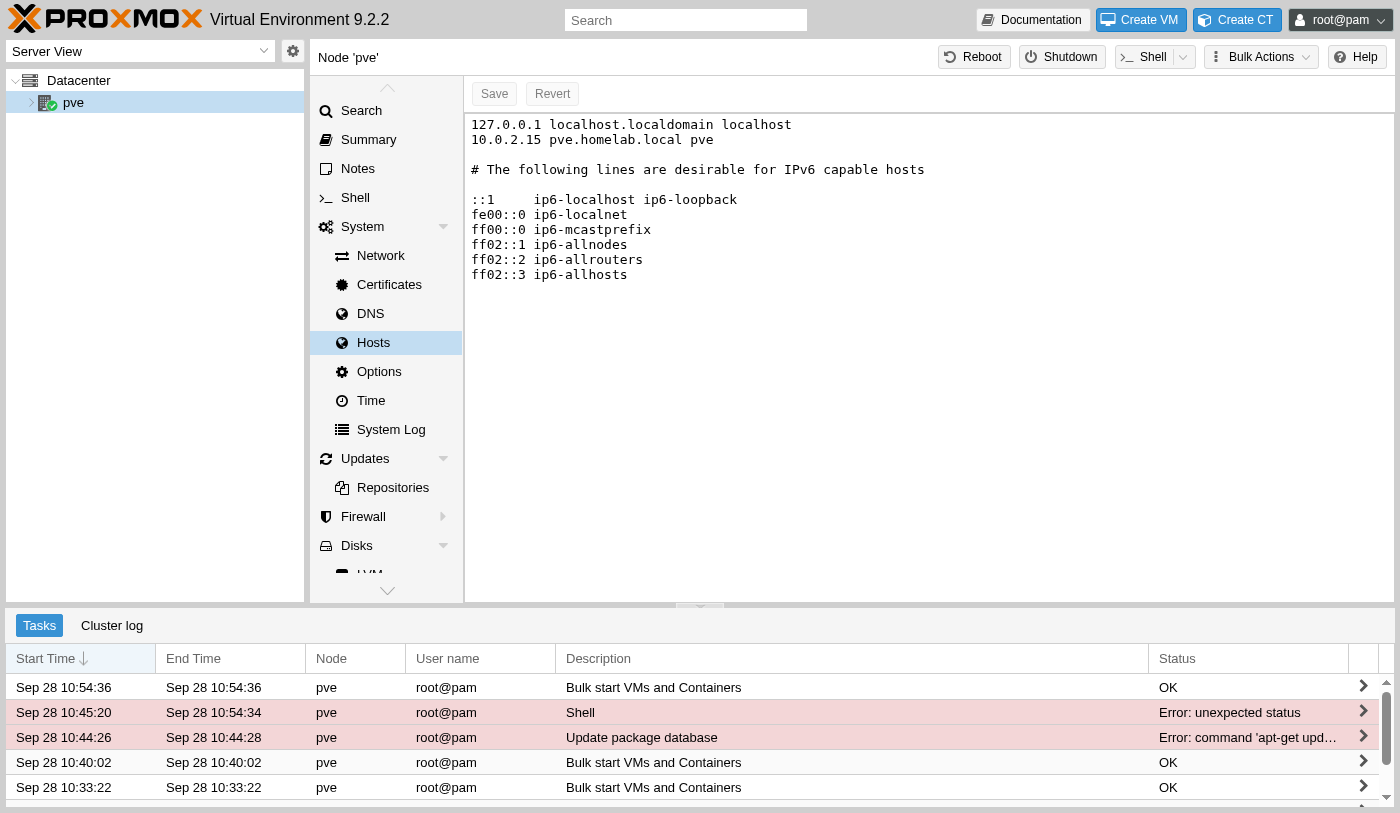
The node's own hosts file is editable right in the interface, and the line worth confirming is the server's own entry: its IP mapped to the exact FQDN set during install, which is what makes that hostname resolve to itself without depending on external DNS at all.
That self-entry matters more than it looks, because Proxmox's own internal tooling relies on that same hostname resolving correctly too, alongside anything external. If this line were ever edited or accidentally removed, symptoms wouldn't necessarily look like a hosts-file problem at all; certain internal API calls or, later, cluster communication between nodes can start failing in ways that look like a network or certificate issue first, with a missing or wrong hosts entry as the actual, much simpler cause underneath.
Disk health lives under Disks, with a Show S.M.A.R.T. values button next to every listed device; on real hardware with real drives, it surfaces reallocated sectors, wear level, and hours of power-on time well before a drive actually fails.
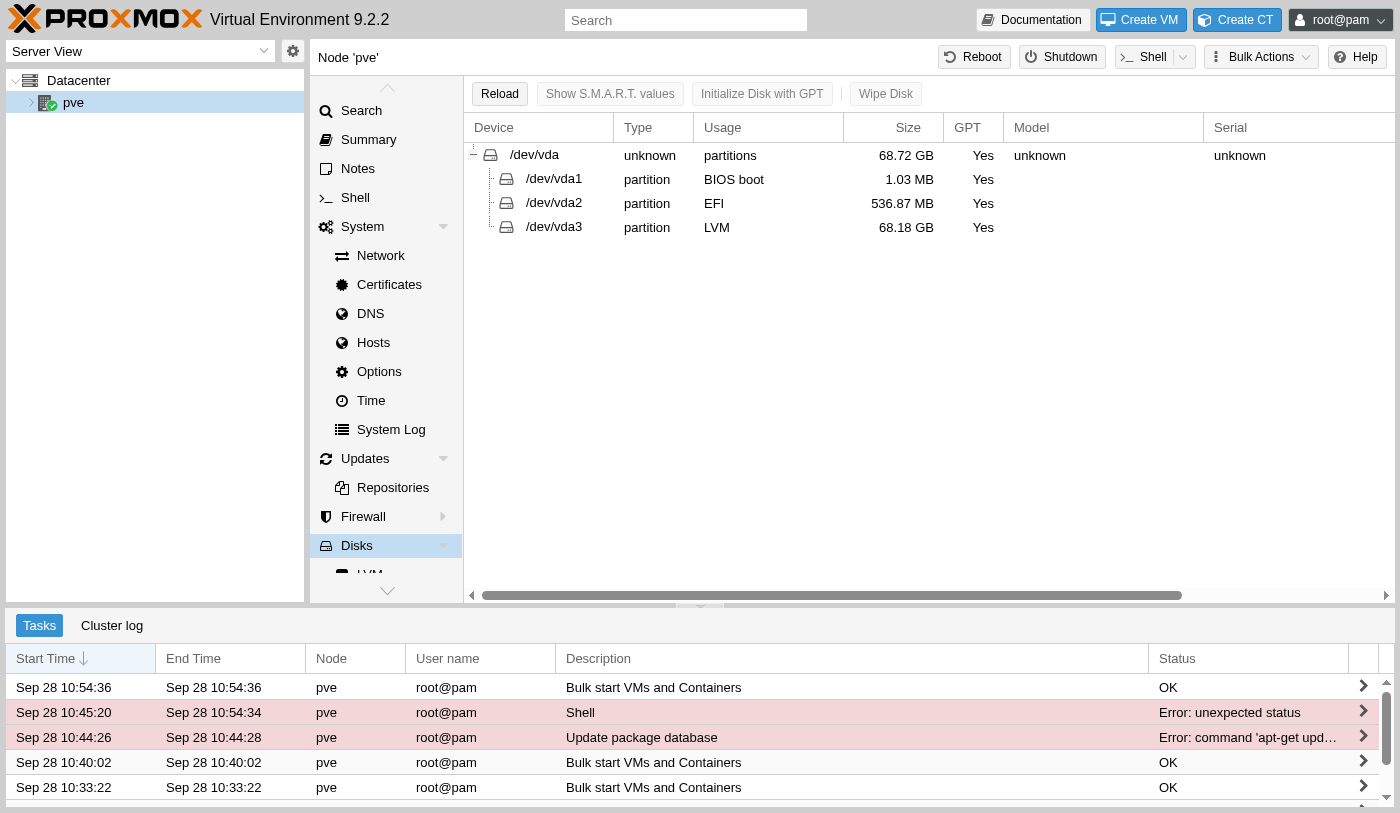
On this virtual disk, that same button returns nothing at all, which is expected rather than broken: a virtual disk has no physical wear to report.
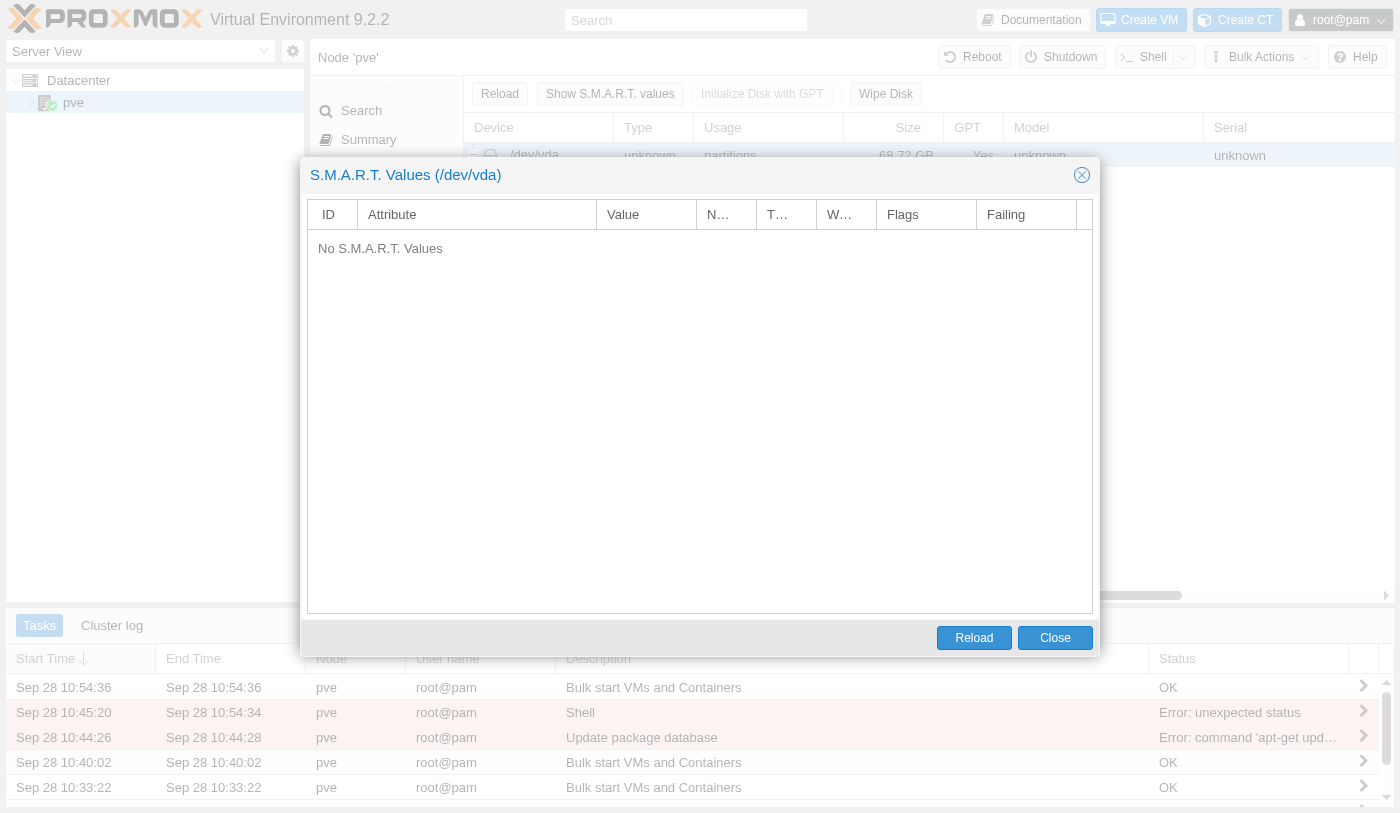
On real hardware, this table is worth understanding rather than just glancing at once, since a small number of its attributes do almost all the useful work. Reallocated Sector Count climbing above zero means the drive has already started quietly retiring bad sectors and remapping them to spares, the industry-standard early warning that shows up well before a drive actually fails outright; Power-On Hours gives a straightforward read on how much life a used drive has already had before it ever reached this server. Given Part 1's own advice to buy used enterprise hardware, drives inherited with that server may already carry real hours and real wear from a previous life, which makes checking this table once, right after install, worth doing rather than assuming a "refurbished" listing meant the drives were replaced too.
In summary
- Fixing the repository warning takes two steps: disable enterprise, then add no-subscription.
- KSM, ballooning, and a lower swappiness value all help fit more VMs into the same RAM.
- A non-root admin account with TFA and a firewall rule are what make root-only access unnecessary day to day.
- ACME, notifications, and API tokens are already wired for real certificates, alerts, and automation later.
In the next section, you'll create the first VM on this platform and install a guest OS on it.