
In the previous guide, you turned the first VM into a reusable template and cloned it in seconds instead of minutes, namely web02, a full working copy with its own identity already fixed. Neither that clone nor the template behind it exists anywhere else yet, so before either one holds anything a customer would miss, you'll first set up Proxmox's own backup system entirely from the panel.
Schedule a Backup Job
Datacenter, Backup in the left tree, opens a job list that starts out completely empty on a fresh node. Add is the only button worth anything yet, and it opens a dialog collecting everything a scheduled backup needs in one place: which guests, which storage, when, and how long to keep what it produces.
Choose What to Back Up and When
The General tab's Guests to Include table lists every VM on the node with a checkbox next to it, the same three VMs from the previous two guides. Checking web02 alone, rather than the template or its unused sibling, keeps this first job focused on the one VM actually worth restoring if something goes wrong.
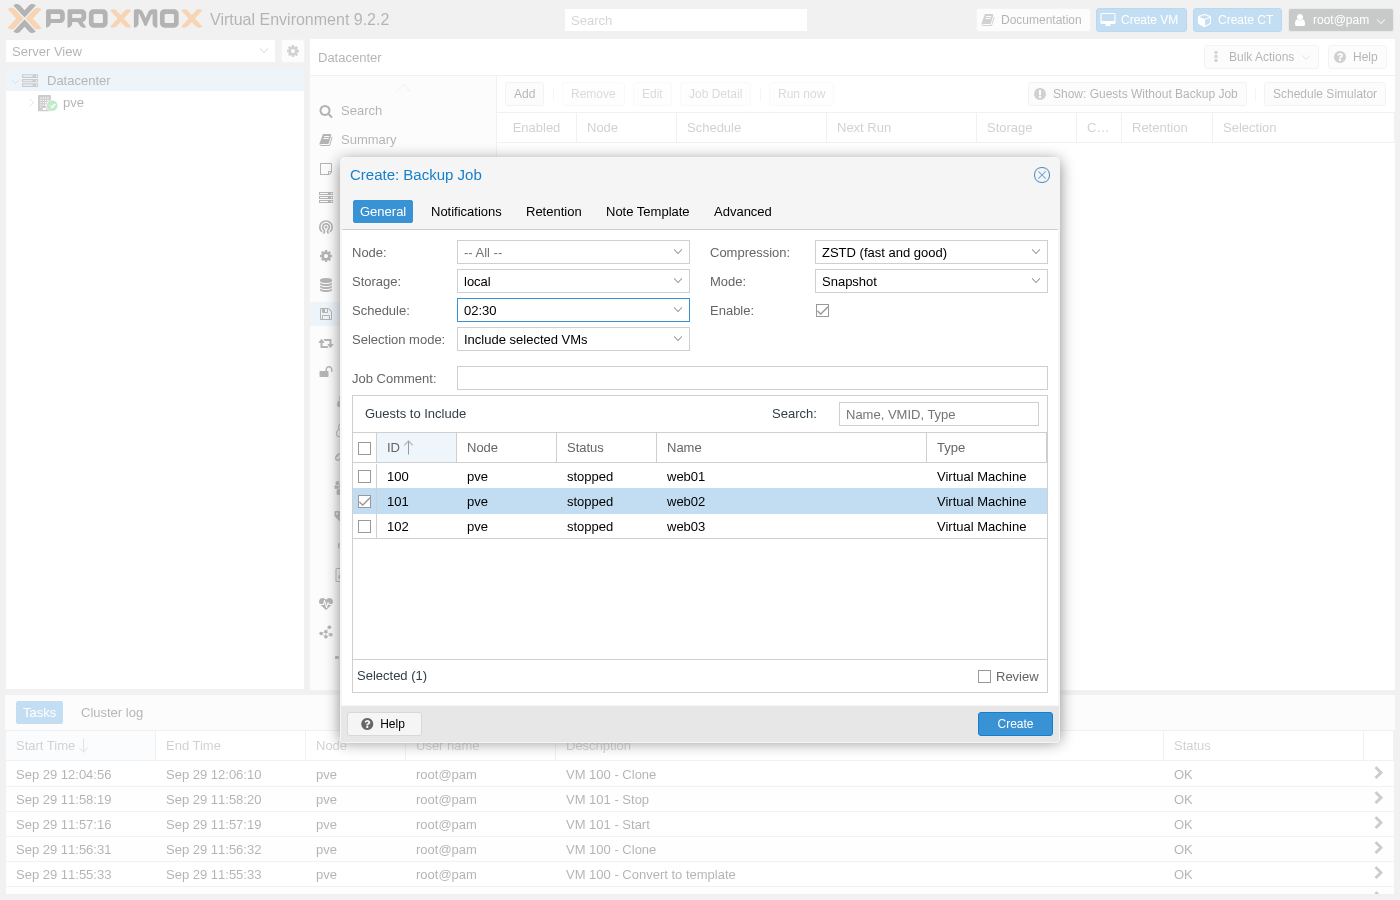
Node stays on -- All --, worth leaving alone even on a single-node lab like this one: on a real multi-node cluster it means the job runs wherever each selected guest actually lives that day, rather than failing silently if a VM migrates off the node a job was pinned to. Schedule accepts either a systemd-style calendar expression or, as here, a plain time of day, and Snapshot mode backs up a running VM without pausing it, falling back to a plain file copy automatically once a VM turns out to be stopped, exactly the case for web02 in this lab.
Set a Retention Policy
The Retention tab is where a job stops being just a schedule and starts being an actual policy: left untouched, every single run keeps its own archive forever, filling the target storage one backup at a time.
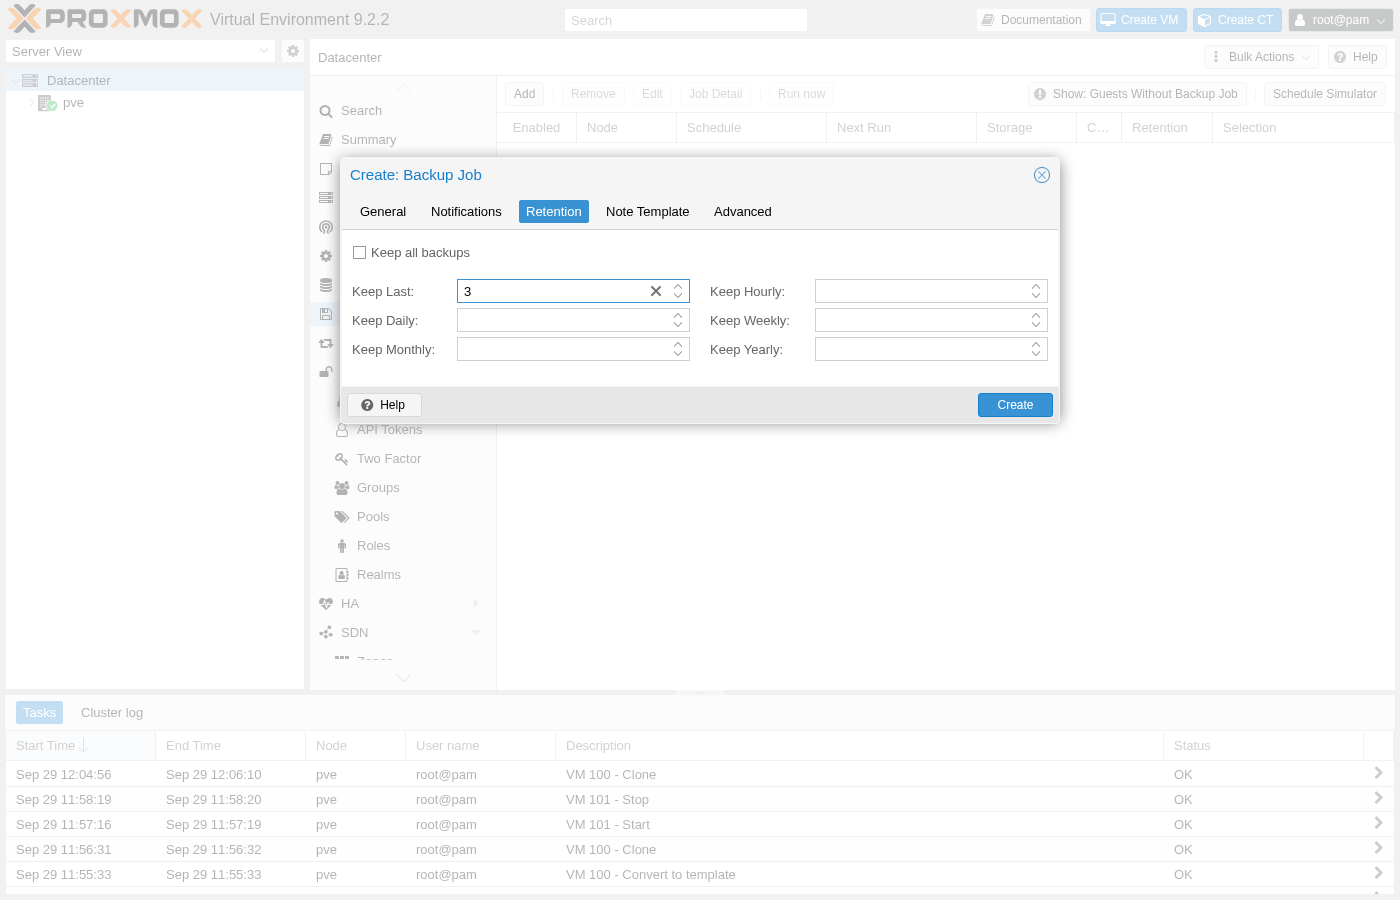
Keep Last, Keep Daily, Keep Weekly, Keep Monthly, and Keep Yearly all combine rather than override each other, the same layered retention pattern most backup tools use once a policy needs to survive longer than a handful of recent runs. The note under the fields is worth reading closely: leaving every field blank here does not mean unlimited retention, it means Proxmox falls back to whatever the storage itself or the node's own vzdump.conf already defines, which may keep far less than expected on a node nobody has tuned yet.
Clicking Create submits both tabs as one job, and the same list that started empty now shows exactly what was configured:
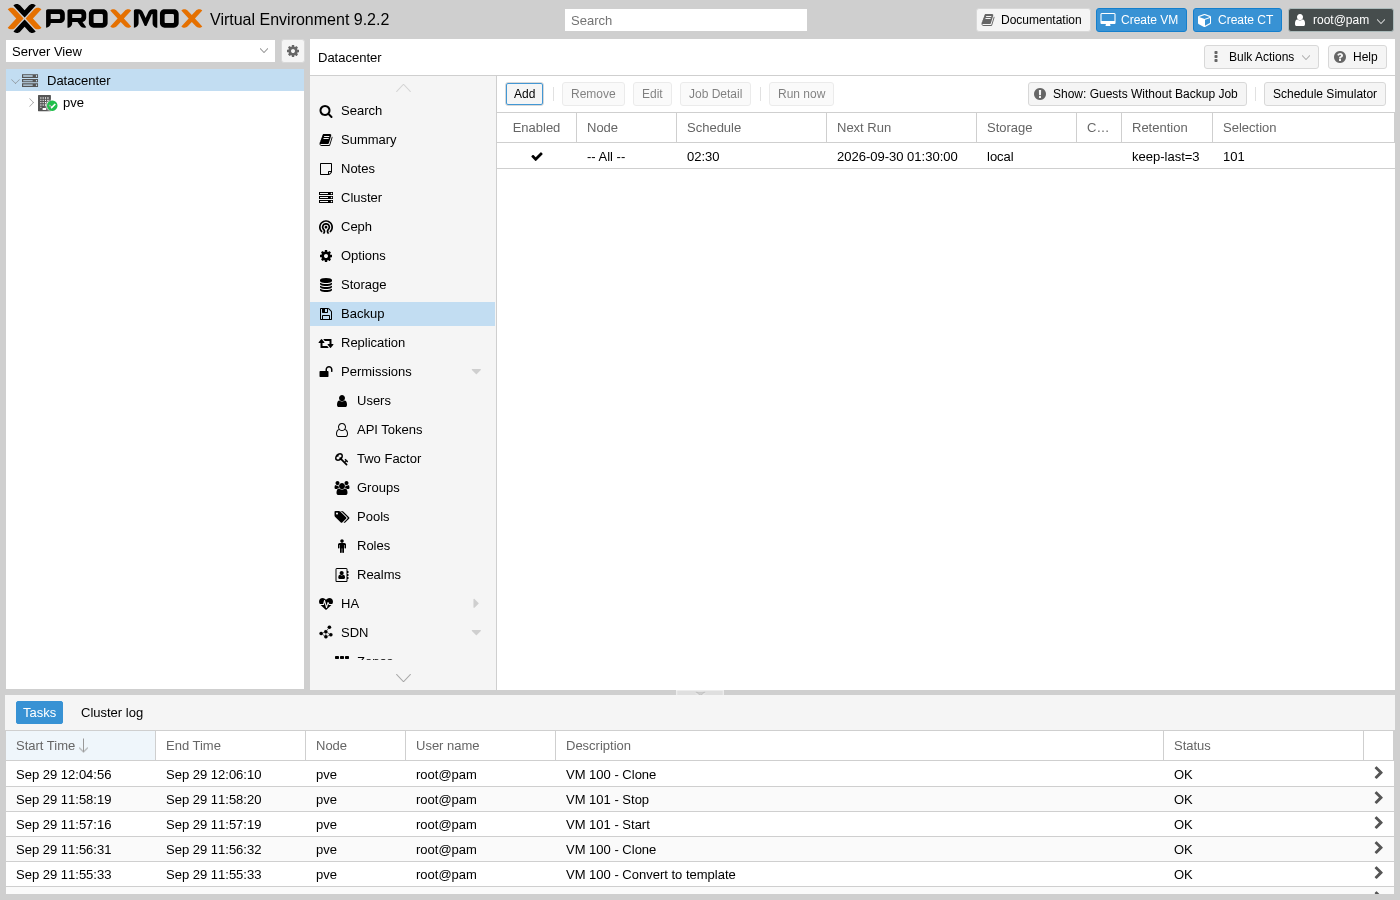
Next Run is a real value, worked out from the schedule the moment the job saves rather than filled in with a placeholder. Schedule Simulator, on that same toolbar, lets a more complex calendar expression be checked against future dates the same way before committing to it.
Run a Backup and Read the Log
Waiting for 02:30 to actually test a brand new job is rarely practical, so Run now, on that same toolbar, triggers the identical job immediately after one confirmation dialog. What it produces is worth reading in full at least once, since every other backup this job ever runs follows exactly the same sequence:
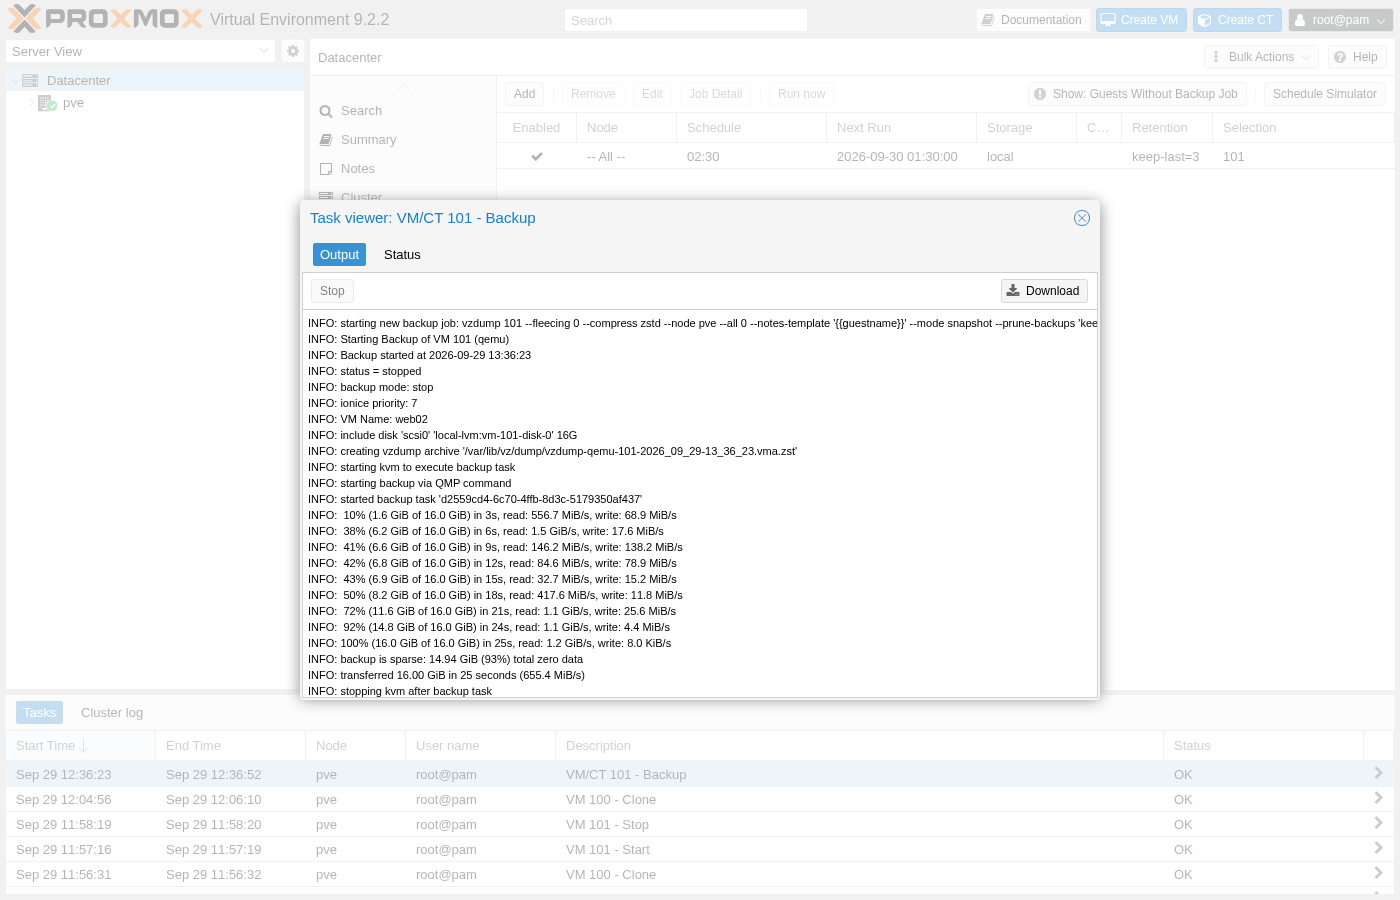
Does Proxmox actually start the VM just to back it up?
No. starting kvm to execute backup task and stopping kvm after backup task bracket a short-lived helper process instead: a QEMU instance that mounts web02's disk and streams it out over QMP, entirely separate from actually booting Debian inside it. That's also why the log reports backup mode: stop even though Snapshot was the mode selected in the dialog: web02 was already stopped when the job ran, so there was no running guest to snapshot in the first place, and Proxmox falls back to the simpler path automatically rather than failing the job.
The percentage lines in the middle carry real throughput numbers next to each one, a genuine progress readout rather than a fixed animation: climbing from 556.7 MiB/s early on down to 4.4 MiB/s as the read pattern got less sequential near the end. backup is sparse: 14.94 GiB (93%) total zero data is the line that explains the biggest single number in this whole log: out of a nominal 16.0 GiB disk, only 7% of it held anything Proxmox actually needed to copy.
Confirm the Archive and Its Real Size
Every VM's own Backup tab lists what that specific VM's own history of archives actually looks like, independent of which job or which storage produced each one.
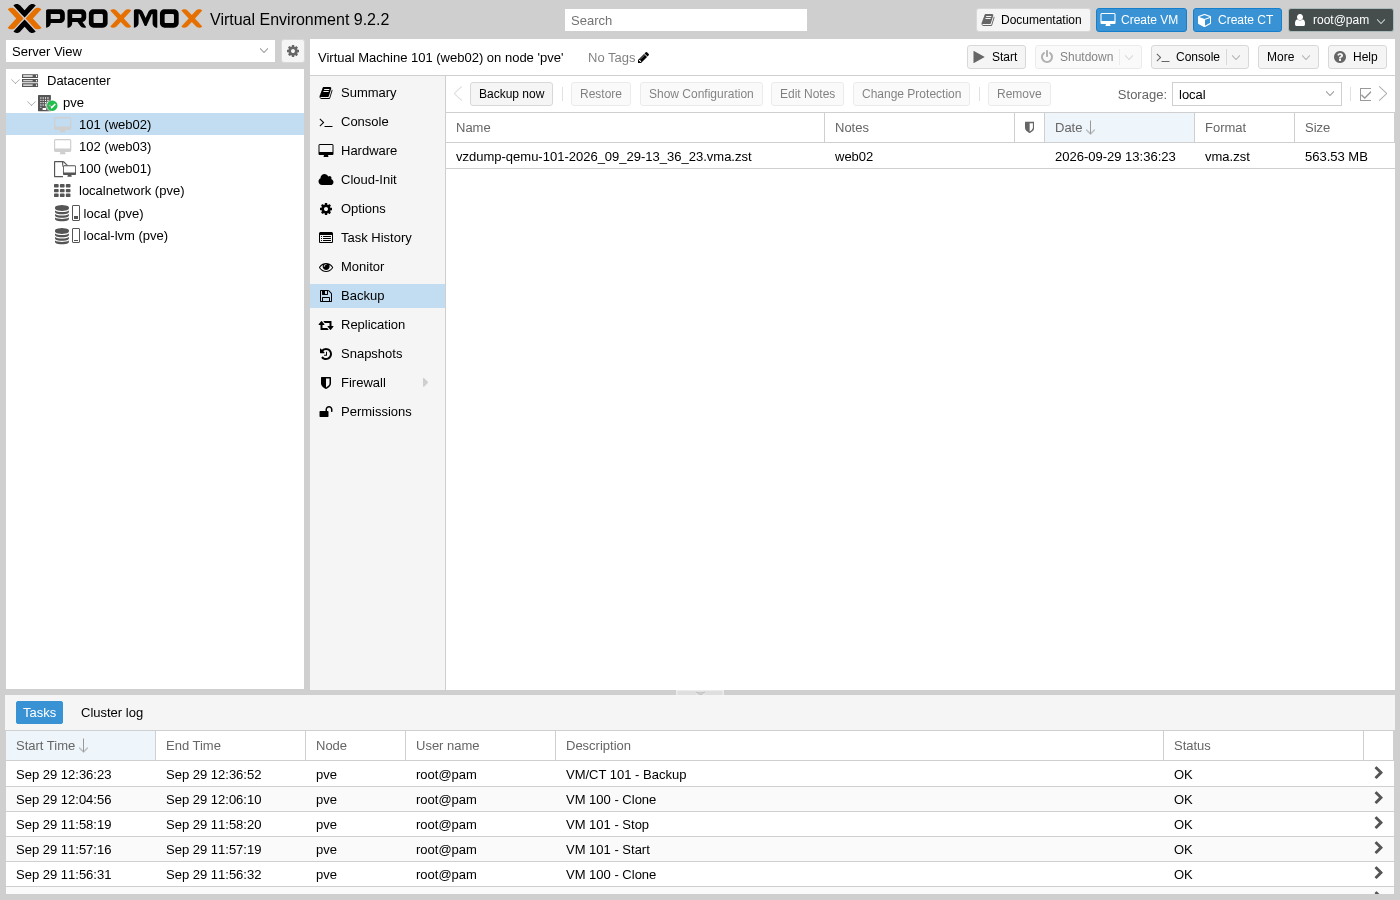
That 563.53 MB is the sparse detection from the task log and ZSTD compression stacked on top of each other: the 93% that was already zero data cost almost nothing to store, and whatever remained still compressed well past its raw size. A disk this empty is the best case a fresh VM offers, and the number only climbs from here as web02 actually fills up with a real deployment, which is exactly why retention limits from the previous section matter well before that growth becomes a problem.
Run a Backup On Demand
Backup now, on that same VM Backup tab, reaches the identical vzdump machinery as the scheduled job, just without waiting for a schedule or touching every guest a job might otherwise cover.
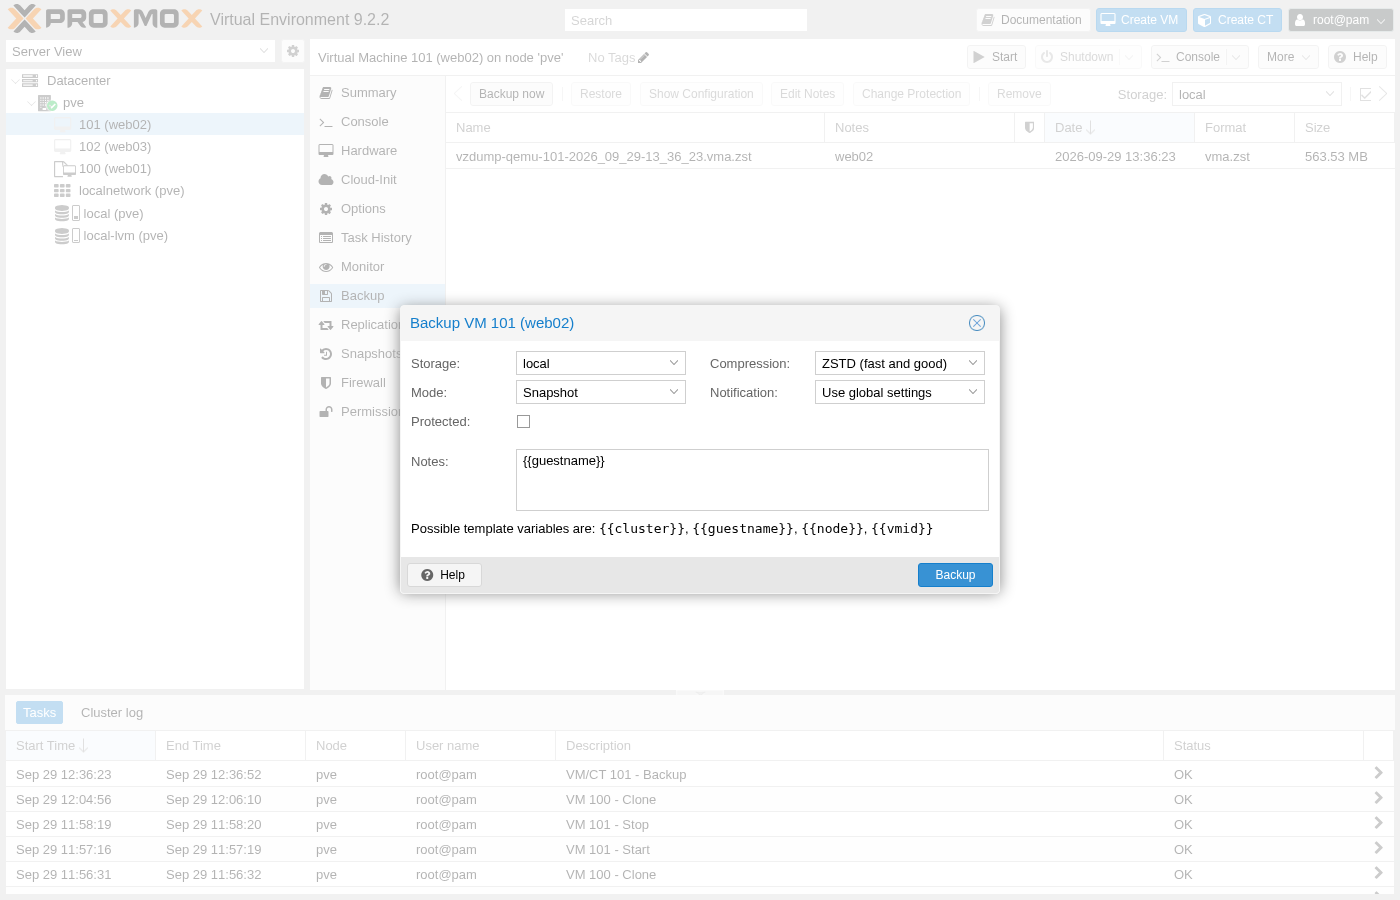
That Notes field is where the "web02" already visible on the archive in the previous section actually comes from: {{guestname}} is a live template variable, filled in with this VM's own name at backup time, and the hint text beneath the field lists the others available for a more detailed note. Protected, left unchecked here, is worth knowing about before ever needing it: checking it exempts that one archive from every retention rule and from Remove itself, the one setting between an accidental prune and a backup a team actually needs to survive.
Restore From a Backup
Selecting an archive in that same list and clicking Restore opens a dialog whose own title already states the risk plainly:
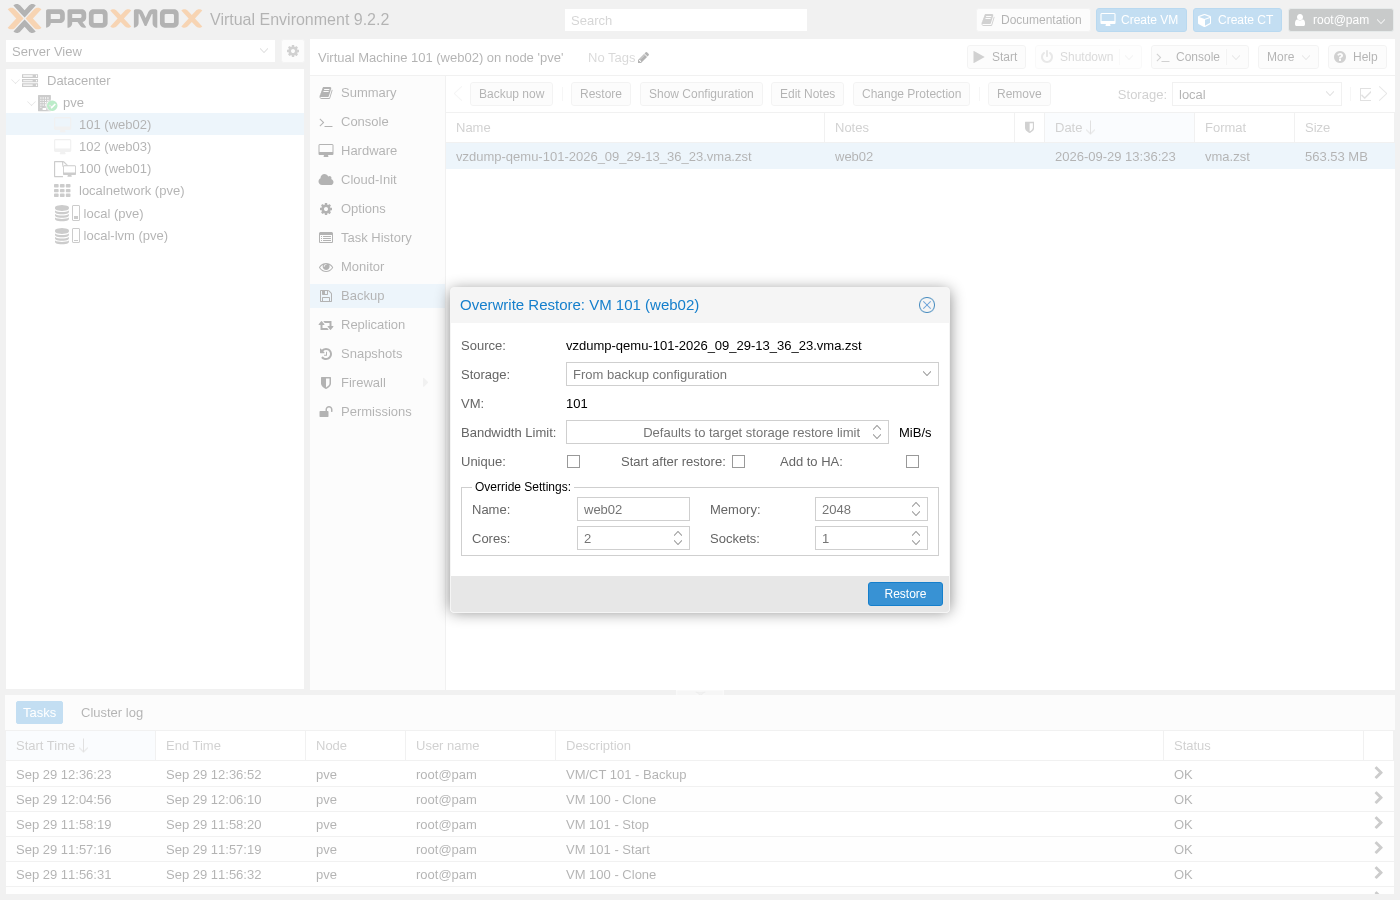
Before clicking Restore on an existing VM ID: make sure that VM's current disk has nothing worth keeping. The dialog's own title says Overwrite Restore for exactly that reason, and there's no separate confirmation step past this one screen.
Restoring onto a different, unused VM ID instead sidesteps that risk entirely, useful for testing whether an archive actually works without touching the live VM it came from. Unique, in that case, regenerates the network MAC address the same way cloning a template already did two guides ago, since two VMs sharing one MAC on the same bridge would collide the moment both came up. Override Settings pre-fills Name, Memory, Cores, and Sockets straight from the backup's own saved configuration, editable here before Restore commits to them, the last checkpoint before this platform's first real disaster-recovery path actually exists.
In summary
- A scheduled Backup Job combines guest selection, storage, schedule, and retention into one Datacenter-level object.
- A real backup runs through a short-lived helper process, never the guest OS itself.
- Sparse-block detection and compression together can shrink a nominal 16 GiB disk down to a few hundred real megabytes.
- Restoring onto an existing VM ID overwrites it; a different ID plus Unique tests an archive safely instead.
In the next guide, you'll add monitoring and alerting on top of what's now running.